Arista ARP-2200AP User Manual
76
|
P a g e
Chapter 7 Video Alignment (Calibration)
Video alignment or calibration, as it is also called, ensures that the mouse cursor appears at the position of touch. Elo uses a three-
point calibration sequence that will accept touchscreens with any orientation of the X or Y axis, in landscape or portrait mode.
Once calibrated, the touchscreen will be ready to use automatically each time the system is restarted.
7.1.
Options to Launch
The video alignment program may be launched six different ways:
1.
During setup a checkbox may be selected to run the alignment program automatically after setup is completed.
2.
Through the Elo Control Panel application by selecting the General tab and clicking the alignment program icon.
3.
Through the Elo Control Panel application by selecting the Properties tab for the individual monitor and clicking the
alignment program icon.
4.
By clicking the Elo icon in the Windows task bar at the bottom right of the display. This will bring up the Elo Control Panel
application and the alignment program may be run via option two or three listed above.
5.
By running EloVa.exe directly from the Windows command line or \Windows\System32 directory.
6.
By calling EloVa.exe directly from an application.
7.2.
Running the Alignment Program
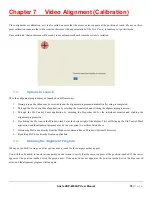
When you run EloVA using one of the options above, touch the three targets as they appear.
You will then be asked to touch various points on the screen to verify that the cursor appears at the position touched. If the cursor
appears at the position touched, click the green arrow. If the cursor does not appear at the position touched, click the blue curved
arrow and the alignment program will run again.
Summary of Contents for ARP-2200AP SERIES
Page 1: ...USER MANUAL ...
Page 26: ...Arista ARP 2200AP User Manual 26 P a g e ...
Page 32: ...Arista ARP 2200AP User Manual 32 P a g e 3 Double click Setup to continue ...
Page 33: ...Arista ARP 2200AP User Manual 33 P a g e 4 Click Finish to complete the setup ...
Page 35: ...Arista ARP 2200AP User Manual 35 P a g e 4 Click Finish to complete the setup ...
Page 37: ...Arista ARP 2200AP User Manual 37 P a g e 3 Double click Setup ...
Page 38: ...Arista ARP 2200AP User Manual 38 P a g e 4 Click Next ...
Page 39: ...Arista ARP 2200AP User Manual 39 P a g e 5 Click Install to begin the installation ...
Page 40: ...Arista ARP 2200AP User Manual 40 P a g e 6 Click Finish to complete the installation ...
Page 43: ...Arista ARP 2200AP User Manual 43 P a g e 5 Click Next 6 Click Finish to complete the setup ...
Page 47: ...Arista ARP 2200AP User Manual 47 P a g e 8 Click Finish to complete the setup ...
Page 49: ...Arista ARP 2200AP User Manual 49 P a g e 4 Click Finish This completes the installation ...
Page 51: ...Arista ARP 2200AP User Manual 51 P a g e ...

