5
GB
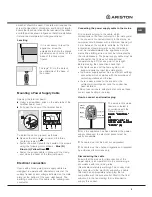
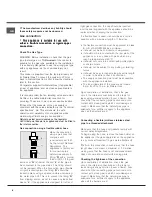
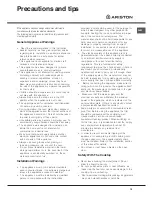
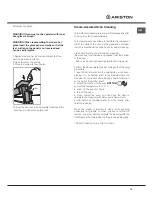
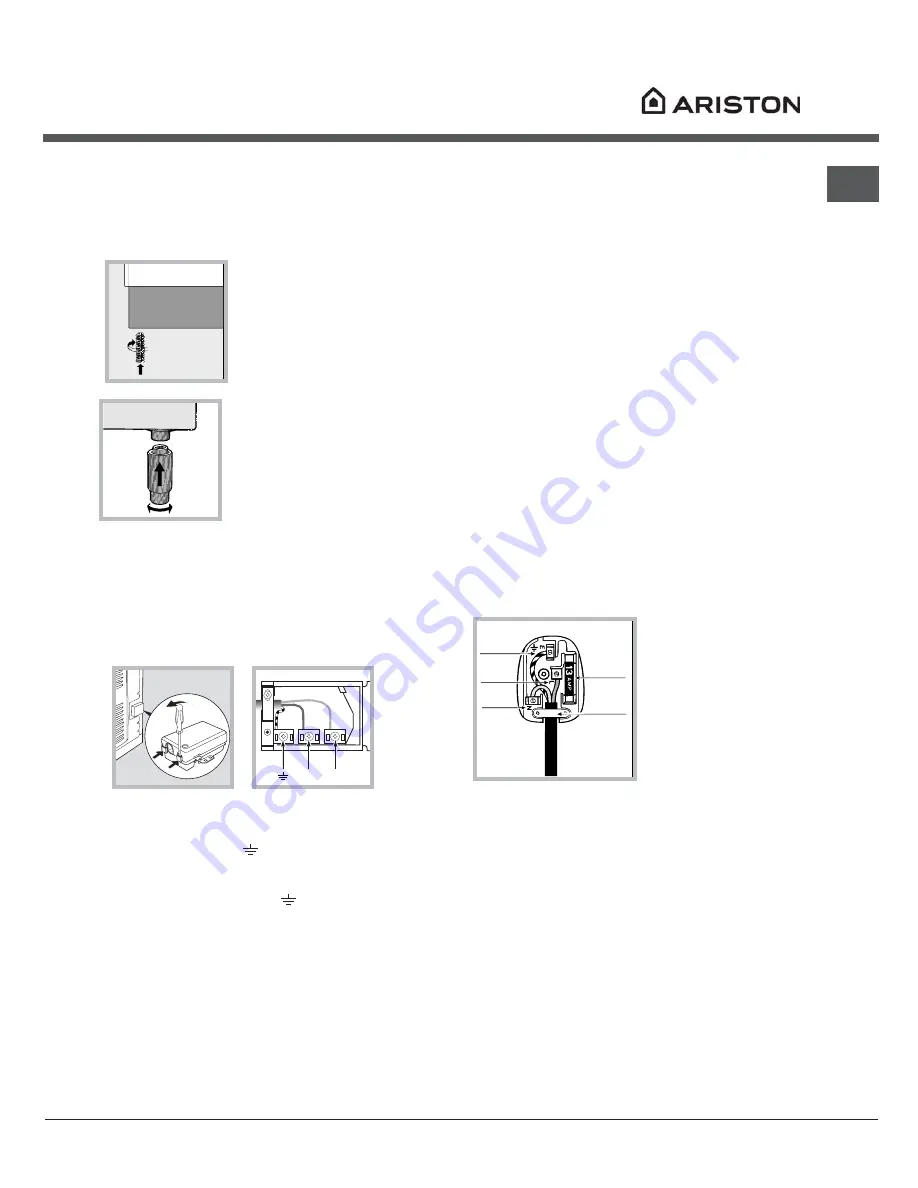
Levelling
If it is necessary to level the
appliance, screw the
adjustable feet into the places
provided on each corner of the
base of the cooker (
see
figure).
The legs* fit into the slots on
the underside of the base of
the cooker.
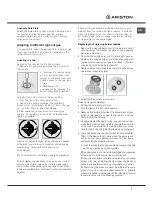
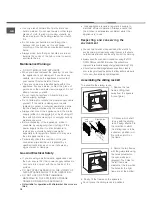
Mounting a Power Supply Cable
Opening the terminal board:
••••• Using a screwdriver, prise on the side tabs of the
terminal board cover;
••••• Pull open the cover of the terminal board.
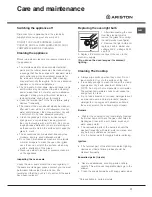
To install the cable, proceed as follows:
••••• Remove the wire clamp screw and the three
contact screws L-N-
• Fasten the wires beneath the heads of the screws
using the following color scheme :
Blue (N)
Brown (L) Yellow-Green
• Fasten the supply cable in place with the clamp
and close the cover of the terminal board.
Electrical connection
Ovens with a three-pole power supply cable are
designed to operate with alternated current at the
supply frequency and voltage indicated on the data
plate (at the bottom of the oven dashboard). The
earthing conductor of the cable is the yellow-green
conductor.
Connecting the power supply cable to the mains.
Fit a normalized plug to the cable, which
corresponds to the load indicated on the data plate;
if the cooker is connected directly to the mains, an
omnipolar circuit-breaker with a minimum opening of
3 mm between the contacts, suitable for the load
indicated and complying with current directives,
must be installed between the appliance and the
mains (the earthing wire must not be interrupted by
the circuit-breaker). The power supply cable must be
positioned so that it does not exceed room
temperature by 50°C at any point of its length.
Before making the connection check that:
• the limiter valve and the home system can
support appliance load (see data plate);
• the power supply system has an efficient earthing
connection which complies with the provisions of
current regulations and the law;
• there is easy access to the socket or the
omnipolar circuit-breaker once the cooker has
been installed.
!
Do not use reducers, adapters or shunts as these
could cause heating or burning.
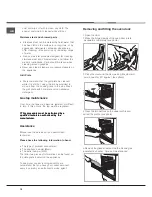
How to connect an alternative plug
The wires in this mains
lead are coloured in
accordance with the
following code:
BLUE “NEUTRAL”
BLUE “NEUTRAL”
BLUE “NEUTRAL”
BLUE “NEUTRAL”
BLUE “NEUTRAL”
(N)
(N)
(N)
(N)
(N)
BROWN
BROWN
BROWN
BROWN
BROWN “LIVE” (L)
“LIVE” (L)
“LIVE” (L)
“LIVE” (L)
“LIVE” (L)
GREEN AND YELLOW
GREEN AND YELLOW
GREEN AND YELLOW
GREEN AND YELLOW
GREEN AND YELLOW
“EARTH” (E)
“EARTH” (E)
“EARTH” (E)
“EARTH” (E)
“EARTH” (E)
!
Once the appliance has been installed, the power
supply cable and the electrical socket must be
easily accessible.
!
The cable must not be bent or compressed.
!
The cable must be checked regularly and replaced
by authorised technicians only.
Disconnecting the cable
Ensure that the means for disconnection of the
power cable is incorporated into the fixed wiring in
accordance with local wiring rules.
(New Zealand statutory warning): The cooker must
be connected to the electricity supply by a cable
fitted with an appropriately rated plug that is
compatible with the socket-outlet fitted to the final
subcircuit in the fixed wiring that is intended to
supply this cooker.
N
L
GREEN &
YELLOW
BROWN
BLUE
13 amp fuse
CROSS-BAR
CORD GRIP
a washer should be used. Concrete wall requires the
screw of at least 8mm of diameter, and 60mm of length.
Ensure that the chain is fixed to the rear wall of the cooker
and to the wall, as shown in figure, so that after installation
it is tensioned and parallel to the ground level.

