Clip Slings Application
15
Lifting Patient from the Floor
The technique described here can be used for
WUDQVIHUULQJSDWLHQWVO\LQJRQWKHÀRRU
3DWLHQWVEHLQJOLIWHGIURPWKHÀRRUGXHWRDVOLS
or fall should only be lifted after examination by
TXDOL¿HGPHGLFDOSHUVRQQHO7KHSDWLHQWFDQEH
lifted from a completely reclined position on the
ÀRRUEXWIRUKLVFRPIRUWSXWDSLOORZXQGHUKLV
KHDG¿UVW
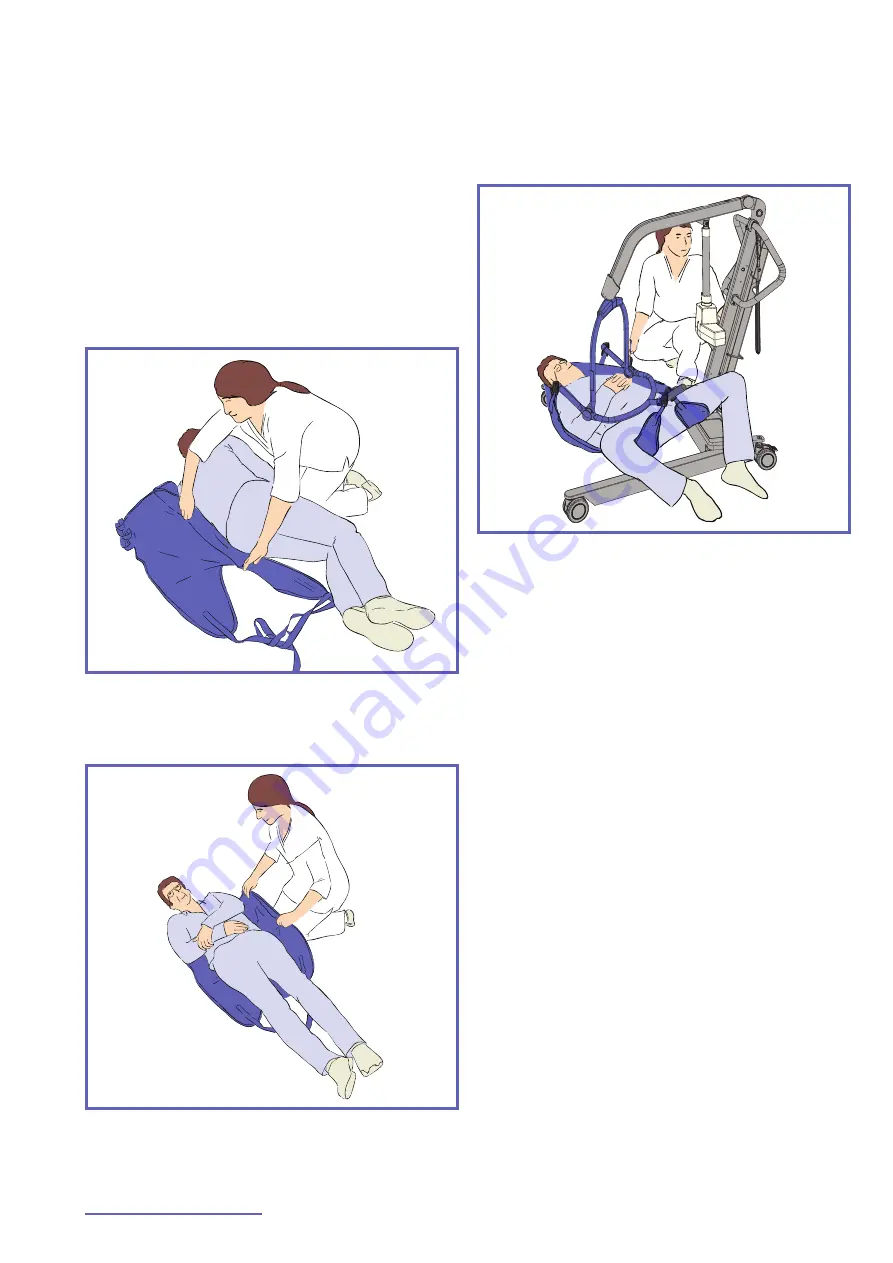
1) Roll the patient onto their side.
2)
)ROGWKHVOLQJLQKDOIDQGSODFHRQWKHÀRRU
land marking it, along the back of the patient
so that the base of his spine is aligned with
the base of the sling, making sure the sling
extends to the top of the patient’s head.
Fig. 24
3) Roll the patient back onto the sling and then
slightly further in the opposite direction, so
that the folded part of the sling can be
unfolded.
Fig. 25
4) Depending on circumstances, space or
position of patient, approach the patient
with the open part of the chassis.
5) Adjustment of the spreader bar height may
have to be made before connection is
possible.
6)
$WWDFK WKH VKRXOGHU VWUDS FOLSV ¿UVW WKHQ
with the open part of the sling, support
frame pointing downwards towards the
shoulders, connect the leg strap clips.
Fig. 26
7) When all the clips are securely attached,
UDLVH WKH SDWLHQW IURP WKH ÀRRU LQ D VHPL
recumbent position.
8)
2QFH UDLVHG IURP WKH ÀRRU HQVXUH WKH
patient’s legs are clear of the chassis before
continuing to lift.
9) Turn the patient to face the caregiver, and
keep at a normal chair height.
10) Proceed with the transfer.
Lowering Patient to the Floor
1) Lower the patient down onto the new
location by making small adjustments
during the descent so that the patient is
always in the best comfortable position.
2) When the patient’s body weight is fully
supported, detach the connections clips.
3) Move the lift away from the patient.
4) Remove the sling from under the patient.
.


