background image


49 

Chapter 5  Advanced System Setup   

The Windows remote client allow you to optimize your NVR unit by adjusting settings like camera, 

record, event, account, storage, network, system, DIO, log and license. It is extremely important 

that you setup your NVR correctly. 


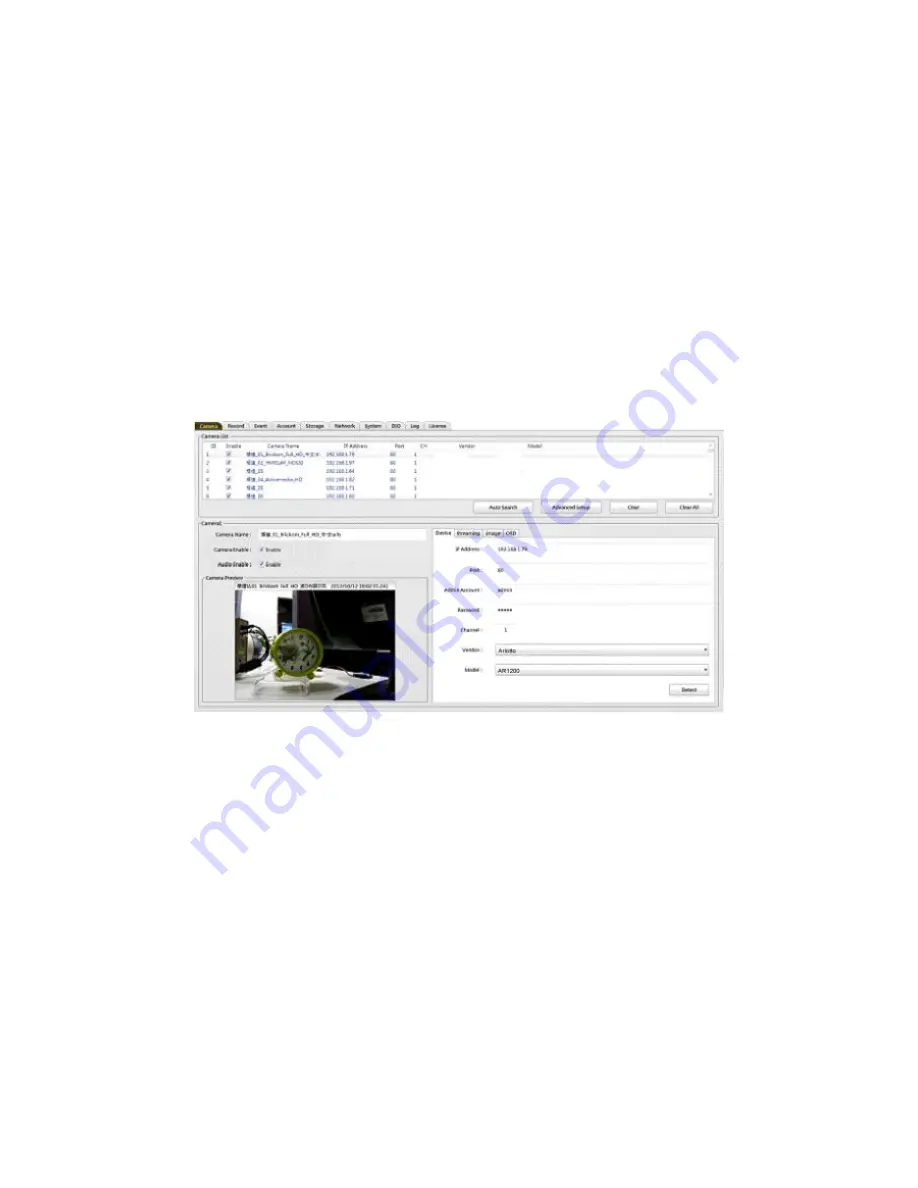
5.1 Camera Setup 

Camera setup page 


Cameras can be added to Camera List in two ways: automatic or manual. 


Summary of Contents for ANVR832

Page 1: ...guard NVR CMS ANVR832 ANVR864 USER MANUAL Version 2 0 About this user manual Before installing and using this NVR unit please read this user manual carefully Be sure to keep it handy for later reference ...

Page 2: ...ve Display Screen 15 3 2 Login Screen 19 3 3 Playback Screen 20 3 4 System Configuration Screen 25 Chapter 4 Windows Remote Client 36 4 1 Login 36 4 2 Live Display Screen 37 4 3 Emap Screen 44 4 4 Playback Screen 45 Chapter 5 Advanced System Setup 49 5 1 Camera Setup 49 5 2 Record Setup 56 5 3 Event Setup 59 5 4 Account Setup 61 5 5 Storage Setup 64 1 6 Network Setup 66 5 7 System Setup 69 5 8 DIO...

Page 3: ...nce application with optimum surveillance and operating efficiency and delivers a better security and stability than the counter part Windows powered system Application Architecture Key Feature Enhanced 64 bit Linux OS well protection against viruses and hackers Intel GPU 1080P 400FPS hardware H 264 decoding H 264 MPEG 4 and M JPEG compression Max 32 64 CH IP cameras recording supports 5 Megapixel...

Page 4: ...eaming dual streaming with compression resolution frame rate bit rate quality brightness contrast hue saturation and sharpness settings Channels Support Recording allows for up to 32 64CH megapixel IP camera recording Audio synchronized audio and video recording two way audio Remote Playback Playback Mode Max 4CH playback Playback Mode 1 2X2 view mode Search Mode By timeline Playback Control Play ...

Page 5: ...igital PTZ control and audio control Device Tree Tree View listing and management backup failure system boot up system shutdown and system configuration changed events within specified time On screen event alert event log digital output email alert with attached recording video alert actions can be activated when an event is triggered Backup Backup recording video of previous day to ftp server Sys...

Page 6: ...onents The package contains the main unit and its components as specified below When you purchase the NVR please check to ensure the components specified below are included The NVR unit Screws for disk drives Power cord Warranty card with Serial Number Setup Wizard Windows Remote Client iPhone app iPad app and Android app 1 3 Front Panel ANVR832 ANVR864 ...

Page 7: ...6 ANVR832 ANVR864 1 4 Rear Panel ...

Page 8: ...tallation 2 1 HDD Installation 1 Remote the front cover open the HDD tray and mount the hard drive ANVR832 ANVR864 2 Mount the hard drive into the HDD tray with screws 4 screws for each tray rotate clockwise to fix it ...

Page 9: ...8 3 Put the HDD tray back Note Please install HDDs with the same model and storage capacity for easily maintenance ...

Page 10: ...Connect the power cord to the power source 4 Connect the power cord to the rear panel of the NVR unit 5 On the front panel of the NVR unit click the power button 6 It takes about one to two minutes for the NVR unit to fully power up Once it is powered up the Power LED will turn blue 2 3 Setup NVR via Wizard The NVR Setup Wizard Setup Wizard program performs the initial setup procedures on the NVR ...

Page 11: ...10 5 Choose your preferred language and then click the Next button English Japanese Russian Traditional Chinese ...

Page 12: ...NVR Setup Wizard will start searching for all the available NVRs on the LAN currently Choose one of them and then click the Next button 7 Type in the admin password default is 1234 click the OK button and then click the Next button ...

Page 13: ...ateway Primary DNS Sever and Secondary DNS Server automatically via DHCP Static IP Setting configure IP Address Netmask Gateway Primary DNS Sever and Secondary DNS Server manually 9 Add cameras for this server Click Search to automatically find all IP cameras on the LAN currently adjust the Timeout parameter of the left bottom if can t find any connected IP ...

Page 14: ...s and then click Next button 10 Type in Admin Name and Password of searched IP camera or manually configuring the IP cameras for the Address Port Admin Name Password CH ID video server only Model No and click Apply and then Next button 11 click the Exit button to finish the settings procedure and activate the NVR unit ...

Page 15: ...14 ...

Page 16: ...ctions of the NVR unit via local console 3 1 Live Display Screen Each time the NVR unit starts the local console defaults to the live display screen The following diagram outlines the functions used on the live display screen You should become familiar with these options as this is the screen that will be displayed the majority of the time Live display screen ...

Page 17: ...Camera is being recorded not being record ed Camera detects motion The camera title box and bounding box of camera view window will be shown in white color It will change to orange color when it becomes as the focus window Double click left mouse button on a given grid will enlarge its size and double click right mouse button on a given gird will reduce its size The grid will show the live video s...

Page 18: ... area and scroll the mouse wheel forward to zoom in and backward to zoom out Double clicking right mouse button will terminate the digital magnifying procedure Task control bar for live display screen The task control bar locates at the bottom side of live display screen it will show or hide automatically when moves or leaves mouse to the bottom of the screen It provides several buttons for easy o...

Page 19: ...s audio Dragging the bar to volume up or volume down or clicking the mute button to enter mute mode Press to enter single view mode Press to enter quad view mode Press to enter 9 split view mode Press to enter 12 split view mode Press to enter 16 split view mode Press to enter other split view modes incl uding 5x5 6x6 7x7 8x8 1 2 1 3 1 5 1 7 and 1 12 split view modes ...

Page 20: ...when navigate PTZ cameras adjust IRIS Focus zoom in and zoom out Icon Description or Press arrow on the camera view window t o adjust the TILT up down PAN left right position Press to zoom in zoom out the PTZ Press to adjust the PTZ focus Press to adjust the PTZ iris Speed Press icon to adjust the PTZ speed Preset Press icon to the preset point then press Go to the preset point 3 2 Login Screen Th...

Page 21: ... the system by entering correct User Name and Password Note The default administrator User Name is admin Password is 1234 3 3 Playback Screen This NVR has several search methods that allow the user to easily playback a particular section of recording video The following describes how to operate these playback features Playback screen ...

Page 22: ...to orange color when it becomes as the focus window Double click left mouse button on a given grid will enlarge its size and double click right mouse button on a given gird will reduce its size The grid will show the playback video stream of each IP camera in the normal case The following background images will appear when abnormal cases happen Image Description No recording clip for the IP camera...

Page 23: ...bar for playback screen The task control bar locates at the bottom side of playback screen it will show or hide automatically when moves or leaves mouse to the bottom of the screen It provides several buttons for easy operate your playback screen Icon Description Press to back to live display window Press to quickly find playback video of a certain time period using timeline or motion search Press...

Page 24: ...back speed playback date time HDD mode and status Timeline Search There are several different types of search methods that can be performed on the NVR unit The basic one is timeline search involves selecting the date camera time and then play 1 Click the Search button 2 Select Timeline search from the Search Mode popup menu 3 Click the Calendar button to pop up or pop down a calendar for selecting...

Page 25: ... in and out the timeline scale 6 Select one more or all cameras 7 Click OK to begin search and then the video can be played forwards backwards or frame by frame as following Icon Description Press to increase backward speed at 1x 2x 4x 8x and 16 x speeds Press to back one frame Press to rewind recorded video Press to pause recorded video ...

Page 26: ...ng mouse left button and dragging an area Click mouse right button can clear the area that just drew 2 Click icon to search the next clip 3 4 System Configuration Screen The system configuration screen allows you to setup your NVR unit by adjusting settings like camera network system and license It is extremely important that you setup your NVR correctly Camera setup 1 Click button only administra...

Page 27: ...Select the check box next to the desired camera 5 Specified the Camera ID for the desired camera 6 Click Add Camera button to add it into Camera List or Cancel button to cancel the change 7 Click an available camera on the Camera List 8 Check Enable to active the video channel ...

Page 28: ... Click Stream Detect button to get IP camera s streaming setting 11 Click Clear button to clear the selected raw or Clear All to clear all cameras setting 12 Click Reset button to reset the related modifications 13 Click Apply button to apply the change or Cancel button to cancel the change ...

Page 29: ...o apply the change or click Cancel button to cancel the change 5 Check NVR Stream 2 if needed 6 Select a stream profile from the stream profiles drop down menu for Stream 2 7 Change the default video codec H 264 MPEG 4 or MJPEG resolution frame rate bit rate quality setting if needed Click Submit button to save your changes to IP camera Note The available values will vary by camera 8 Click Reset b...

Page 30: ...uration slider bar to the right or left to adjust the overall color intensity of the image 5 Hue move the Hue slider bar to the right or left to adjust the color cast of the image 6 Sharpness move the Sharpness slider bar to the right or left to adjust the edge contrast of the image 7 Click Submit button to save your changes to IP camera 8 Click Default button to reset it to IP camera s default 9 ...

Page 31: ...eaming port default is 8888 2 Enable SSH for remote maintenance purpose 3 If your NVR has two Ethernet ports make sure both Ethernet ports are connected to the network first and then select dual IP Load Balancing or Fail over mode for the TCP IP setting A Dual IP assign different IP settings for each Ethernet channel ...

Page 32: ...tmask will default to 192 168 1 200 255 255 255 0 for eth0 and 192 168 1 201 255 255 255 0 for eth1 in case of no DHCP server existed B Static IP Setting configure IP Address Netmask Gateway Primary DNS Sever and Secondary DNS Server manually C PPPoE setting Enter User Name and Password provided by ISP The system will return the IP assigned by ISP in case of dialup successfully 5 Specify Maximum O...

Page 33: ...eturn your DDNS name assigned by no ip when connect successfully 7 Configure your SMTP here to send event notifications to the E mail address specified in Event i Enter your SMTP server ii Enter User Name of SMTP server iii Enter User Password of SMTP server iv Enter the sender address of event notifications 8 Click Apply button to apply the change or click Cancel button to cancel the change ...

Page 34: ...n ugrade firmware reboot shutdown NVR system and language setting Backup Load Configuration 1 Click Backup Load button 2 Browse a destination file for backup load 3 Click the OK button 4 A confirmation dialog pops up 5 Click the OK button to confirm and start backup load 6 After configuration load the NVR will restart automatically ...

Page 35: ... 2 Click the OK button 3 A confirmation dialog pops up 4 Click the OK button to confirm and start upgrade 5 After upgrade the NVR will restart automatically Language setting 1 Select a preferred language 2 Click Apply button to apply the change or click Cancel button to cancel the change License Setup Register a license to have more channel capacity for NVR Max 64 channels for each NVR Licenses ca...

Page 36: ...nter your Serial Number 3 NVR will verify Host Info and Random Number and then obtain a License Key via Internet 4 Click Apply button to register this license info 5 System will reboot automatically if registered successfully 6 The new License Info will be updated in License List ...

Page 37: ...t NVR Remote Client at your Windows desktop When the client is up you will see the following login window Login window Login your NVR unit by entering its NVR Name IP Address Port No User Name Password Language and Resolution and then click OK begin using this unit Note The default administrator User Name is admin Password is 1234 After entering the correct information you will see the live displa...

Page 38: ...ou can select available NVR units from the drop down menu during next time you log in and the system will fill in the related fields automatically and you only need to reenter the Password field to login your NVR unit 4 2 Live Display Screen Upon successful login the live display screen will be shown ...

Page 39: ...nt Press to enter live display screen Press to enter playback screen Press to enter setup screen Camera view window Camera view window displays camera title bar and its live video stream in a grid The NVR supports different view modes for these grids including single quad 9 split 12 split 16 split and 64 split view modes Camera information will be shown on the camera title bar it includes camera n...

Page 40: ...ble click left mouse button on a given grid will enlarge its size and double click right mouse button on a given gird will reduce its size The grid will show the live video stream of each IP camera in the normal case The following background images will appear when abnormal status happens Image Description This channel is trying to connect to IP ca mera No response from IP camera Network fai lure ...

Page 41: ...case of abnormal Expanding each device will show subordinate devices such as sensor input devices or alarm output devices on network I O modules Icon Description Normal Abnormal NVR Normal Abnormal IP camera Normal Abnormal video server Normal Abnormal video channel Normal Abnormal network I O module Normal Abnormal sensor input device Normal Abnormal alarm output device ...

Page 42: ...quad view mode Press to enter 9 split view mode Press to enter 12 split view mode Press to enter 16 split view mode Press to enter full screen view mode Press to show video in original aspect ratio Press to take a snapshot from focus camera view window Press to auto switch camera views Press Up Down arrow to adjust the switch interval 10 seconds as default max 30 seconds Listen to camera s audio e...

Page 43: ...d of camera Through camera view window you can see the live video when navigate PTZ cameras adjust IRIS Focus zoom in and zoom out Icon Description Press arrow or to adjust the TILT up down PAN left right position Press to go the default position Press to zoom in zoom out the PTZ Press to adjust the PTZ focus Press to adjust the PTZ iris Preset Press Up Down arrow to the preset point and then pres...

Page 44: ...procedure Event panel Event panel shows latest events from the NVR or its connected IP cameras with their status type date time camera name description and device IP information New events are constantly appended to the top of the list and old events will be removed from the list Icon Description Alarm happen and still exist Alarm happen but disappeared Currently supported event types include vide...

Page 45: ...istrator can have an idea of where a device is located and their current status The device icons will be shown as red color on the map and Emap panel when an event is triggered For a camera device click camera icon will pop up associated live video window for live surveillance Emap panel shows all the connected maps and devices of NVR A device can be an Emap NVR IP camera or a network I O module T...

Page 46: ...normal Map Normal Abnormal NVR Normal Abnormal IP camera Normal Abnormal video server Normal Abnormal video channel Normal Abnormal network I O module Normal Abnormal sensor input device Normal Abnormal alarm output device 4 4 Playback Screen Most of the functions are the same as those seen in live display screen but there are some differences in the playback screen ...

Page 47: ...NVR unit The basic one is timeline search involves selecting the date camera time and then play 14 Select Time Line search from the drop down menu within the search panel 15 Click the Calendar button to pop up or pop down a calendar for selecting a date 16 Select one more or all cameras 17 Click OK to begin search ...

Page 48: ...d then the video can be played forwards backwards or frame by frame as following Playback control Icon Description Press to increase backward speed at 1x 2x 4x 8x and 16 x speeds Press to back one I frame Press to rewind recorded video Press to pause recorded video Press to play recorded video Press to forward one frame Press to increase forward speed at 1x 2x 4x 8x and 16 x speeds ...

Page 49: ...48 LED panel The LED panel will show the playback date time and the play control information when in playback screen ...

Page 50: ...mize your NVR unit by adjusting settings like camera record event account storage network system DIO log and license It is extremely important that you setup your NVR correctly 5 1 Camera Setup Camera setup page Cameras can be added to Camera List in two ways automatic or manual ...

Page 51: ...ll the currently available cameras 20 Select the check box next to the desired camera 21 Specified the channel ID of video server for the desired camera 22 Click Apply button to apply the change or Return button to cancel the change 23 Click an available camera on the Camera List 24 Enter the Admin Account and Password ...

Page 52: ...51 25 Click Apply button to apply the change or Cancel button to cancel the change ...

Page 53: ...mera videos should be streamed to NVR unit Most IP cameras are capable of providing multiple video streams at the same time We call those video streams as stream profile Steam profile defines which video codec H 264 MPEG 4 or MJPEG resolution frame rate bit rate quality will be pulled from the IP camera The available stream profiles will vary by camera By default NVR pull only one stream NVR strea...

Page 54: ...2 Click Apply button to apply the change or click Cancel button to cancel the change 13 Check NVR Stream 2 tab if needed 14 Select a stream profile from the stream profiles drop down menu for NVR Stream 2 15 Change the default video codec H 264 MPEG 4 or MJPEG resolution frame rate bit rate quality setting if needed Click Submit button to save your changes to IP camera Note The available values wi...

Page 55: ...rall color intensity of the image 15 Sharpness move the Sharpness slider bar to the right or left to adjust the edge contrast of the image 16 Click Submit button to save your changes to IP camera 17 Click Default button to reset it to IP camera s default 18 Click Cancel button to cancel the change 19 Click Apply button to apply the change or click Cancel button to cancel the change Define a generi...

Page 56: ...dmin Account and Password 5 Define your camera Vendor and Model as Generic 6 Click Apply button to apply the change or click Cancel button to cancel the change 7 Select Streaming Tab 8 Specify the RTSP URL for your IP camera 9 Specify the transport protocol TCP UDP or HTTP 10 Click Apply button to apply the change or click Cancel button to cancel the change ...

Page 57: ...56 5 2 Record Setup The record setup page allows you to create different recording schedules based on the day time and type of recording desired Record setup page ...

Page 58: ...ecording when NVR detects motion o from cameras can be the same or other cameras or digital input of network I O modules 4 Specify how many days of record data are going to be kept in storage which will not be removed when recycling record data 5 Event record mode Specify Pre Alarm Recording time maximum 30 seconds Post Alarm Recording time maximum 30 seconds and event sources motion or digital in...

Page 59: ...time frame for recording Click any blue bar the blue bar will be shown with yellow border click the Modify button and then change from to time for schedule modification Click any blue bar the blue bar will be shown with yellow border click the Delete button to remove the schedule Click the Delete All button to remove all schedules 7 Click Apply button to apply the change or click Cancel button to ...

Page 60: ...be video motion camera disconnected video loss and digital input but also system events like storage full hard disk failure abnormal recording backup failure system boot up system shutdown and system configuration changed events Event setup page Add an event 1 Click Add button ...

Page 61: ...he clip length can be specified 6 Click Apply button to apply the change to Event Setup List or click Cancel button to cancel the change Modify an event 1 Select an Event Setup on the Event Setup List column 2 Click Modify button 3 Modify the Schedule and Action columns setting 4 Click Apply button to apply the change to Event Setup List or click Cancel button to cancel the change Delete an event ...

Page 62: ...efault password 1234 It has the rights of live view playback and setup The admin account cannot be deleted They have the rights to create and delete super users normal users and guest users and change their passwords 2 Power user power users can be granted the same rights as administrator or just be granted partial administrator rights They can be deleted by administrator 3 Normal user normal user...

Page 63: ...ce for confirmation purposes Type administrator power user normal user or guest user Enable check this box to enable this account and idle client timeout period disconnected if remote client idle more than this period information for the new account 3 Select channels that the user has access rights ...

Page 64: ...DO control password change Emap access view change setup for the specified channels 5 Click Apply button to apply the change to Account List or click Cancel button to cancel the change Modify a user 1 Select a user on the Account List column 2 Click Modify button 3 Modify the related account information setting ...

Page 65: ...k Apply button to apply the change to Account List or click Cancel button to cancel the change 5 5 Storage Setup Storage setup page shows all information related to HDD Drives installed on the NVR it including 1 HDD mode RAID or non RAID mode independent HDD mode The RAID level depends on the number of HDD installed if in RAID mode HDD number Mode 1 2 NO RAID 3 8 RAID 5 Storage setup page ...

Page 66: ...heir status capacity and free size 3 The summary column will show the total storage capacity status and RAID rebuild progress in case of rebuild RAID Change HDD mode 1 Select independent mode or RAID mode 2 Check Auto Format to format any new installed or crashed HDD when boot NVR 3 Check Record Recycle to enable recycling record data if HDD full 4 Click Apply button the system will reboot immedia...

Page 67: ...e NVR Host Name HTTP port default is 80 Streaming port default is 8888 10 Enable SSH for remote maintenance purpose 11 If your NVR has two Ethernet ports make sure both Ethernet ports are connected to the network first and then select dual IP Load Balancing or Fail over mode for the TCP IP setting ...

Page 68: ...HCP server the IP Address and Netmask will default to 192 168 1 200 255 255 255 0 for eth0 and 192 168 1 201 255 255 255 0 for eth1 in case of no DHCP server existed E Static IP Setting configure IP Address Netmask Gateway Primary DNS Sever and Secondary DNS Server manually F PPPoE setting Enter User Name and Password provided by ISP The system will return the IP assigned by ISP in case of dialup ...

Page 69: ...ssword field iii Select the Sync Period to setup interval for IP DDNS synchronization iv The domain name field will return your DDNS name assigned by no ip when connect successfully 15 Configure your SMTP here to send event notifications to the E mail address specified in Event ...

Page 70: ...rver iv Enter the sender address of event notifications 16 Click Apply button to apply the change or click Cancel button to cancel the change 5 7 System Setup System setup page is used to show system information modify time zone system time backup data control local console and system maintenance ...

Page 71: ...0 Show System Information The system information tab shows the following items Model Firmware Version Camera Capacity MAC Address System Temperature System Memory CPU Temperature CPU Fan Speed CPU Usage ...

Page 72: ...n Internet NTP or Rdate time server automatically 5 Enter the IP address or the domain name of the NTP or Rdate server in the Time Server 1 Time Server5 field and fill in the sync period NVR can be configured as the NTP server for the IP cameras or other servers To ensure the date and time of the IP cameras are synchronized with the NVR enter the NVR IP as the NTP server of the IP cameras 6 Click ...

Page 73: ...nter the IP address of FTP server 2 Enter the User Name and Password 3 Set up the Backup Path for backup files 4 Enter the Backup Storage Capacity 5 Enter the Start Time for backup 6 Select the cameras for backup 7 Click Apply button to apply the change or click Cancel button to cancel the change ...

Page 74: ...nter the Dwell Interval for auto switch 4 Enable show Event Video when event triggered 5 Enter the Dwell Interval for Event Video 6 Check Enable to enable OSD default checked 7 Select the OSD position top or bottom 8 Click Apply button to apply the change or click Cancel button to cancel the change System Maintenance Windows client supports several remote NVR management features including backup r...

Page 75: ... and start backup load 12 After configuration load the NVR will restart automatically Reset to Default Configuration 5 Click the Reset to Default button 6 A confirmation dialog pops up 7 Click the OK button to reset 8 After configuration load the NVR will restart automatically Upgrade firmware 3 Browse the firmware file for upgrading 4 Click the OK button 5 A confirmation dialog pops up ...

Page 76: ...8 DIO Setup The NVR can handle the digital input relay output devices via AP SIO20 network I O module Digital input alarm output devices are connected directly with AP SIO20 network I O module and digital input alarm output signals are converted to Ethernet through AP SIO20 network I O module DIO setup page ...

Page 77: ...LED stand for abnormal status 6 Specify the name for each relay output device and click ON OFF button to turn on turn off relay output device blue LED stand for turn off red LED stand for turn on 7 Click Apply button to apply the change to DIO List or click Cancel button to cancel the change Modify a network I O module 1 Select a network I O module on the DIO List column 2 Click Modify button 3 Mo...

Page 78: ...ck Delete button or Delete All button 3 Click Apply button to apply the change to DIO List or click Cancel button to cancel the change 5 9 Log The Log setup page shows recent event and login logs In case of abnormal event or system malfunction the logs can be searched to analyze the related events or system problems Log page ...

Page 79: ...p failure system boot up system shutdown and system configuration changed events or Login s username and source local or remote 3 Specify the search time range 4 Click Search button will show the results in Log List column 5 10 License Register a license to have more channel capacity for NVR Max 64 channels for each NVR Licenses can be registered to NVR in two ways online and offline ...

Page 80: ...n 8 Enter your Serial Number 9 NVR will verify Host Info and Random Number and then obtain a License Key via Internet 10 Click Apply button to register this license info 11 System will reboot automatically if registered successfully 12 The new License Info will be updated in License List ...

Page 81: ... right client the associated icon at Emap tree panel of right top corner 3 Click Change Map to change map or Delete Map to delete map 4 Place Camera NVR network I O module Din Dout and Map to anywhere on the top layer map by right click on the top layer map and select Add Object 5 Select an object type and then enter their name source IP index and icon 6 Add a camera object ...

Page 82: ...81 7 Add a NVR object 8 Add a network I O module object ...

Page 83: ...82 9 Add a Din object 10 Add a Dout object ...

Page 84: ...83 11 Add a sub layer map object 12 Click Apply button to apply the change or click Cancel button to cancel the change ...

Page 85: ...s an enterprise solution The look and feel of CMS client is quite similar with NVR Windows remote client We ll mention the difference parts as below 6 1 Login Click the Start button NVR Client CMS Client at your Windows desktop When the client is up you will see the following login window Login window Login your CMS client by entering User Name Password Language and then OK begin using this unit N...

Page 86: ...r the details 6 3 Playback Screen Please refer to section 4 4 for the details 6 4 CMS Setup Page NVR setup page NVRs can be added to NVR List in two ways automatic or manual Automatic add NVR 1 Click Auto Search button to bring up the Search NVR popup ...

Page 87: ...ancel the change Manual add NVRs 1 Click a desired NVR on the NVR List 2 Enter the NVR Name 3 Enter the IP Address and Port 4 Enter the Login Name and Password 5 Check Alarm Auto report to enable the event report of associated NVR 6 Enter the Channel Number Din Number and Dout Number of NVR capacity column 7 Click Apply button to apply the change or Cancel button to cancel the change Account setup...

Page 88: ...ccount List column 6 Click Modify button 7 Modify the related account information setting 8 Click Apply button to apply the change to Account List or click Cancel button to cancel the change Delete a user 4 Select n user on the Account List column 5 Click Delete button 6 Click Apply button to apply the change to Account List or click Cancel button to cancel the change Event setup page The event se...

Page 89: ...n digital input camera disconnected video loss storage full hard disk failure abnormal recording backup failure system boot up system shutdown and system configuration changed events and camera number 4 Specify the search time range 5 Click Search button will show the results in Event List column Emap setup page Please refer to section 5 11 for the details ...

Reviews: