SECTION 3
GETTING STARTED
PAGE 73
9711-26020-0001
Exp o rt Co n tro lle d – S e e P a g e 3
Rev B
Using the Webcam
Image and video capture is performed using the built-in webcam and image capture software.
Your X10gx is provided with a version of Picasa 3™ image editor to demonstrate the image
capture process. Follow the procedure in
Capturing Images and Video
Table 6 to capture and save a still image or movie using this software.
NOTE
Remove the blue protective film from the webcam lens before
using the camera.
Table 6. Capturing a Still Image or Video
STEP
ACTION
1.
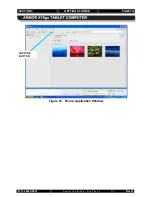
Double-click on the
Picasa 3 icon
on the desktop to open the Picasa application
window, as shown in Figure 40.
2.
Click on the “Capture photos or video…” button in the options bar. A Capture dialog
window will open displaying the current webcam image.
3.
To capture the image as a
still image
, click on the
camera
button below the image.
Each capture will appear as a thumbnail at the bottom of the window.
4.
When finished, click on the
Done
button to access editing and correction options or to
save or upload your images.
5.
To capture moving video, click on the
Record
button below the image. The capture
window will change to a viewer with options to view, save and upload your captured
video.
6.
To return to the main window, click on the
Back to Library
button.
7.
Refer to the Picasa Help resources for detailed instructions.


