507838-01
Issue 1813
Page 9 of 19
BCE7E
Filter Size – In. (mm)
-018, -024, -030, -036
20” x 20” (508mm x 508mm)
-042, -048, -060
20” x 24” (508mm x 610mm)
Table 3. Filter Dimensions
Sealing the Unit
There must be an airtight seal between the bottom of
the air handler and the return air plenum. Use fiberglass
sealing strips, caulking, or equivalent sealing method
between the plenum and the air handler cabinet to
ensure a tight seal. Return air must not be drawn from a
room where this air handler or any gas-fueled appliance
(i.e., water heater), or carbon monoxide-producing
device (i.e., wood fireplace) is installed.
WARNING
Seal the unit so that warm air is not allowed into the cabinet.
Warm air introduces moisture, which results in water blow-
off problems. This is especially important when the unit is
installed in an unconditioned area.
Make sure the liquid line and suction line entry points are
sealed with either the provided flexible elastomeric thermal
insulation, or field provided material (e.g. Armaflex,
Permagum or equivalent). Any of the previously mentioned
materials may be used to seal around the main and
auxiliary drains, and around open areas of electrical inlets.
Measuring Static Pressure
1. Measure tap locations as shown in Figure 9.
MANOMETER
SUPPLY
RETURN
UNIT SHOWN IN
HORIZONTAL DISCHARGE LEFT POSITION
Figure 9. Static Pressure Test
2.
Punch a 1/4ʺ (6mm) diameter hole in supply and return
air plenums. Insert manometer hose flush with inside
edge of hole or insulation. Seal around the hose with
Permagum. Connect the zero end of the manometer to
the discharge (supply) side of the system. On ducted
systems, connect the other end of manometer to the
return duct as above. For systems with non-ducted
returns, leave the other end of the manometer open to
the atmosphere.
LEFT-HAND AIR
DISCHARGE
MAIN DRAIN ON
RIGHT
OVERFLOW
DRAIN ON LEFT
UP-FLOW OR
DOWN-FLOW
RIGHT-HAND AIR
DISCHARGE
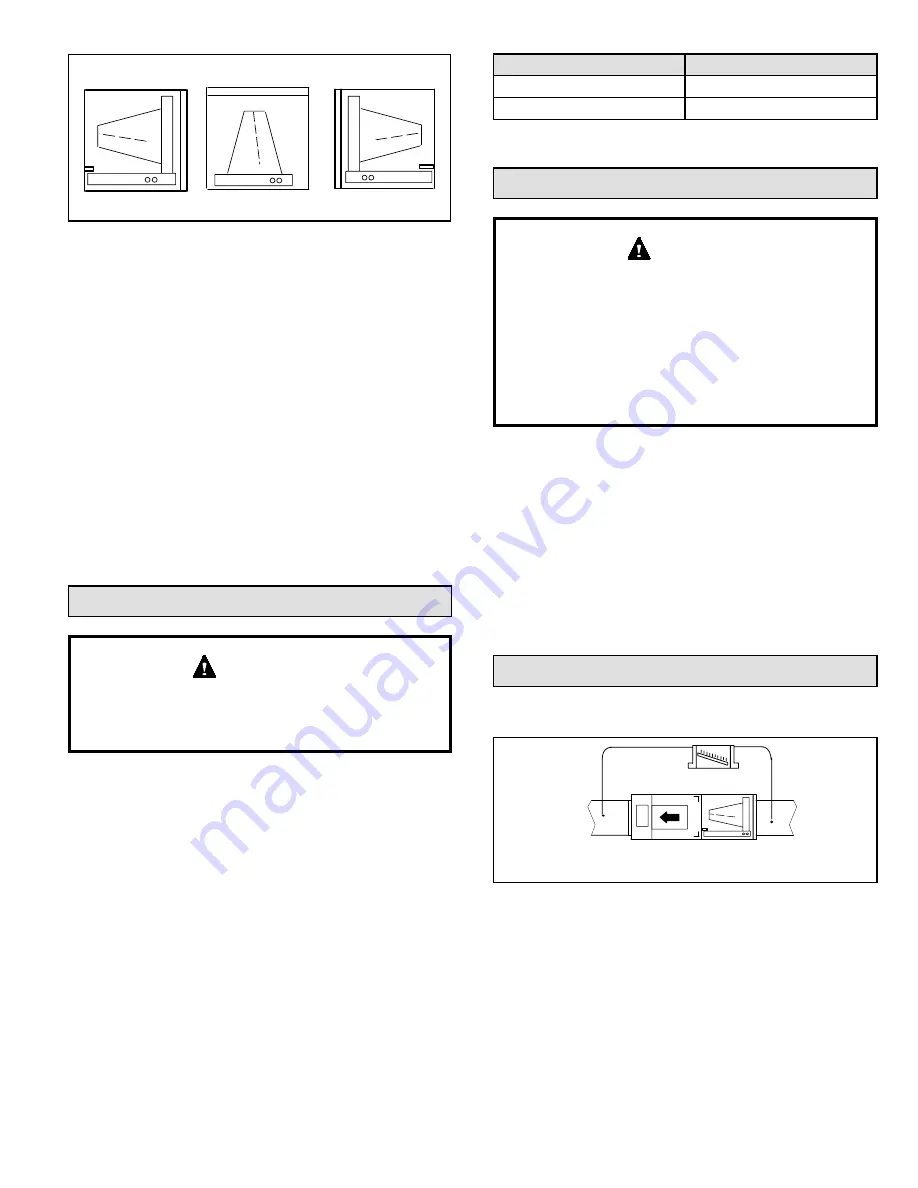
Figure 8.
Main and Overflow Drain Locations Based
on Coil Orientation
Best Practices
The following best practices are recommended for the
condensate removal process:
•
Main and overflow drain lines should NOT be smaller
than both drain connections at drain pan.
•
Overflow drain line should run to an area where
homeowner will notice drainage.
•
It is recommended that the overflow drain line be
vented and a trap installed. Refer to local codes.
•
Condensate drain lines must be configured or provided
with a cleanout to permit the clearing of blockages and
for maintenance without requiring the drain line to be
cut.
Inspecting and Replacing Filters
Filter access panel must be in place during unit
operation. Excessive warm air entering the unit may
result in water blow-off problems.
IMPORTANT
Filters may be duct-mounted or installed in the cabinet. A
filter is installed at the factory. Note that filter access door
fits over access panel. Air will leak if the access panel is
placed over the filter door.
Filters should be inspected monthly and must be cleaned or
replaced when dirty to assure proper air handler operation.
Reusable filters supplied with some units can be washed
with water and mild detergent. Some units are equipped
with standard throw-away type filters which should be
replaced when dirty.
To replace filter:
1.
Loosen the thumbscrews holding the filter panel in
place. Remove the dirty filter.
2.
Insert new filter and replace panel.


