4
Repair and Adjustment Procedures for
C-1801 Pneumatic Operators
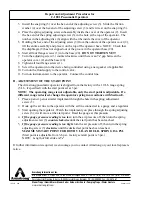
3. Install the snap ring (5) over the hex end of the adjusting screw (3). Slide the friction
washer (4) over the hex end of the adjusting screw (3) and let it rest on the snap ring (5).
4. Place the spring adjusting screw subassembly inside the cover of the operator (2). Insert
the hex end of the spring adjusting screw (3) in the hole at the top of the operator. The
notches in the adjusting disc (6) align with the ribs inside the cover of the operator.
5. Holding the hex end of the adjusting screw (3) from the outside of the operator cover (2),
lift the entire assembly and place it on the top of the operator base. NOTE: Check that
the diaphragm (9) has not slipped out of the groove in the operator base (20).
6. Start all four flange screws (1) into the base (20).
DO NOT TIGHTEN YET!
7. Turn the adjusting screw (3) counterclockwise until there is an
¹⁄₈
" gap between the
operator cover (2) and the base (20).
8. Tighten all four flange screws (1).
9. Screw the operator into the device being controlled using a new gasket (if applicable).
10. Turn on the fluid supply to the control valve.
11. Turn on instrument air to the operator. Connect the control line.
H. ADJUSTMENT OF THE START POINT
The Armstrong pneumatic operator is shipped from the factory with a 10 Lb. range spring
(5 Lb., if specified) with the start point set at 3 psi.
NOTE: The operating range is not adjustable, only the start point is adjustable. If a
different range is desired, change the operator spring in accordance with Section E.
1. Place a pencil, pen or similar implement through the hole in the spring adjustment
screw (3).
2. Hook up the air line to the operator with the air line connected to a gauge and a regulator.
3. Start opening the regulator. Watch the implement you place through the spring adjusting
screw (3); it will move at the start point. Read the gauge at this pressure.
4.
If the gauge pressure reading is too low:
turn the air pressure off, then turn the spring
adjustment screw (3)
counterclockwise
until the start point has been reached.
5.
If the gauge pressure reading is too high:
turn the air pressure off, then turn the spring
adjusting screw (3)
clockwise
until the desired set point has been reached.
MAXIMUM START POINT FOR BOTH 5 LB. AND 10 LB. SPRING IS 6 PSI.
(Start point is adjustable from 3-6 psi., factory set start point is 3 psi.)
NOTE: Length of full stroke is
³⁄₄
".
If further information is required, we encourage you to contact Armstrong or your local represen-
tative.
Armstrong International, Inc.
816 Maple Street, P.O. Box 408, Three Rivers, Michigan 49093 - USA Ph: (616) 273-1415 Fax: (616) 273-9500
Parc Industriel Des Hauts-Sarts, B-4040 Herstal/Liege, Belgium Ph: (04)409090 Fax: (04)481361
Steam Traps \ Humidifiers \ Steam Coils \ Valves \ Air Vents \ Pumping Traps \ Water Heaters
www.armstrong-intl.com
IB-53-B 4/99
Printed in U.S.A.


