8. If drain valve and fill valve are both energized and water is below the 1/3 full level in the electrode
canister (float canister for DI units), make sure the status of Steam Generation in menu is "STEAM
GEN.". Perform continuity check to be sure.
9. If drain valve only is energized and water level is below the 2/3 full level in electrode canister (float
canister for DI units), there may be excessive debris in electrode canister (float canister for DI
units). Inspect and clean if needed. See page 21 for Cleaning Procedure for Electrodes.
10. PC board may be defective. Consult the factory.
Humidifier fills with water, but does not turn "STEAM GEN" message on for 3 minutes
after reaching low water level.
1. Perform steps 1 through 3 from above "Humidifier will not fill..."
2.
For Tap Water:
Check AC voltage across the common electrode (longest) and the low level
electrode (medium length). The voltage will be approximately 17-20 VAC if the circuit is open.
When the water level closes, circuit voltage should drop to <5 volts.
(a) If voltage is not 17-20 VAC with circuit open, check continuity of wires from electrodes to
PC board. If continuity is OK, the PC board is likely defective.
(b) If voltage is 17-20 VAC with circuit open, but does not drop when water contacts the two
electrodes, the water may be too pure (consult factory) or if the voltage drops very slowly to
about 5 volts then the electrodes need cleaning. See page 21 for cleaning procedure for
electrodes.
3.
For DI Water:
Check continuity across the two wires to the low water float switch. If no continuity,
switch may be defective or "hung up". Make sure movement of switch is vertical so the float arm
swings freely.
4. If high limit/sail circuit is closed, low water level circuit is closed, and there is a calling for humidity,
the status of steam generation should be "STEAM GEN.". If not, PC board or wiring harness is
defective.
"STEAM GEN." turns on after initial fill to low water level, but amperage draw check
shows low or no amperage draw.
1. Check for line voltage to heating elements at secondary side of contactor and/or power module.
Verify power supply is same as voltage rating on humidifier nameplate.
2. If voltage is correct, the heating elements are likely defective. Turn off main power, disconnect all
elements and check element resistances (see resistance chart on Page 36 and 38). Look for open
circuits or elements with high resistance.
3. If voltage is not present at elements, check primary voltage fusing.
23
Summary of Contents for HumidiClean HC-6100 Series
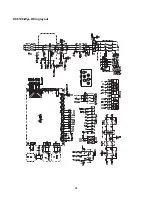
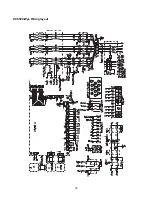
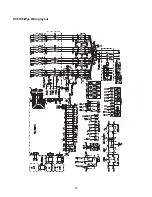
Page 28: ...HC6100 Wye Wiring layout 28...
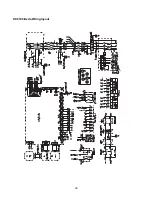
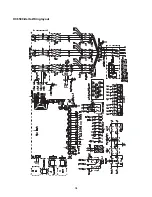
Page 29: ...HC6100 Delta Wiring layout 29...
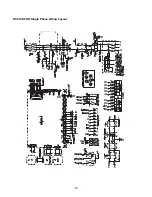
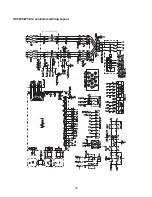
Page 30: ...30 HC6100 PAR Single Phase Wiring Layout...
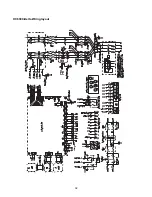
Page 31: ...HC6300 Wye Wiring layout 31...
Page 32: ...HC6300 Delta Wiring layout 32...
Page 33: ...HC6500 Wye Wiring layout 33...
Page 34: ...HC6500 Delta Wiring layout 34...
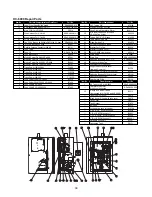
Page 35: ...35 HC6500 WYE 2 contactors Wiring Layout...
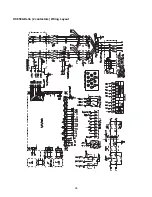
Page 36: ...36 HC6500 Delta 2 contactors Wiring Layout...
Page 37: ...HC6700 Wye Wiring layout 37...

