Toronto
English
18
00 18/04/2012
PORTUGUESA
9) Power absorbed during defrost phase (fans + hot defrost resistance)
10) Lighting power (where installed)
11) Usable display space
12) Usable load volume
13) Type of refrigerant fluid used by the unit
14) Environmental climate class and reference temperature
15) Anti-humidity protection class
16) Unit production work order number
17) Order number for unit production
18) Unit production year
In the case of a request for technical assistance, it is enough to communicate the following for identifica-
tion of the unit: product name (2); serial number (4); work order number (16)
5. Transportation (Fig. 3)
The units are provided with a wooden support attached to the bottom for movement using forklifts.
Always place the loading fork at the point indicated on the wooden support, in order to avoid risk
of overturning.
. Use an appropriate manual or electric fork lift to raise the unit in question, with a nominal
capacity greater to or equal to 1000 kg.
6. Receipt and initial cleaning
Upon receipt of the unit:
- make sure that the packaging is intact and does not show any obvious damage;
- carefully unpack the unit so as to not cause any damage;
- check all parts of the unit, making sure that all components are intact;
- if any damage is found, immediately contact your supplier;
- carry out an initial cleaning using neutral products and drying the unit with a soft cloth. Do not use
abrasive substances or metallic sponges.
- do not use alcohol or similar products to clean the parts in Plexiglas.
For proper disposal of the packaging, please remember that it consists of:
Wood - Polystyrene - Polythene - PVC - Cardboard.
Pursuant to EEC Directive 94/62, the appropriateness of the above materials is here declared.
7. Installation and environmental conditions (Fig. 3)
Do not place the unit:
- in areas where explosive gaseous substances are present;
- outside and exposed to atmospheric agents;
- near heat sources (direct sunlight, heating systems, incandescent light bulbs, etc.)
- near air streams (near doors, windows, air conditioning units, etc.) that exceed the speed of 0.2 m/sec.
- Remove the wooden supports on the bottom (used for transportation) and attach the adjustable feet (Rif.
2) positioning them so that the unit is horizontal, using a level (Rif. 1) to check the alignment. If the unit
is moved, repeat the leveling process.
- before connecting the unit to the power supply, make sure that the rating plate information corresponds
to the characteristics of the electrical system to which it will be connected.
- For proper unit performance, the temperature and relative humidity must fall within the parameters
called for under
EN-ISO 23953-1/2
which calls for Climate Class 3 (+25°C; U.R. 60%).
- make sure that the condenser unit ventilation openings are not obstructed - version with assembly
incorporated.
N.B.All these operations should be performed by specialized technical personnel only.
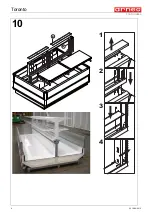
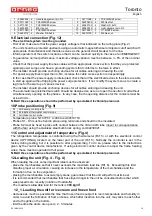
8. Multiplexing units (Fig. 11)
To multiplex two or more units, proceed as follows:
- Disassemble the sides
- Place the units side by side
- Remove the backs in order to have access to the riser openings
- Connect the risers and the brackets using the screws and aligning pins provided
- Replace the back panels.
MULTIPLEX JOINT KIT
Ref.
Code
Qty
Description
Ref.
Code
Qty
Description

