26
3. Place the food in the bowl.
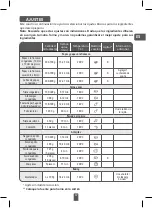
Note: Never fill the bowl beyond the MAX level mark or exceed the maximum
amount indicated in the table (see into section ‘Cooking Guide’), as this could affect
the quality of the end result.
4. Slide the bowl back into the appliance.
Caution: Do not touch the bowl during use and for some time after use, as it gets very
hot. Only hold the bowl by the handle.
5. To begin cooking, you can select between the automatic cooking mode and the manual
settings.
a. If choosing manual settings:
• Set the temperature by pressing
key and adjust temperature with
+
and keys.
The thermostat varies from 80-200°C.
• Then set the desired cooking time by pressing the key and adjusting the time with the
+
and buttons. The timer can be set for between 0 and 60 minutes.
• Press the Start key to begin cooking with the selected temperature and time settings.
Cooking starts. The selected temperature and remaining cooking time will alternate on
the screen display.
b. If choosing automatic cooking mode:
• Press
key to display the cooking mode. All menus will be illuminated.
• Then press key, to select the desired cooking mode, the function will be switched
clockwise direction. (these modes are described in detail in the
“Cooking guide” section
).
• Confirm the cooking mode by pressing the Start . This will launch the cooking process.
• Cooking starts. The selected temperature and remaining cooking time will alternate on
the on-screen display.
6. Excess oil from the food is collected in the bottom of the bowl.
7. Some foods require shaking halfway through the cooking time (see section ‘Cooking
Guide’). To shake the food, pull the bowl out of the appliance by the handle and shake it.
Then slide the bowl back into the appliance and press the Start button again to restart
cooking.
8. When you hear the timer sound, the cooking time set has finished. Pull the bowl out of the
appliance and place it on a heat-resistant surface.
9. Check if the food is ready.
If the food is not ready yet, simply slide the bowl back into the appliance and set the
timer for a few extra minutes.
10. When the food is cooked, take out the bowl. To remove food, use a pair of tongs to lift
the food out of the bowl.
Caution
: Do not turn the bowl, be careful of any excess oil collected at the bottom of the
bowl that may leak onto the food and the grid which may fall out.
After hot air frying, the bowl, the grid and the food are very hot. Depending on the type
of food cooked in the appliance, be careful as steam may escape from the bowl.
11. When a batch of food is ready, the appliance is instantly ready for preparing another
batch of food.
Note : the appliance has automatic shut-off and will automatically shut down when
Summary of Contents for AirFry Ultra
Page 1: ...www arno com br PT ES EN AirFry Ultra TBC ...
Page 2: ......
Page 6: ...4 Apresentação do produto A F D E C B G ...
Page 12: ...10 ...
Page 16: ...14 Presentación del producto A F D E C B G ...
Page 22: ...20 ...
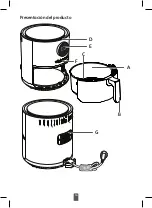
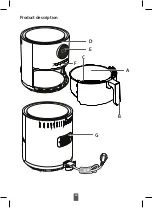
Page 26: ...24 A F D E C B G Product description ...
Page 33: ...31 EN ...
Page 34: ......
Page 35: ......
Page 36: ......
Page 37: ...Ref 1520011267 43 2020 ...

