


3
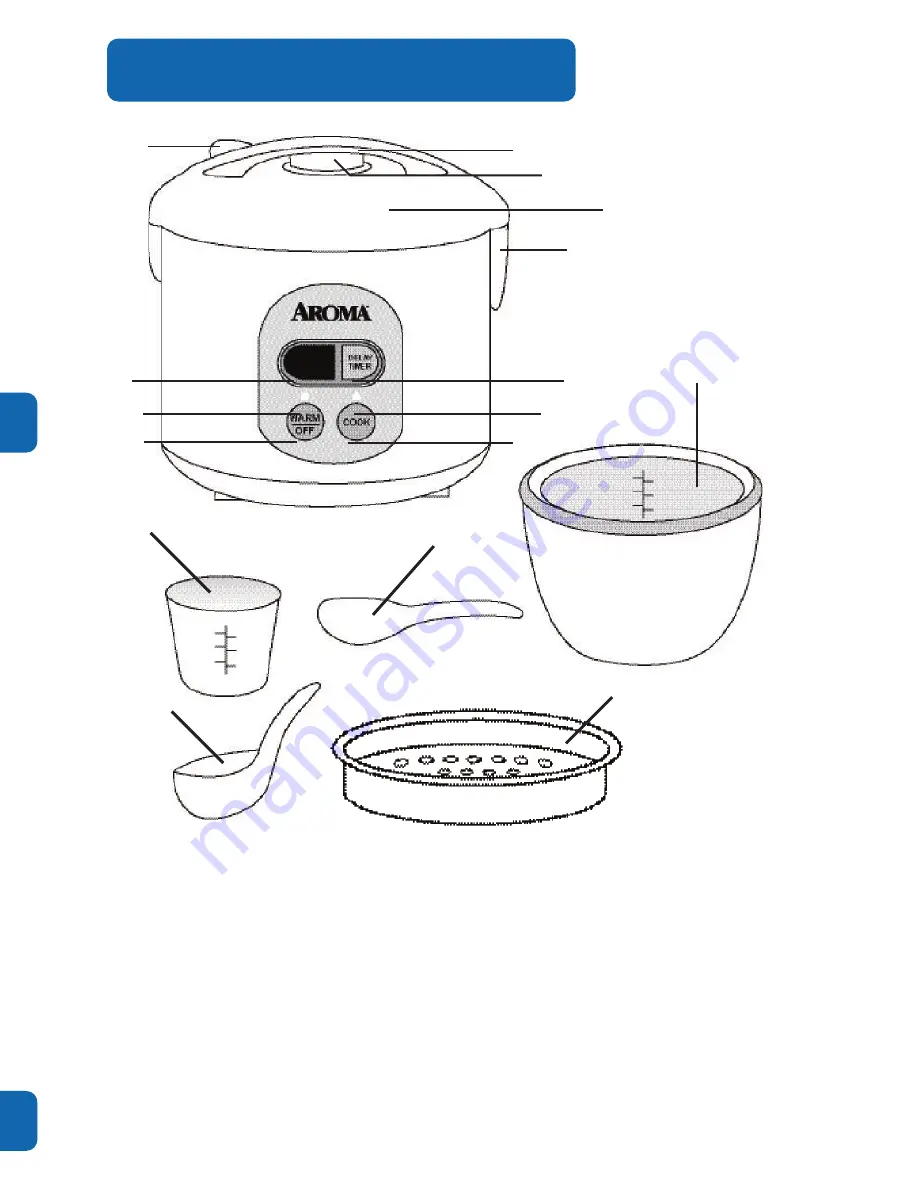
PARTS IDENTIFICATION
1
4
2
3
5
12
13
14
15
16
1. Lid Release Button
2. Handle
3. Steam Vent
4. Lid
5. Condensation Collector
6. Delay Timer Button
7. Cook Indicator Light
8. Cook Button
9. Digital Delay Timer Display
10. Warm Indicator Light
11. Warm/Off Button
12. Inner Pot
13. Rice Measurement Cup
14. Rice Paddle
15. Soup Ladle
16. Steam Tray
6
7
8
9
10
11
1.Un
filcourt
d'alimentationélectrique
estfourni
pourréduire
lesrisques
d'enchevêtreme
ntou
detrébuchement
àla
suitede
l'utilisationd'un
filplus
long.
2.Des
rallongesplus
longuessont
disponibleset
peuventêtre
utiliséesavec
prudence.
3.Si
unerallonge
pluslongue
estutilisée
:
a.Les
caractéristiquesde
tensionnominale
indiquéessur
larallonge
doivent
êtreau
moinségales
auxcaractéristiques
detension
nominalede
l'appareil.
b.Le
filplus
longdoit
êtredisposé
demanière
àne
paspendre
par-dessusle
comptoirou
latable,
cardes
enfantspeuvent
letirer
ouil
peutêtre
la
causede
trébuchements
involontaires.
3
Cetappareil
aune
fichepolarisée
(unelame
estplus
largeque
l'autre);suivre
lesinstructions
ci-dessous:
Pourréduire
lerisque
d'électrocution,
cettefiche
nepeut
s'insérerdans
une
prisepolarisée
quedans
unseul
sens.S'il
n'estpas
possibled'insérer
àfond
la
fichedans
laprise,
inverserles
lamesde
côté.Si
lafiche
nepeut
toujourspas
s'insérerdans
laprise,
ilfaut
alorscommuniquer
avecun
électricienqualifié.
N'essayezpas
demodifier
lafiche
d'aucunemanière.
Sile
fild'alimentation
estendommagé,
ildoit
êtreremplacé
parle
fabricant,
sonagent
préposéaux
réparationset
àl'entretien,
ouune
autrepersonne
qualifiéepour
éviterune
situationdangereuse.
Cet
app
are
il
est
des
tin
é
à
une
util
isa
tio
n
dom
est
iqu
e
uniquement.
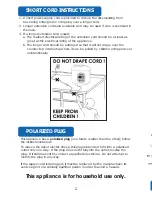
INSTRUCTIONSPOUR
LEFIL
COURT
FICHEPOLARISÉE
NEPAS
LAISSERLE
FILPENDRE!
TENIRÀ
L'ÉCARTDES
ENFANTS!


