


Always unplug unit and allow to cool completely before cleaning.
1. Remove the inner cooking pot. Wash it in warm, soapy water using a sponge
or dishcloth.
2. Rinse and dry thoroughly.
3. Repeat process with steam tray and other provided accessories.
4. Wipe the underside of the lid with a warm, damp cloth. Dry with a soft cloth.
5. Wipe the body of the rice cooker and the underside of the lid clean with a
damp cloth.
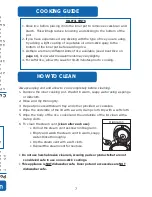
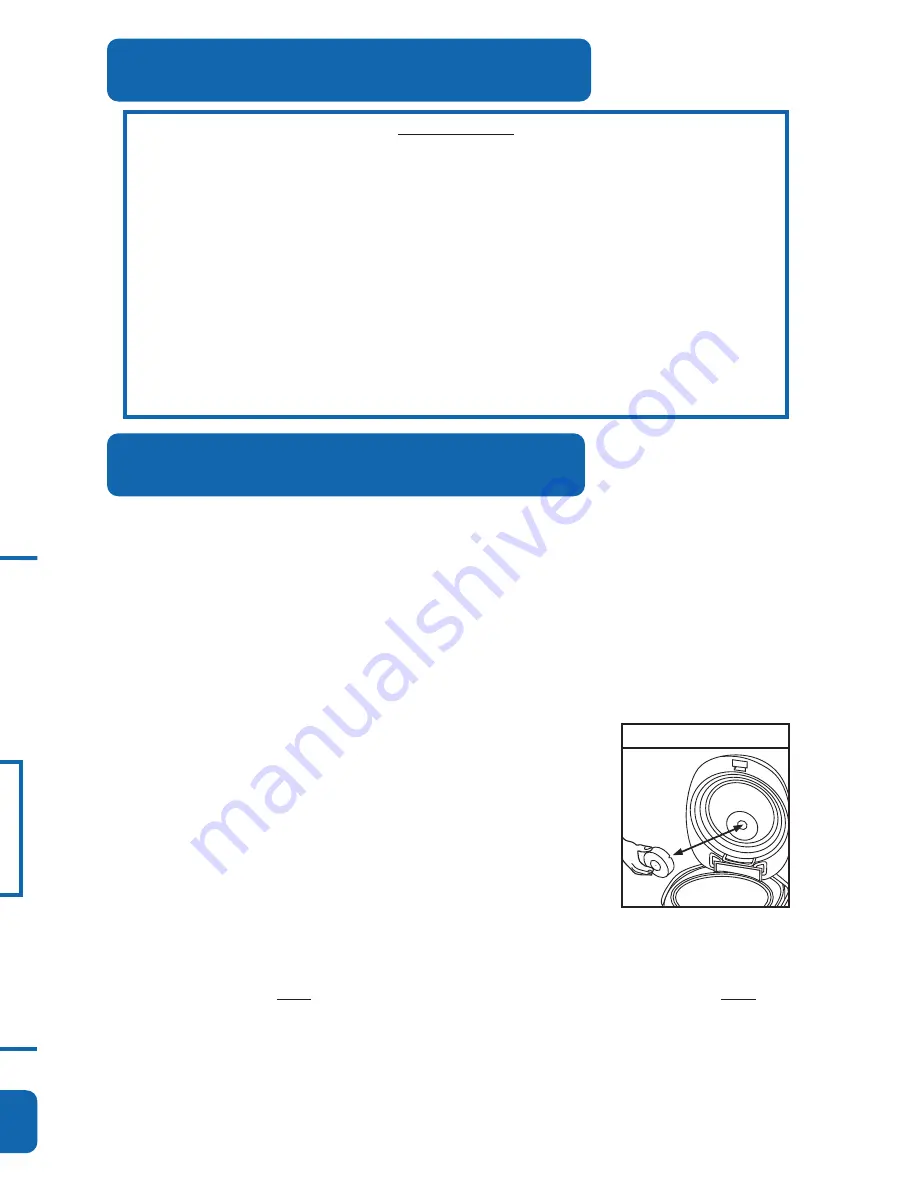
6. To clean the steam vent (clean after each use):
• Pull out the steam vent as shown in Diagram 1.
• Empty and wash the steam vent in warm, soapy
water. Rinse thoroughly.
• Dry the steam vent with a soft cloth.
• Reinsert the steam vent for next use.
• Do not use harsh abrasive cleaners, scouring pads or products that are not
considered safe to use on non-stick coatings.
• This appliance is NOT dishwasher safe. Inner pot and accessories are NOT
dishwasher safe.
7
HOW TO CLEAN
HELPFUL HINTS
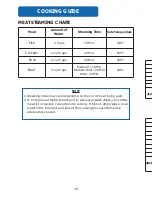
1. Rinse rice before placing it into the inner pot to remove excess bran and
starch. This will help reduce browning and sticking to the bottom of the
pot.
2. If you have experienced any sticking with the type of rice you are using,
try adding a light coating of vegetable oil or non-stick spray to the
bottom of the inner pot before adding rice.
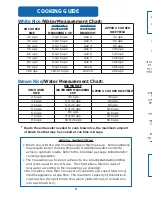
3. As there are many different kinds of rice available (see About Rice on
page 11), rice/water measurements may vary slightly.
4. For softer rice, allow it to soak for 10-20 minutes prior to cooking.
COOKING GUIDE
Diagram 1
7
UTILISATIONDE
VOTRECUISEUR
ÀRIZ
Pou
rU
tilis
erL
aM
inu
ter
ie
àR
eta
rde
men
t:
1.
Appuyezsur
lebouto
n«
MINUTERIEÀ
RETARDEMENT»
(parincréments
d'une
heure)jusqu'à
cequ'il
affichele
nombred'heures
pendantlesquelles
vous
désirezque
votreriz
aitfini
decuire.
2.
Appuyezsur
«CUISSON
»après
avoireffectué
votrechoix.
3.
Appuyezsur
lebouto
n«
MAINTIENAU
CHAUD/ARRÊT»
pourannuler
votre
choixet
remettre
l'appareilà
zéro.
REM
ARQ
UE
L'a
ffic
hag
en
um
ériq
ue
de
cet
app
are
iln
ese
rtq
u'à
la
fon
ctio
nd
em
inu
ter
ie
àre
tar
dem
ent
.L
orsq
ue
la
min
ute
rie
àre
tar
dem
ent
n'e
stp
asu
tilis
ée,
l'a
ffic
hag
ein
diq
ue
deu
xlig
nes
(vo
irl
'illu
stra
tio
nc
i-d
ess
ous
).
Cui
sso
nD
es
Alim
ent
sà
La
Vap
eur
:
1.P
our
une
cui
sso
nà
la
vap
eur
uni
que
men
t,a
jou
tez
la
qua
ntit
éd
'ea
u
app
rop
rié
ed
ans
le
bol
int
ern
e,e
nfo
nct
ion
de
l'a
lim
ent
àc
uire
.U
ng
uid
e
pra
tiq
ue
de
cui
sso
nà
la
vap
eur
est
pré
sen
té
àp
arti
rd
ela
pag
e1
1,à
des
fin
s
de
réf
ére
nce
.
2.P
lac
ezl
'al
im
ent
dan
sle
pla
tea
uv
ape
ur.
Les
pet
its
alim
ent
sp
euv
ent
être
disp
osé
sd
ans
un
pla
tq
uir
ésis
te
àla
cha
leu
re
tp
lac
ése
nsu
ite
sur
le
pla
tea
u
vap
eur
.
3.E
nv
ous
ass
ura
ntq
ue
la
sur
fac
ee
xté
rie
ure
du
bol
int
ern
ee
ste
ntiè
rem
ent
pro
pre
ets
èch
e,p
lac
ezl
eb
olin
ter
ne
dan
sle
cor
psd
uc
uise
urà
riz
etm
ette
z
ens
uite
le
pla
tea
uv
ape
urd
ans
le
bol
int
ern
e.F
erm
ezl
ec
ouv
erc
le
et
bra
nch
ezl
efi
lé
lec
triq
ue
dan
sla
pris
ed
ec
our
ant
mur
ale
.
4.A
ppu
yez
sur
le
bou
ton
«C
UISS
ON
»L
eté
moi
nlu
min
eux
cui
sso
nv
as'
allu
mer
.
5.L
orsq
ue
la
cui
sso
nà
la
vap
eur
est
ter
min
ée,
l'a
ppa
rei
lse
met
aut
om
atiq
uem
ent
en
mod
e«
Mai
ntie
na
uc
hau
d».
Nou
sre
com
man
don
sd
e
ne
pas
mai
nte
nir
les
alim
ent
se
nm
ode
«M
ain
tie
na
uc
hau
d»
pen
dan
tp
lus
de
5à
10
min
ute
sp
our
évi
ter
une
sur
cui
sso
n.
6.L
ec
uise
urà
riz
res
ter
ae
nm
ode
«M
ain
tie
na
uc
hau
d»
jus
qu'
àc
eq
u'il
soi
t
déb
ran
ché
.V
eille
zà
déb
ran
che
rle
fild
ela
pris
eé
lec
triq
ue
mur
ale
lor
squ
e
l'a
ppa
rei
ln
'es
tp
asu
tilis
é.
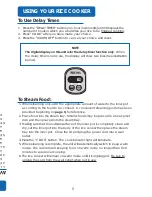
DELAY
TIMER
WARM
OFF
COOK


