19
3645A Programmable Power Supply
ARRAY ELECTRONIC CO.,LTD 2002.3
3645A-TYPE USER’S MANUAL
Add: Select “Add” in the function items and then input the contents of each item. After the
set of the input, it is just needed to select “Save” to save it.
Delete: Select the POWER record to be deleted in the table and then select “Delete”. Finally
select “Save” and it will be OK.
Modify: Select the POWER record to be modified in the table and then select “Modify” to
modify it. After the modification, select “Save” and it will be OK.
Query: Select “Query” and then wait for the name of the power supply to be queried.
Show: Select “Show” and it will show all the records.
Print: Select “Print” and it will print all the current records.
Fig. 4-3 System Prompt the restart
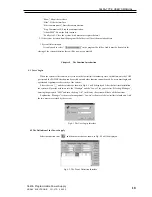
Login in the identity of “Manager” and then select the quick icon after the system restarts. The dialogue
frame as shown in Fig.4-4 will be displayed.
Fig. 4-4 COM Port and address set
In Fig. 4-4, select the page key “COM” and select the COM port from the pull-down table. If the COM port does not
exit, the system will prompt the diagram as shown in Fig. 4-5. And the “OK” button and the page key “ADDRESS”
are out of work. And vice versa. (And users must be in the identity of the “Manager” otherwise the “ADDRESS”
cannot be used.
Notes:
When selecting the “Add” function item to add POWER, the name and address of the POWER cannot
be repeated. After entering all the information, click “OK” and the dialogue frame as shown in Fig. 4-3 will be
displayed. In Fig.4-3, select “YES” and the system will close and restart.
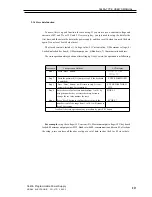
Parameter Explanation
Parametrer Explanation Range
Remarks
Power Name Name Of the Power Supply
Must be Input
Current Up The Max Current 0~3A
Must be Input
Power Up The Max Power 0~108W Must be Input
Voltage Configure The Max Voltage 1~36V
Must be Input
Configure
ID
The ID Number
No Consideration
4.3 The COM Port and Lower Machine (Power Supply) Address Set


