background image

Arriflex 535B Quick Guide, 7/97a, Page 9 

Threading the Film
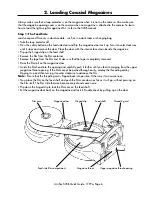
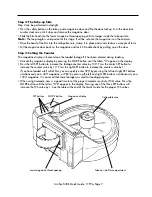
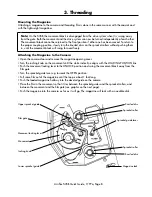
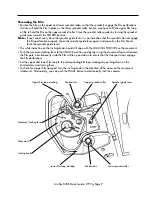
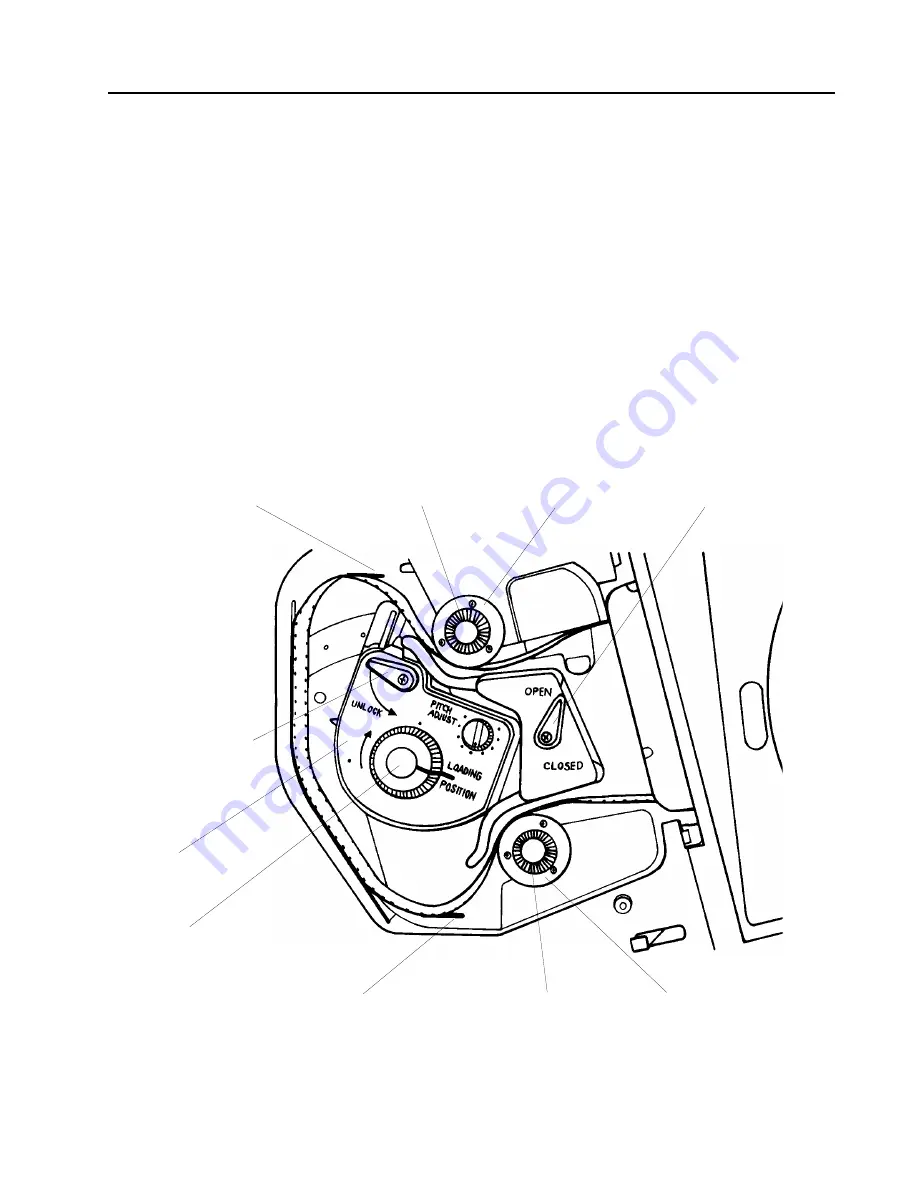
• Position the film on the upper and lower sprocket rollers so that the sprockets engage the film perforations.

Gravity will hold the film in place on the lower sprocket roller, but you may have to lift the upper film loop
a little to hold the film on the upper sprocket roller. Close the sprocket roller guides by turning the sprocket
guide lever towards the CLOSED position. 

Note:

If you cannot easily close the sprocket guide lever, it is an indication that the sprockets do not engage
the film perforation properly. Open the sprocket guide lever again and reposition the film. Never
force the sprocket guide lever!

• The white index line on the inching knob should still align with the LOADING POSITION on the movement. 
• Push the movement locking lever to the UNLOCK position and gently swing the movement forward towards

the film gate. Simultaneously slide the film a little up and down to ensure that the transport claws engage
the film perforations. 

• Set the upper and lower film loop to the corresponding film loop markings by pushing down on the

knurled discs and turning them. 

• To check for proper film transport, turn the inching knob in the direction of the arrow on the movement

(clockwise). Alternatively, you can push the PHASE button to electronically inch the camera. 

Upper sprocket roller

Lower sprocket roller

Sprocket guide lever

Upper film loop marking

Lower film loop marking

Knurled disc

Knurled disc

Movement locking lever

Inching knob

Movement

Summary of Contents for 535B

Page 1: ...Support Information 2 Camera Left Front 3 Camera Right Back 4 1 Quick Specs 5 2 Loading Coaxial Magazines 6 3 Threading 8 4 Power On Camera RUN Inching 10 5 Changing Fps 11 6 Changing Shutter Angle 12...

Page 2: ...performance it is essential that you acquaint yourself with this Quick Guide and that you follow the operating instructions described herein We strongly recommend that you also acquaint yourself with...

Page 3: ...MODE button SEL button SET button Bubble level Image rotation knob Image rotation release Friction adjustment Viewfinder Viewfinder extension lock PL mount Mirror shutter LCD display Locking slider R...

Page 4: ...er Two 3 8 16 mounting holes underneath camera RS receptacles remote RUN 24 V dc BAT receptacle power input RU receptacle remote unit DU receptacle display unit ESU MCL receptacle external synchroniza...

Page 5: ...claws and two registration pins Flange focal distance 51 98 51 97 mm Temperature range 4 Fahrenheit to 122 Fahrenheit 20 Celsius to 50 Celsius Viewfinder Indicators END blinking Film end coming up in...

Page 6: ...ve the tape from the film end Make sure that the tape is completely removed Place the film roll on the magazine door Guide the film head into the opening and carefully push it further until you feel i...

Page 7: ...ate the magazine display by pressing the MODE button until the letters ft appear in the display Press the left SET button to increase the footage counter value by 100 Press the center SET button to in...

Page 8: ...nching knob on the movement until the white index line aligns with the LOADING POSITION line Push the movement locking lever to the UNLOCK position and swing the movement block away from the film gate...

Page 9: ...ket guide lever The white index line on the inching knob should still align with the LOADING POSITION on the movement Push the movement locking lever to the UNLOCK position and gently swing the moveme...

Page 10: ...cator light glows red when the camera is in Standby the camera is not ready and pushing the RUN button will have no effect Inching The ARRIFLEX 535B can be inched manually with the inching knob or ele...

Page 11: ...eed to be changed The display will show full frame speed plus three digits past the decimal point The 1 1000 th of a fps is displayed in the upper right hand corner of the display Note Set the NORM PS...

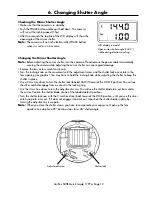
Page 12: ...opening see graphic You may have to hold the inching knob while adjusting the shutter to keep the shutter in place Use a 2 mm hex driver to turn the shutter lock labeled CATCH towards the LOOSE posit...

Page 13: ...tive 6 8531 Color Negative 7 8550 Color Negative 4 8551 Color Negative 6 8560 Color Negative 6 8561 Color Negative 5 8570 Color Negative 6 8571 Color Negative 5 35 mm Kodak Film Stocks Emulsion Type T...

Reviews: