93
Accessories
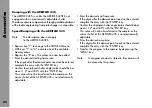
Activating and Running Programs
Note:
If the “PROG”-button on the camera is not
accessible, the “F4”-key in the REMOTE menu on
the CCU-1 can be used as a “PROG”-button.
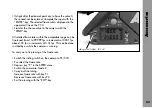
• Set the NORM/PS switch on the camera to “PS/CCU”.
• Activate the program mode with the “PROG”-button on
the left side of the camera (the indication “Pr” appears in
the camera display).
• Start the camera. The camera runs at the starting frame
rate and the corresponding shutter angle.
• Depress the “PROG”-button.
The camera changes its frame rate (and the shutter angle
– only 435ES) in the programmed time to the end frame
rate (and end shutter angle – only 435ES).
• By again depressing the “PROG”-button the frame rate
(and shutter angle – only 435ES) will return to their
starting values simultaneously.
Note:
To prevent an unintentional alteration the
function of “PROG” button can be locked using
the sliding switch “LOCK”. However this locking
does not affect connected accessories such as
the CCU-1.
Note:
The program itself is stored in the camera and
therefore can also be activated if the CCU is not
plugged in. As soon as a program is activated,
accessories connected to the “ACC” socket will no
longer control the camera. At the same time, it is
no longer possible to send a new program from
the CCU to the camera. Furthermore, the RCU-1
can only be used in the “CAM” Mode.
Displaying Programs
which are Stored in the Camera
• Depress the “PROG”-button to activate the stored program.
• Depress the “MODE”-button six times (or four times if no
functional expansion module is attached) to change to
Mode 7.
• The display shows an angle symbol and the starting shutter
angle in the upper line. In the lower line the starting frame
rate is shown.
• Depress the “SEL”-button.
• The display shows an angle symbol and the end shutter
angle in the upper line. In the lower line the end frame
rate is shown.
• Depress the “SEL”-button.
• In the upper line “SEC” is shown, in the lower line the
ramp time.
Note:
After 3 seconds the display switches back ito
the start display of mode 7.
Summary of Contents for ARRIFLEX 435 ES
Page 10: ...Introduction 10 magazine opening cover movement in locked position loop protector...
Page 16: ...Installation 16 shoulder set S 4 shoulder cushion base plate...
Page 24: ...Power Supply 24...
Page 48: ...Camera Body 48...
Page 56: ...Optics 56...
Page 74: ...Video Assist Saystem 74...
Page 98: ...Accessories 98...
Page 122: ...Maintenance 122...

