background image

6

BACK TO

INDEX

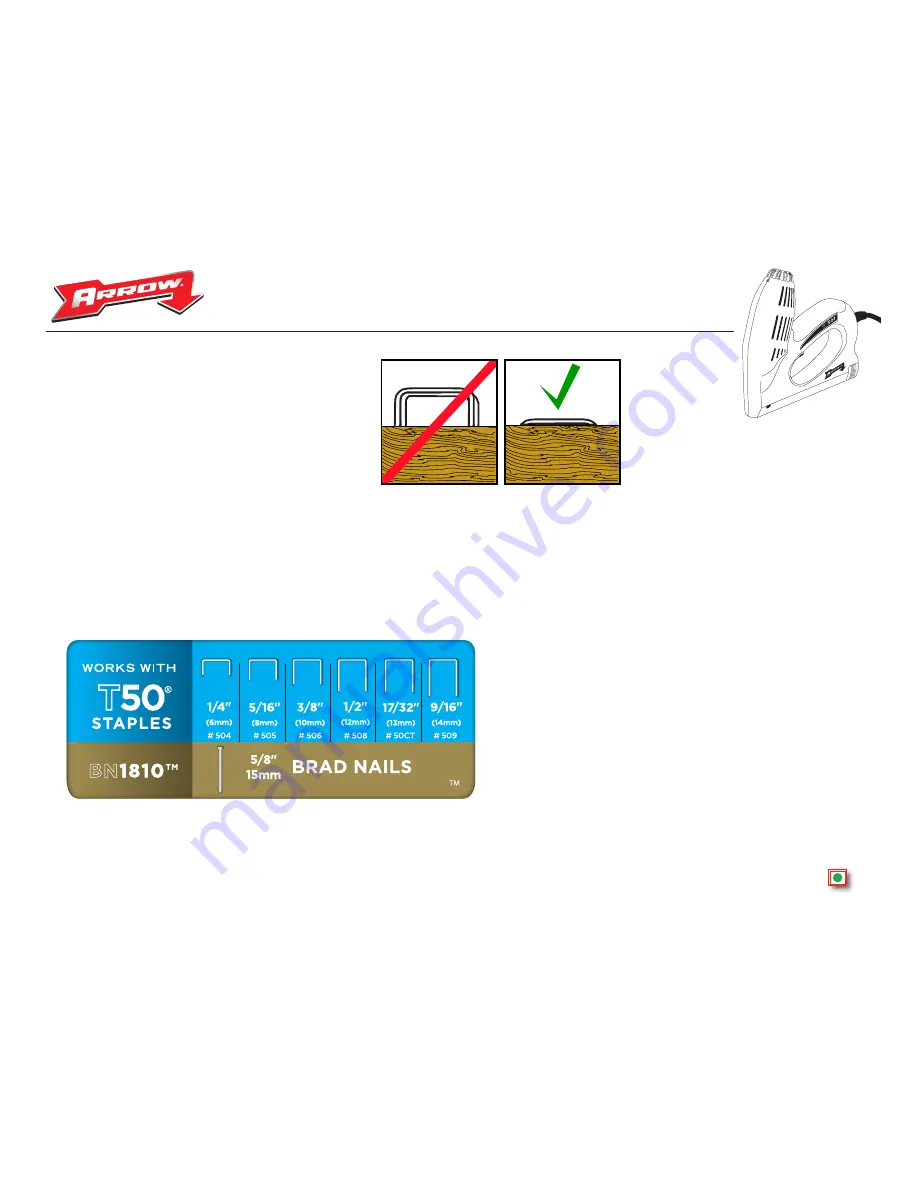
HOW TO DETERMINE PROPER STAPLE LEG SIZE

In choosing the proper staple leg length for a job there are two basic things
to consider:
1. Thickness of material to be stapled.
2. Hardness of the wood.

As a general rule, in hardwood, approximately 3/16" to 1/4" penetration
into the wood is sufficient...and for softwood – up to approximately 3/8"
should be sufficient. However, if the staple used “stands away” from the
work – this means that too long a leg length has been used. In that case
we recommend the next shorter leg length for desired results.

NAIL PENETRATION

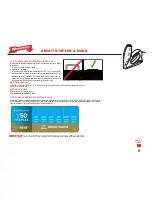
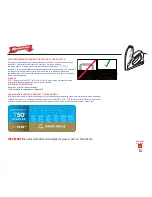
The ET501™ shoots a BN1810™ 5/8" (15mm) nail. For best penetration, hold the gun flat against the surface.
Do not tilt or raise the gun.

EXTENSION CORDS

Replace or repair damaged cords.

• For extension cord use #14 wire.

A WORD ABOUT ARROW

®

STAPLES AND NAILS

Only Arrow

®

knows the proper staple and nail tolerances required for best performance of the ET501™ Electric  Nail Gun. Only

Genuine Arrow

®

T50® Staples and BN1810™ Nails are made to these exact tolerances to insure top fastening performance. Accept no

substitutes. Always insist on Genuine Arrow

®

Staples and Nails.

IMPORTANT

Gun must NOT be loaded with staples and nails at the same time.

ABOUT STAPLES & NAILS

Summary of Contents for ET501

Page 1: ...UTILIZADOZ P 10 DESCRIPCIÓN FUNCIONAL P 10 ENSAMBLAJE Y OPERACIÓN P 11 SOBRE GRAPAS Y CLAVOS P 12 MANTENIMIENTO Y ACCESORIOS P 13 CONSIGNES GÉNÉRALES DE SÉCURITÉ P 14 CONSIGNES PARTICULIÈRES DE SÉCURITÉ P 15 DEFINITION DES SYMBOLES UTILISES SUR L OUTIL P 16 DESCRIPTION FONCTIONNELLE P 16 MONTAGE ET FONCTIONNEMENT P 17 AU SUJET DE AGRAFES ET CLOUS P 18 ENTRETIEN ET ACCESSOIRESS P 19 Click Button to...

Page 2: ...hair clothing and gloves away from moving parts Loose clothes jewelry or long hair can be caught in moving parts Avoid accidental starting Be sure switch is off before plugging in Carrying tools with your finger on the switch or plugging in tools that have the switch on invites accidents Remove adjusting keys or switches before turning tool on A wrench or key that is left attached to a rotating pa...

Page 3: ... this rule will reduce the risk of eye injury 4 Protect your lungs Wear a face or dust mask if the operation is dusty Following this rule will reduce the risk of serious personal injury 5 Protect your hearing Wear hearing protection during extended periods of operation Following this rule will reduce the risk of serious personal injury 6 Do not abuse cord Never carry tool by cord Never yank cord t...

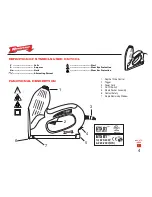
Page 4: ...on Wear Ear Protection DEFINITION OF SYMBOLS USED ON TOOL FUNCTIONAL DESCRIPTION 6 3 5 2 4 ET501 for 120V ET501 for 220 240V 220 240V UK LISTED E322184 Depth of Drive Control Trigger Power Cord On Off Switch Staple Pusher Assembly Contact Safety Staple Remaining Window 1 2 3 4 5 6 7 1 7 ...

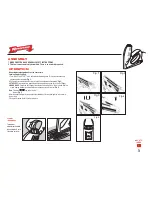
Page 5: ... and nail magazine Fig 2 3 STAPLES Place staples into magazine with the points facing up and out of the tool Fig 3 4 BRAD NAILS Place brad nails against the side wall of the magazine this is the side with the staple viewing window with brad nail points facing up and out of the tool Fig 4 Note Follow the symbols at back of the tool Fig 5 Never Attempt to completely remove pusher assembly as this ma...
Page 6: ... shorter leg length for desired results NAIL PENETRATION The ET501 shoots a BN1810 5 8 15mm nail For best penetration hold the gun flat against the surface Do not tilt or raise the gun EXTENSION CORDS Replace or repair damaged cords For extension cord use 14 wire A WORD ABOUT ARROW STAPLES AND NAILS Only Arrow knows the proper staple and nail tolerances required for best performance of the ET501 E...

Page 7: ...ool clean and free of dust Wipe clean with a dry cloth do not use harsh chemicals to clean your ET501 Your ET501 contains no user serviceable parts In the unlikely event that your ET501 should need service contact Arrow accessories and genuine Arrow T50 Staples and Brad nails are available at retail outlets hardware stores lumberyards and wherever fine tools are sold ...

Page 8: ... y el cabello largo pueden ser atrapados por las partes móviles Evite el arranque imprevisto Asegúrese de que el interruptor esté en posición apagada antes de enchufar la herramienta El transporte de la herramienta con el dedo sobre el gatillo y su conexión a la red con el interruptor encendido puede originar accidentes Retire cualquier llave o pieza de ajuste antes de encender la herramienta Una ...

Page 9: ... reducir el peligro de lesiones oculares 4 Proteja sus pulmones Utilice una máscara contra el polvo si durante la operación se libera polvo Siga esta indicación para reducir el peligro de lesiones personales serias 5 Proteja sus oídos Utilice protección auditiva cuando trabaje durante periodos prolongados Siga esta indicación para reducir el peligro de lesiones personales serias 6 No abuse del cab...

Page 10: ...DEFINICIÓN DE LOS SÍMBOLOS UTILIZADOZ DESCRIPCIÓN FUNCIONAL 6 3 5 2 4 ET501 Para 120V ET501 Para 220 240V y 220 240V UK LISTED E322184 Ajuste De La Profundidad De Grapado Gatillo Cable de corriente Interruptor de encendido apagado Armado de la pistola de grapas Seguro de contacto Ventanilla de control de grapas restantes 1 2 3 4 5 6 7 1 7 ...

Page 11: ...Introducir las grapas en el cargador de forma que las puntas muestren hacia arriba y hacia el exterior de la herramienta Fig 3 4 CLAVOS Colocar los clavos contra el lateral del cargador el lado con la ventanilla de control de grapas de forma que las puntas muestren hacia arriba y hacia el exterior de la herramienta Fig 4 Nota Guíese por los símbolos en la parte trasera de la herramienta Fig 5 Nunc...

Page 12: ...ara tener el resultado deseado CLAVADO ET501 dispara clavos BN1810 de 5 8 15mm Para un mejor clavado sosténgase la pistola recta contra la superficie trabajada No elavar ni separar la pistola CORDONES DE EXTENSION Reemplaze o arregle los cordones dañados Para un cordón de extensión use alambre 12 UNA PALABRA SOBRE LAS GRAPAS Y CLAVAS ARROW Solamente Arrow conoce las tolerancias de grapas y clavas ...

Page 13: ...resivos para limpiar su ET501 sólo use un paño seco Su ET501 contiene accesorios que no deben ser reparados por el usuario En el caso improbable de que su ET501 necesite alguna reparación comuníquese con Los accesorios Arrow las grapas Arrow genuinas T50 y los clavos cabeza de diamante BN1810 5 8 se encuentran disponibles en tiendas de venta al menudeo ferreterías depósitos de madera y en cualquie...

Page 14: ...té des pièces en mouvement Des vêtements amples des bijoux ou des cheveux longs peuvent être happés dans des pièces en mouvement Éviter les mises en marche accidentelles S assurer que l interrupteur est en position d arrêt avant de brancher l outil Transporter un outil en gardant le doigt sur l interrupteur ou brancher un outil dont l interrupteur est en position de marche risque de causer des acc...

Page 15: ...oculaires 4 Protéger ses poumons Si le travail à effectuer crée de la poussière porter un masque antipoussières qui réduit les risques de blessures graves 5 Protéger ses oreilles Porter des protecteurs d oreille pendant les longues périodes de fonctionnement d un outil Porter des protecteurs d oreille minimise les risques de blessures graves 6 Ne pas maltraiter le cordon Ne portez jamais l outil p...

Page 16: ...bruit DEFINITION DES SYMBOLES UTILISES SUR L OUTIL DESCRIPTION FONCTIONNELLE 6 3 5 2 4 ET501 Pour 120V ET501 Para 220 240V et 220 240V UK LISTED E322184 Dispositif De Contrôle De Profondeur Gâchette Cordon électrique Interrupteur marche arrêt Ensemble poussoir d agrafes Sécurité de contact Fenêtre du magasin d agrafes 1 2 3 4 5 6 7 1 7 ...

Page 17: ...agasin vers l avant jusqu à la butée d arrêt Fig 2 3 AGRAFES Insérer la bande d agrafes dans le magasin la pointe vers le haut Fig 3 4 POINTES Insérer la bande de pointes contre le flanc du magasin côté de la fenêtre de niveau de chargement la pointe vers le haut Fig 4 Remarque Suivre les symboles au dos de l outil Fig 5 Ne jamais essayer de sortir complètement le magasin en forçant au delà de la ...

Page 18: ...0 de 15mm Pour une pénétration optimale maintenez l appareil bien à plat contre la surface Ne pas lever ou soulever l appareil CORDONS DE RALLONGE Remplacer ou reparer les cordons abimes Pour un cordon de rallonge utiliser le fil 12 UN MOT AU SUJET DES AGRAFES ET CLOUS ARROW Nous sommes les seuls à connaître les tolérances exactes pour les agrafes et clous nécessaires pour obtenir les meilleurs ré...

Page 19: ...oyez pas de produits chimiques abrasifs pour nettoyer votre cloueuse ET501 Votre cloueuse ET501 ne contient aucune pièce réparable par l utilisateur Dans le cas rare où votre cloueuse ET501 nécessiterait une réparation veuillez contacter Les accessoires Arrow et les véritables agrafes T50 et clous de finition 5 8 BN1810 Arrow sont disponibles dans les points de vente les quincailleries les sites d...

Reviews: