background image

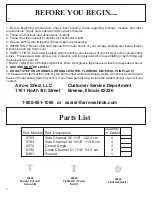
1. Before beginning construction, check local building codes regarding footings, location and other
requirements.  Study and understand this owner's manual.
2. Follow all directions and dimensions carefully.
3. Follow the step sequence carefully for successful results.
4. Be sure all the parts fit together properly before proceeding.
5. IMPORTANT: Remove Owner's Manual from main carton of your storage building and locate Interior
Dimensions on the front cover.
6. SAFETY FIRST: Care must be taken when handling various pieces of your kit since some contain sharp
edges.  Please wear work gloves, eye protection and long sleeves when assembling or performing any
maintenance on your kit.
7. BASIC TOOLS: No. 2 Phillips screwdriver, pliers, work gloves, tape measure, level and a spade or shovel.
8. 

GROUND MUST BE LEVEL!

9.

 DO NOT STEP ON CHANNELS OR ANGLES UNTIL FLOORING MATERIAL IS IN PLACE!

10. Separate contents of the carton by the part number while reviewing parts list.  Check to be sure that you
have all the necessary parts for your kit.  If you find a part missing, include the model number of your kit and
contact:

Arrow Shed, LLC

      Customer Service Department

1101 North 4th Street      Breese, Illinois 62230

BEFORE YOU BEGIN....

      QP02

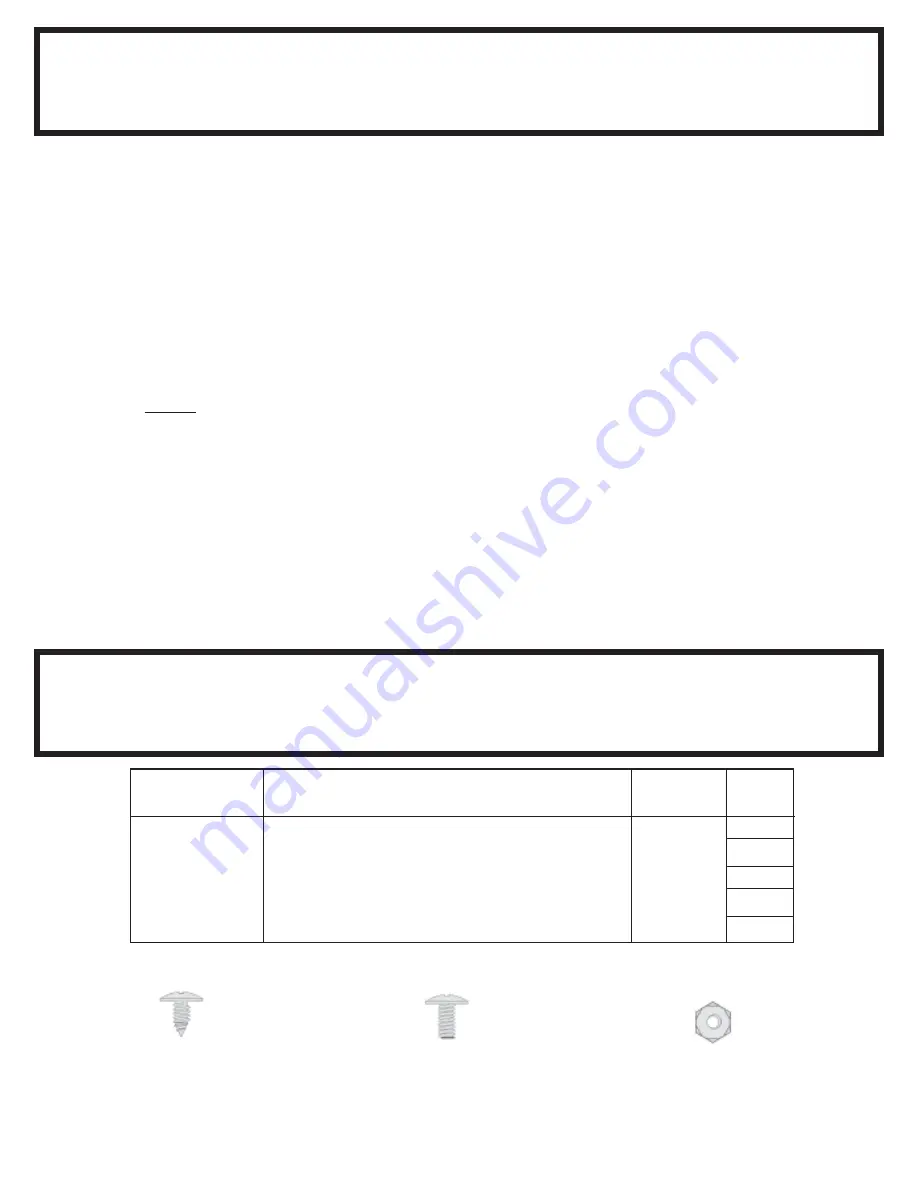
Parts List

Quantity

Part Number Part Description

in Carton

9783

Side Channel 56 1/16"  142,4 cm

2

9784

Side Channel 44 13/16"  113,8 cm

4

0572

Corner Angle

3

9782

Cross Channel 21 7/16"  54,5 cm

3

6481

Gusset

1

2

1-800-851-1085   or   assist@arrowsheds.com

65004

#8Ax5/16" (8 mm)

Screw (38)

65923

#8-32x3/8" (10 mm)

Bolt (7)

65103

#8-32 Hex Nut (7)

Summary of Contents for FDN54

Page 1: ...ELF SUPPORTING SEE IMPORTANT INSTRUCTIONS ON BACK COVER CAUTION SOME PARTS HAVE SHARP EDGES CARE MUST BE TAKEN WHEN HANDLING THE VARIOUS PIECES TO AVOID A MISHAP FOR SAFETY SAKE PLEASE READ SAFETY INFORMATION PROVIDED IN THIS MANUAL BEFORE BEGINNING CONSTRUCTION WEAR GLOVES WHEN HANDLING METAL PARTS ...

Page 2: ...ance on your kit 7 BASICTOOLS No 2Phillipsscrewdriver pliers workgloves tapemeasure levelandaspadeorshovel 8 GROUND MUST BE LEVEL 9 DO NOT STEP ON CHANNELS OR ANGLES UNTIL FLOORING MATERIAL IS IN PLACE 10 Separate contents of the carton by the part number while reviewing parts list Check to be sure that you have all the necessary parts for your kit If you find a part missing include the model numb...

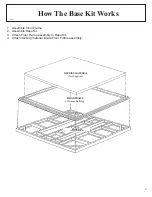
Page 3: ...t Works QO03 DECKINGMATERIAL NotSupplied BASEKIT Assemble Floor Frame Assemble Base Kit Attach Floor Frame assembly to Base Kit Attach decking material inside Floor Frame assembly FLOORFRAME of Storage Building 10x9 Illustrated ...

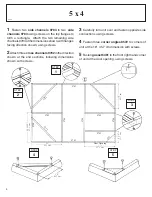
Page 4: ...ons following dimensions shown with screws 5 3 Carefully turn unit over and fasten opposite side connections using screws 4 Fasten three corner angles 0572 to corners of unit at the 18 45 7 cm dimension with screws 5 Fasten gusset 6481 to the front right hand corner of unit at the door opening using screws STEP 1 STEP 3 STEP 4 STEP 2 6 4 8 1 0 5 7 2 18 45 7 cm STEP 0572 9784 9783 21 53 3 cm 9784 9...

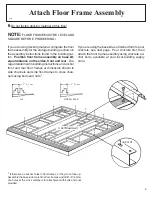
Page 5: ...ructions and anchor front and rear floor frames at dimension shown to side channels and side floor frames to cross chan nels using bolts and nuts If you are using the base kit as a finished form to pour concrete see next page Pour concrete first then attach the floor frame assembly using concrete an chor bolts available at your local building supply store SIDES REAR USE SLOT 2 5 1 cm 2 5 1 cm 5x4 ...

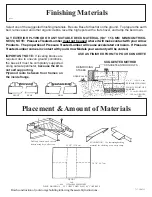
Page 6: ...round To prepare the earth bed remove sod and other organic debris level the high spots with a flat shovel and tamp the bed down LAY EXTERIOR PLYWOOD OR ANY SUITABLE DECK MATERIAL 5 8 15 5 MM MINIMUM THICK NESS NOTE Pressure Treated Lumber must not be used where it will make contact with your Arrow Products The properties of Pressure Treated Lumber will cause accelerated corrosion If Pressure Trea...

Reviews: