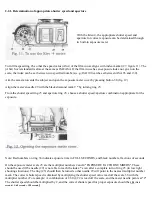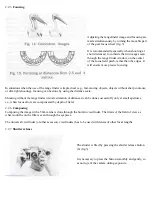
Then, remove the back cover to take out the cartridge and take-up spool, and detach the film from the take-up spool if
film leader is still attached to the film take-up spool. Replace the take-up spool back into the camera. Before closing
the camera, it is recommended to examine its interiors, and check for dust, bits of film and dirt, and remove these with
a blower brush.
4. FLASH PHOTOGRAPHY
The camera has a mechanism to synchronies its shutter with flash. Before using flash with the camera, it is
recommended to study carefully these instructions.
For mounting flash directly on the camera, there is an accessory shoe
10
and a PC plug outlet 14 (fig. 3). Only flash
with cord connection can be used (for flash with shoe contacts, a special adapter for ""hot shoe"" to PC cord
connector is available).
Flash exposures should only be done at shutter speeds from 1/25 to 1/2 second. The contacts of the synchronization
circuit are closed with a- fired shutter (connected), and when the shutter is cocked, the circuit is open "off" It is
important to turn the flash on (if connected to the camera) only AFTER cocking the camera, or the flash will fire
spontaneously. Cock the shutter immediately or turn off the flash after shooting.
4.butkus.org
Note: Connect the flash only with the flash switched-off, or a cocked shutter.
5. INTERCHANGEABLE LENSES
The camera is designed to take in other lenses with [Kiev] bayonet mounts ( lens specifications are given in the table).
The standard lens supplied with the camera is "Jupiter-8", F=50mm, 1:2, but may be replaced with "Jupiter-3",
F=50mm 1:1.5, or "Helios-103", F=50mm, 1:1.8. These standard lenses are mounted on the internal ring of the
focusing mechanism. All the other lenses mount on the external bayonet, with their respective depth of field scales
engraved on their fixed barrels.
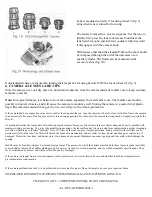
When replacing the standard lens with lenses of other focal lengths, the standard lens must first be removed with the
focusing mount set at "infinity", and press the spring fastener (fig. 19). Turn the lens clockwise until the red ledge
below it aligns with the red dots on the focus mount and camera body to loosen, and pull out.
Note: Mounting the standard lens back requires the reverse sequence.
Each lens, except the "Jupiter-3 and and has its own focusing mechanism, distance, and depth of field scales. All
lenses focus through the aid of the camera's rangefinder.
Before mounting a lens, remove its rear cap. Both the camera's focusing mount and the lens have to be set at infinity.
Put the lens on the bayonet so that the red dot on the lens barrel and the red dot on the camera body coincide. Push in
lens and turn counter clockwise until the latch engages and the locks the lens.


