Hardware Preparation and Installation
MVME8100 / MVME8110 Installation and Use (6806800P25J)
53
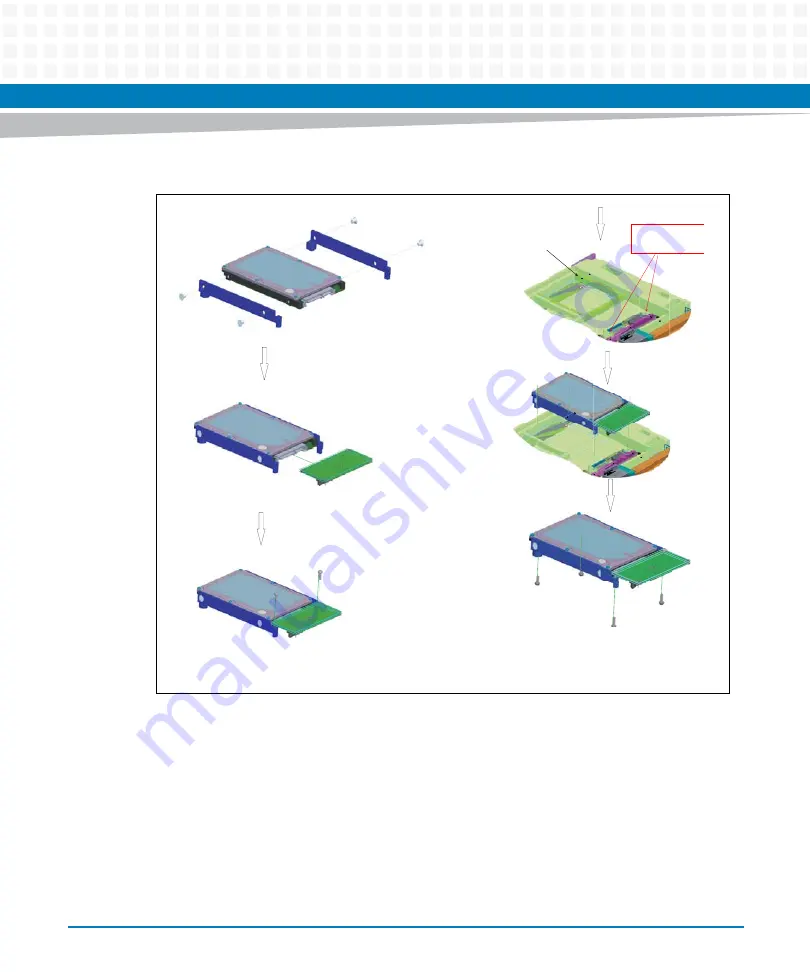
Use the following steps to install a SATA drive:
1. Wear an ESD strap to your wrist and fix the other end of the ESD strap to an electrical
ground.
2. Secure mounting brackets to each side of SATA drive as shown in step 1 of
3. Attach SATA adapter board to SATA drive as shown in step 2 of
4. Use two screws to secure adapter to mounting brackets as shown in step 3 of
Figure 2-4
SATA drive Installation
STEP 1
STEP 2
STEP 3
STEP 6
ASSEMBLE FOUR MTG SCREWS
FROM SIDE 2 OF THE BOARD
STEP 5
REMOVE PMC BRACKET
STEP 4
REMOVE PMC
Mounting Posts
Summary of Contents for MVME8100
Page 1: ...MVME8100 MVME8110 Installation and Use P N 6806800P25J August 2015 ...
Page 8: ...MVME8100 MVME8110 Installation and Use 6806800P25J 8 List of Tables ...
Page 10: ...MVME8100 MVME8110 Installation and Use 6806800P25J 10 List of Figures ...
Page 26: ...MVME8100 MVME8110 Installation and Use 6806800P25J Sicherheitshinweise 26 ...
Page 58: ...Hardware Preparation and Installation MVME8100 MVME8110 Installation and Use 6806800P25J 58 ...
Page 84: ...Connectors LEDs and Switches MVME8100 MVME8110 Installation and Use 6806800P25J 84 ...
Page 108: ...Functional Description MVME8100 MVME8110 Installation and Use 6806800P25J 108 ...
Page 122: ...Related Documentation MVME8100 MVME8110 Installation and Use 6806800P25J 122 ...
Page 123: ......


