


Hardware Preparation and Installation
RTM-ATCA-7350 Installation and Use (6806800H30G)
29
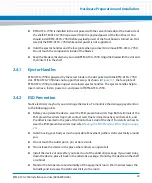
Note the following points at the time of installing or replacing components:
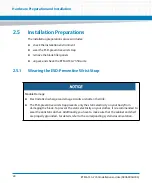
Make sure that you wear an electrostatic discharge (ESD)-preventive wrist strap to prevent
the static electricity from hurting you or damaging the device.
Keep the area where the components reside clean and keep the components away from
the heat-generating devices, such as radiators.
Ensure that your sleeves are tightened or rolled up above the elbow. For safety purpose, it
is not recommended to wear jewelry, watch, glasses with metal frame, or clothes with
metal buttons.
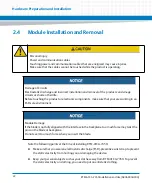
Do not exert too much force, or insert or remove the components forcibly. Avoid damage
to the components or plug-ins, for example, the pins are bent or get short circuit.
2.6.2
Preparations
Before you install or replace a component, make the following preparations
Confirming the feasibility of the operation
–
There are available spare parts of the component to be installed or replaced in the
equipment warehouse. When the available spare parts are in short supply, contact
Artesyn technical support for help in time.
–
Make sure that the new component is in good condition, without defects such as
oxidation, chemical corrosion, missing component, or transportation damage.
–
By reading this document, you are familiar with how to install and replace the
component and master the skills required by the operation.
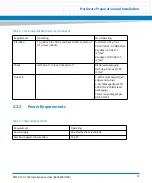
Checking the environment
Make sure that the shelf, power supply, temperature, and humidity meet the operating
requirements of the blades and components. For details, refer to
ATCA-7350 Installation
and Use Manual
and other related documents.
Preparing spare parts and tools
–
Prepare the component to be installed or replaced.
When you hold or transport the component, use the special antistatic package. In
addition, you need to tidy, record, and repair the component during routine
maintenance.
Summary of Contents for RTM-ATCA-7350
Page 1: ...RTM ATCA 7350 Installation and Use P N 6806800H30G September 2014 ...
Page 6: ...RTM ATCA 7350 Installation and Use 6806800H30G 6 List of Tables ...
Page 8: ...RTM ATCA 7350 Installation and Use 6806800H30G 8 List of Figures ...
Page 14: ...RTM ATCA 7350 Installation and Use 6806800H30G About this Manual 14 About this Manual ...
Page 18: ...Introduction RTM ATCA 7350 Installation and Use 6806800H30G 18 ...
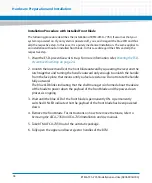
Page 46: ...Hardware Preparation and Installation RTM ATCA 7350 Installation and Use 6806800H30G 46 ...
Page 60: ...Controls LEDs and Connectors RTM ATCA 7350 Installation and Use 6806800H30G 60 ...
Page 66: ...Functional Description RTM ATCA 7350 Installation and Use 6806800H30G 66 ...
Page 69: ......


