background image

Controls, Indicators, and Connectors

SharpStreamer™ Mini PCIE-7205 Installation and Use (6806800U01A)

59

4.3

Controls

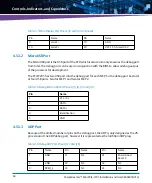
A Reset button SW2 is available at the rear side of the PCIE-7205 card. By pressing the Reset 
button (labeled as SW2), all the MCP processors on the card get reset. The following figure 
shows the Reset button location on the card.

Figure 4-2

Reset Button Location

Reset 

#VUUPO


U43 Temperature 

S E C O N DA R Y  S I DE

Summary of Contents for SharpStreamer Mini PCIE-7205

Page 1: ...P R E L I M I N A R Y V E R S I O N SharpStreamer Mini PCIE 7205 Installation and Use P N 6806800U01A April 2016 ...

Page 2: ...o an Artesyn website The text itself may not be published commercially in print or electronic form edited translated or otherwise altered without the permission of Artesyn It is possible that this publication may contain reference to or information about Artesyn products machines and programs programming or services that are not available in your country Such references or information must not be ...

Page 3: ...ering and Support Information 27 2 Hardware Preparation and Installation 29 2 1 Unpacking and Inspecting PCIE 7205 Card 29 2 2 Environmental Thermal and Power Requirements 30 2 2 1 Environmental and Thermal Requirements 30 2 2 2 Power Requirements 32 2 3 Precautions 32 2 3 1 ESD Prevention 34 2 4 PCIE 7205 Card Installation and Removal 35 2 4 1 PCIE 7205 Card Installation 36 2 4 2 PCIE 7205 Card R...

Page 4: ... MicroSD as Firmware Recovery Option 47 3 4 7 2 MicroSD as Non Volatile Storage 48 3 4 7 3 MicroSD as Boot Device 48 3 4 8 Temperature Sensors 48 3 4 9 Voltage and Current Monitor 50 3 4 10 Debug Board 50 3 5 Power 51 3 6 JTAG 51 4 Controls Indicators and Connectors 53 4 1 Connectors 53 4 1 1 Edge Connector 53 4 2 LEDs 55 4 3 Controls 59 4 4 P8 CPLD Programmer Pinout 60 4 5 Ports 61 4 5 1 SFP Port...

Page 5: ...al IO Configuration 80 5 3 3 Security Menu 81 5 3 4 Power Menu 82 5 3 4 1 Advanced CPU Control 83 5 3 5 Boot Menu 85 5 3 6 Exit Menu 87 5 4 Updating the BIOS 88 6 Software Installation 89 6 1 Prerequisites 89 6 1 1 Preparing Host System 89 6 1 1 1 Firewall Configuration 90 6 1 1 2 SELinux Configuration 90 6 1 1 3 TFTP Configuration 90 6 1 1 4 pci7207 Utility Installation 91 6 1 1 5 DHCP Configurat...

Page 6: ...rm 96 6 4 Software Upgrade 97 6 5 Software Removal 97 7 Utilities and Applications 99 7 1 pci7207 Host OS Utility 99 7 1 1 pci7205 Usage 100 7 2 PCIE 7205 OS 104 7 2 1 Sensor Information 104 7 2 2 BIOS Update 104 7 2 3 AMT Provisioning 105 A Related Documentation 107 A 1 Artesyn Embedded Technologies Embedded Computing Documentation 107 ...

Page 7: ... 4 8 Debug Micro USB Port Pinout J5 J6 J13 and J14 64 Table 4 9 Debug XDP Port Pinout J17 and J18 64 Table 4 10 Serial Port P5 P6 65 Table 4 11 Debug Port SPI Flash Programming Port Pinout 66 Table 5 1 Serial Port Configuration Parameters 67 Table 5 2 BIOS Setup Menu Bar 70 Table 5 3 Legend Keys 71 Table 5 4 Main Menu 74 Table 5 5 Advanced Menu 75 Table 5 6 Boot Configuration 76 Table 5 7 Console ...

Page 8: ...SharpStreamer Mini PCIE 7205 Installation and Use 6806800U01A 8 List of Tables ...

Page 9: ...e 49 Figure 3 6 Location of Temperature Sensors Secondary Side 50 Figure 4 1 LED Arrangement View 56 Figure 4 2 Reset Button Location 59 Figure 5 1 BIOS Setup Screen 68 Figure 5 2 General Help Menu 72 Figure 5 3 Main Menu 73 Figure 5 4 Advanced Menu 74 Figure 5 5 Boot Configuration 75 Figure 5 6 Console Redirection Setup 77 Figure 5 7 Serial IO Configuration 80 Figure 5 8 Security Menu 81 Figure 5...

Page 10: ...SharpStreamer Mini PCIE 7205 Installation and Use 6806800U01A 10 List of Figures ...

Page 11: ... requirements and installation and removal instructions Functional Description on page 39 provides information about the functional blocks in the SharpStreamer Mini PCIE 7205 card block diagram Controls Indicators and Connectors on page 53 provides information about the controls indicators connectors and pin assignments associated with the PCIE 7205 card BIOS on page 67 provides the BIOS setup con...

Page 12: ...Replaceable Unit GPIO General Purpose Input Output ISP Internet Service Provider JTAG Joint Test Action Group MAC Media Access Control MCP Multi Chip Package MSO Multiple System Operator OTT Over the Top PCH Peripheral Control Hub PCI Peripheral Component Interconnect SMBus System Management Bus SOL Serial Over LAN SPD Serial Presence Detect TCK Test Clock TDI Test Data Input TDO Test Data Output ...

Page 13: ...ron screenoutputandcoderelatedelements or commands in body text Courier Bold Used to characterize user input and to separate it from system output Reference Used for references and for table and figure descriptions File Exit Notation for selecting a submenu text Notation for variables and keys text Notation for software buttons to click on the screen and parameter description Repeated item for exa...

Page 14: ...Indicates a hazardous situation which if not avoided could result in death or serious injury Indicates a hazardous situation which if not avoided may result in minor or moderate injury Indicates a property damage message No danger encountered Pay attention to important information Notation Description Part Number Publication Date Description 6806800U01A April 2016 Initial release ...

Page 15: ...rained by Artesyn or persons qualified in electronics or electrical engineering are authorized to install remove or maintain the product The information given in this manual is meant to complete the knowledge of a specialist and must not be used as replacement for qualified personnel Keep away from live circuits inside the equipment Operating personnel must not remove equipment covers Only factory...

Page 16: ...equency emissions compliance is maintained Operation Product Damage Surface of the Product High humidity and condensation on the product surface causes short circuits Do not operate the product outside the specified environmental limits Make sure the product is completely dry and there is no moisture on any surface before applying power Overheating and Product Damage Operating the product without ...

Page 17: ...g the product or electronic components make sure that your are working in an ESD safe environment Product Damage Incorrect installation of the product can cause damage of the product Only use appropriate tools when installing removing the product to avoid damage deformation to the card and or PCB Environment Always dispose equipment that is finally taken out of operation according to your country ...

Page 18: ...SharpStreamer Mini PCIE 7205 Installation and Use 6806800U01A Safety Notes 18 ...

Page 19: ...ionen benötigen sollten wenden Sie sich bitte an die für Sie zuständige Geschäftsstelle von Artesyn Das System erfüllt die für die Industrie geforderten Sicherheitsvorschriften und darf ausschließlich für Anwendungen in der Telekommunikationsindustrie und im Zusammenhang mit Industriesteuerungen verwendet werden Einbau Wartung und Betrieb dürfen nur von durch Artesyn ausgebildetem oder im Bereich ...

Page 20: ...geführt werden können dazu führen dass der Anwender die Genehmigung zum Betrieb des Produktes verliert Boardprodukte werden in einem repräsentativen System getestet um zu zeigen dass das Board den oben aufgeführten EMV Richtlinien entspricht Eine ordnungsgemässe Installation in einem System welches die EMV Richtlinien erfüllt stellt sicher dass das Produkt gemäss den EMV Richtlinien betrieben wird...

Page 21: ...e FunktionsfähigkeitmußdurcheinenqualifiziertenReparaturdienstwiederhergestelltwerden Installation Beschädigung von Schaltkreisen Elektrostatische Entladung und unsachgemäßer Ein und Ausbau des Produktes kannSchaltkreise beschädigen oder ihre Lebensdauer verkürzen Bevor Sie das Produkt oder elektronische Komponenten berühren vergewissern Sie sich daßSie in einem ESD geschützten Bereich arbeiten Be...

Page 22: ...SharpStreamer Mini PCIE 7205 Installation and Use 6806800U01A Sicherheitshinweise 22 ...

Page 23: ... the Top OTT streaming servers mobile network optimization video conferencing and broadcast equipment Artesyn employs multiple Intel Core i5 and Graphics Processor Unit GPU accelerated devices in a small and scalable PCI Express card footprint that is easily deployable in off the shelf platforms The PCIE 7205 also offers net work scalability enabling providers to add more cards and density as need...

Page 24: ...o encoder application Optimized H 264 AVC and H 265 HEVC transcoding density in a smaller format Full height Half length PCI Express form factor compatible with 1RU and 2RU systems 1 2 Hardware Overview The PCIE 7205 card contains single dual Intel i5 5350U 2 2Ghzprocesors Each subsystem communicates with the host server over its own Gigabit Ethernet link and supports 8GB of DDR3 1600 dual channel...

Page 25: ...1 3 Software Overview 1 3 1 Host OS The recommended host OS is a standard 64 Bit CentOS 7 x desktop linux distribution The PCIE 7205 was tested on the host system running with CentOS 7 1 The host OS needs to provide DHCP and TFTP services to enable the PCIE 7205 CPUs to obtain the IP address and to load OS through PXE Boot Figure 1 1 Mechanical Layout 167 65 mm 111 15 mm ...

Page 26: ...gured BIOS 1 3 1 2 AMT The PCIE 7205 card does not have a physical serial console for each of the CPUs instead it uses Intel Active Management Technology AMT to access the CPU console through VNC or SOL Intel AMT is a hardware and firmware technology for remote out of band management used by Intel processors AMT is configured on all PCIE 7205 CPUs at the factory While AMT provides several features...

Page 27: ... 4 2003 FCC 15 109 g CISPR 22 1997 2003 Class A ANSI C63 4 2003 ICES 003 Issue 5 2012 Class A CAN CSA CISPR 22 2008 Radiated Emissions CISPR 22 2012 Class A CISPR 22 2012 EN 300 386 V1 6 1 2012 Class A EN 55022 2011 FCC 15 107 2015 Class A ANSI C63 4 2003 ICES 003 Issue 5 2012 Class A CAN CSA CISPR 22 2008 Conducted Emissions EN 300 386 v1 6 1 2012 EN 61000 4 2 2009 ESD EN 300 386 v1 6 1 2012 EN 6...

Page 28: ...tallation and Use 6806800U01A 28 PCIE 7205 2 2 PCIE card with 2x dual core Intel Core i5 5350U Processor 1 8 GHz 2x Intel 82599EN 10G Ethernet controllers connected to front panel SFP sockets Table 1 2 Ordering Information Part Number Description ...

Page 29: ...on To inspect the shipment perform the following steps 1 Verify that you have received all items of your shipment One SharpStreamer Mini PCIE 7205 card One printed copy of Quick Start Guide One printed copy of Safety Notes Summary Any optional items ordered 2 Check your shipment and report any damage or differences to the Contact Center at RMASupport ec Artesyn com Damage of Circuits Electrostatic...

Page 30: ... Requirements Make sure the card is thoroughly inspected before shipment If any damage has occurred during transportation please contact our Contact Center immediately Operating temperatures refer to the temperature of the incoming air passing across the card and out of the faceplate and not the temperature of the components Card Damage High humidity and condensation on the card surface causes sho...

Page 31: ...uirement Operating Non Operating Temperature 0 C to 50 C 40 C to 70 C Minimum Airflow Reference to sea level 500 LFM 2 5 m sec 400 LFM 2 m sec for 35 C Operation Temperature Change 30 C hr 30 C hr Relative Humidity 5 to 85 Non Condensing 5 to 90 Non Condensing but not to exceed 0 024 kg of water per kg of dry air Shock and Vibration 0 01G s 5 to 200Hz EN 300 019 2 2 Class 2 3 Altitude Up to 1800m ...

Page 32: ...linux login prompt Active When the MCPs are in transcoding state Peak When all the two MCPs are in turbo mode The MCP limits itself to maintain an overall Thermal Design Power TDP of 15 W The peak power state is only for a temporary duration and it is the maximum power the thermal characteristics allow for the consumption To reduce the risk of personal injury fire or damage to the equipment do not...

Page 33: ... an ElectroStatic Discharge ESD preventive wrist strap or antistatic glove to prevent the static electricity from hurting you or damaging the device Keep your personal objects such as your clothes away from the system To prevent the static electricity from damaging the device it is recommended to wear antistatic clothes Pin Damage If the board is not fully aligned with the interface in the backpla...

Page 34: ...apmustcontactwell Oneterminaltouchesyourbareskin andthe other is inserted in the jack at the front or back side of the shelf Avoid moving as much as possible Movement gathers static electricity around you Do not touch the solder point pin or bare circuit Do not leave the device in the place where others can operate it Install the device at once after you take it out of the anti static package If y...

Page 35: ... working in an ESD safe environment Shipping the card along with a server is not recommended If you still need to ship the card along with the server ensure the card is properly secured in the server Check if necessary precautions were followed to keep the card resistive against wobbling Otherwise there are chances of card getting damaged For more information about securing the PCIe card in a serv...

Page 36: ...m has the required PCIe slot with a minimum x4 PCIe connector to hold the card 4 Insert the PCIE 7205 card into the PCIe slot secure it and ensure that the card is properly fitted in the PCIe slot 5 Lock the slot ejectors close the system cover and then power on the system For detailed information about the PCIe card installation refer to the respective rack mount server manufacturer s product doc...

Page 37: ...D safe environment 2 Power off the system disconnect the system fromtheelectricaloutletand peripheralsand remove any cables connected to the card 3 Remove the system cover 4 Gently pull the PCIE 7205 card from the slot 5 Close the cover of the system Wait at least 30 minutes for the card to cool down as the heat sink could be extremely hot Place the PCIE 7205 card into an ESD protective bag and se...

Page 38: ...Hardware Preparation and Installation SharpStreamer Mini PCIE 7205 Installation and Use 6806800U01A 38 ...

Page 39: ...s designed as a server accelerator contains two Intel Core processor subsystems dual core with Hyperthreading With two cores and two threads per core for a total of 8 additional threads running at 2 2Ghz This additional horsepower can be used in a virtualcloudcomputingenvironment to acceleratea1Uor2Userverwith8processingthreads per PCIe slot A typical Dell R720 has four full length PCIe slots whic...

Page 40: ...yboard Mouse debug 25 6GB s 1GB Ethernet Intel i218 PCIe Gen1 x1 2 5Gbps Micro SD slot 20MB s Intel I5 5350U Broadwell Intel HD Graphics 6000 DDR3L Memory 1600 bottomside DDR3L Memory 1600 bottomside DDR3L Memory 1600 bottomside DDR3L Memory 1600 bottomside DDR3L Memory 1600 bottomside DDR3L Memory 1600 bottomside DDR3L Memory 1600 bottomside DDR3L Memory 1600 bottomside DDR3L Memory 1600 topside ...

Page 41: ...rd Each MCP accelerator sends and receives traffic over the Gigabit Ethernet link 3 1 2 PCIe The other side of the i350 is the PCIe communicating to the server through the PCIe slot gold fingers in x4 Gen2 mode Aggregate 20Gbps throughput on the PCIe bus 3 2 CPU Complex Each CPU complex consists of a MCP Multi Chip Package combining both an i5 5350U Broadwell mobile processor with an Intel QM87 Ch...

Page 42: ...er the 12 V GF comes above 11V it will turn on the i350 1 8 V and 1 0 V power with the 1 8 V coming up first then the 1 0 V coming up later and Intel 82599EN 1 2 V the 3 3 V should come up first then the 1 2 V If the 12 V GF drops below 8 V then the 1 8 V and 1 0 V and all the power control of the board will be turned off Power cycle Control Running the pci7205 command from the linux console on th...

Page 43: ...gabit Ethernet controller This clock source comes from the server in which the card is inserted into Each MCP has a dual channel memory each memory channel provides an 800 Mhz clock to their respective memory channel 3 4 3 Reset Structure The CPLD controls each MCP reset During power up the CPLD state machine drives the reset control to each MCP During an induced reset from the server the GPIO on ...

Page 44: ...ernal PCH Media Access Control MAC The Gigabit Ethernet connects to i350 dual Gigabit controller via a transformer The i350 then connect its x4 PCIe to the PCIe gold finger connector Figure 3 2 Reset Architecture RE SE T_N RE SE T_N RE SE T_N RE SE T_N RE SE T_N RE SE T_N RE SE T_N Reset Diagram CPU Complex x2 DRAM Devices SM_DRAMRST CPLD PWR GOOD RESET_IN RESET_OUT Broadwell U PLTRST_N PERST PE_R...

Page 45: ...x16modeto save routingspace and to allow a faster development cycle 3 4 7 MicroSD Card There are two MicroSD cards mounted towards the faceplate of the card Each MicroSD goes to one of the respective MCP complex s The MicroSD is designed for either a nonvolatile storage space and or as a firmware recovery option Figure 3 3 below shows the location of the MicroSD cards on the board and the correspo...

Page 46: ...ional Description SharpStreamer Mini PCIE 7205 Installation and Use 6806800U01A 46 The following figure shows the location of the MicroSD cards and the corresponding MCPs on the board Figure 3 3 MCP Location ...

Page 47: ...d into the server Boot the server to a Linux CentOS and run the pci7207 command to recover the firmware The pci7207 utility will drive the i350 GPIO to the CPLD which will drive the GPIO to the individual MCP PCHtosettheinsideBIOStorecoverymode WhentheMCPboots theBIOSwillsensethe recovery GPIO and write the firmware BIOS from the MicroSD to the firmware chip to recover a mis configured BIOS FW The...

Page 48: ... SPD memory temperature sensor devices are available around the card Four for the DDR3 memory SPD devices and one for the MCP1 FRU chip and one for the PCIe gold finger FRU SPD memory device Each SPD memory device has a temperature sensor in addition to the memory There are four SPD memory devices on the card Two SPD memory devices for each MCP one SPD per memory channel The SPD temperature sensor...

Page 49: ...Description SharpStreamer Mini PCIE 7205 Installation and Use 6806800U01A 49 Figure 3 5 Location of Temperature Sensors Primary Side U128 Temperature U120 Temperature U80 Temperature U45 Temperature P PRIMARY SIDE ...

Page 50: ...or on the bulk 12 V bus to the MCP core voltage regulator for each MCP It is used to measure the power consumed by each MCP 3 4 10 Debug Board The debug board attaches to the back of the board on the debug connectors and provides debug ports to each MCP Figure 3 6 Location of Temperature Sensors Secondary Side U43 Temperature U37 Temperature S SECONDARY SIDE ...

Page 51: ... 3 V from host through PCIe Gold Finger connector For PCIE7205 this two power rails are now connected via single resistor so that all power shall be supplied by the PCIe Gold finger 3 6 JTAG The PCIe slot Joint Test Action Group JTAG pins are mapped to the i350 and the CPLD JTAG programming pins The first device in the JTAG chain is the CPLD the second device is the i350 The JTAG to the CPLD is us...

Page 52: ...Functional Description SharpStreamer Mini PCIE 7205 Installation and Use 6806800U01A 52 ...

Page 53: ...ut Table 4 1 PCIE 7205 Card Edge Connector Pinout Pin Name Side B Description Name Side A Description 1 12V 12V power PRSNT 1 PCIe edge present input 2 12V 12V power 12V 12V GF 3 12V 12V power 12V 12V GF 4 GND Ground GND Ground 5 SMCLK PCIE EDGE SMBCLK SMBus System Management Bus Clock JTAG2 PCIe Edge TCK Test Clock 6 SMDAT PCIE EDGE SMBDAT SMBus System Management Bus Data JTAG3 PCIe Edge TDI Test...

Page 54: ...air 14 PETp0 Transmitter differential pair Lane 0 REFCLK 15 PETn0 GND Ground 16 GND Ground PERp0 PCIE0 EDGE RX P PCIE0 EDGE RX N Receiver differential pair Lane 0 17 PRSNT2 Hot Plug presence detect PERn0 18 GND Ground GND Ground End of the x1 connector 19 PETp1 PCIE3 EDGE TX P PCIE3 EDGE TX N Transmitter Lane 1 Differential pair RSVD Reserved NOT CONNECTED 20 PETn1 GND Ground 21 GND Ground PERp1 P...

Page 55: ...o indicate the basic power state of the card All the LEDs are shown on the primary side of the card 25 GND Ground PERp2 PCIE1 EDGE RX P PCIE1 EDGE RX N Receiver Lane 2 Differential pair 26 GND Ground PERn2 27 PETp3 PCIE3 EDGE TX P PCIE3 EDGE TX N Transmitter Lane 3 Differential pair GND Ground 28 PETn3 GND Ground 29 GND Ground PERp3 PCIE1 EDGE RX P PCIE1 EDGE RX N Receiver Lane3 Differential pair ...

Page 56: ...ee pci7205 commands D35 Green2 ON ALL MCP PCHPWR not OK OFF Power OK D36 Green3 ON MCP3 out of Reset OFF MCP3 in Reset BLINKING Server is holding MCP3 power off through i350 GPIO see PCI7205 commands D33 Green4 ON ALL MCP1_SYSPWR not OK OFF Power OK D32 Green5 BLINKING CPLD is running through the power up state that means not in the powerdown state and all is good OFF No 3 3v GF power to the CPLD ...

Page 57: ...CP3_VTT_PG is NOT Good OFF Power OK D40 Amber3 Solid amber MCP3 CATERR BLINKING amber MCP3 THERMTRIP D38 Amber 4 ON P12V_ATX_FAIL or P12V_GF_FAIL OFF Power OK D24 activity green3 BLINKING green MCP3 activity D4 speed green1 MCP1 link is at 10 100 LINK D3 activity green1 BLINKING green MCP1 activity D5 speed Gig amber1 MCP1 Link is at Gigabit speed D1 MCP1_10GE_10G LINK D11 MCP1_10GE_1GLINK D9 MCP1...

Page 58: ...lowing types of errors Legacy MCERRs CATERR is asserted for 16 BCLKs Legacy IERRs CATERR remains asserted until warm or cold reset THERMTRIP Thermal Trip The processor protects itself from catastrophic overheating by use of an internal thermal sensor This sensor is set well above the normal operating temperature to ensure that there are no false trips The processor will stop all execution when the...

Page 59: ...ls A Reset button SW2 is available at the rear side of the PCIE 7205 card By pressing the Reset button labeled as SW2 all the MCP processors on the card get reset The following figure shows the Reset button location on the card Figure 4 2 Reset Button Location Reset VUUPO U43 Temperature S E C ON DA R Y S I DE ...

Page 60: ...inout The CPLD can be programmed from P8 through the rear of the card The P8 is not populated so a 2x4 header is inserted into the P8 with the other side on the lattice programmer This is done to allow programming access with limited space on the top of the card due to the full size heat sink Table 4 3 Pinout for P7 GPIO Switches Pin Name 1 GND 2 GND 3 GND 4 GND 5 GND 6 3 3V Pull up 7 JTAG BUFFER ...

Page 61: ...C Table 4 4 CPLD Programming Pinout Pin Name Table 4 5 SFP Connector Pinout J1 and J2 Pin Name Pin Name 1 Transmitter Ground 11 Receiver Ground 2 Transmitter Fault 12 Receiver DATA 3 Transmitter Disable 13 Receiver DATA 4 I2C DATA 14 Receiver Ground 5 I2C CLOCK 15 Receiver Power Supply 6 Module Absent 16 Transmitter Power Supply 7 Rate Select 0 17 Transmitter Ground 8 Loss of Signal Indication 18 ...

Page 62: ...CCIO OUT 3 GND 23 SPI Prog MOSI 43 XDP PREQ 4 GND 24 Display Port Data 2 44 GND 5 3 3 V Supply 25 GND 45 XDP PRDY 6 3 3 V Supply 26 GND 46 XDP VCCIO OUT 7 USB Port 1 Over Current 27 SPI Prog MISO 47 XDP CFG3 8 GND 28 Display Port Data 3 48 MCP PCIE Reset 9 USB Port 1 DATA 29 SPI Prog 3 3V Supply 49 XDP Power Good 10 Display Port Data 0 30 Display Port Data 3 50 XDP DBReset 11 USB Port 1 DATA 31 GN...

Page 63: ... The display is a direct view of the MCP video output This is helpful for debug 16 Display Port Data 1 36 DisplayPortAUX 56 XDP JTAG TRST 17 USB Port 2 DATA 37 Serial UART CTS 57 MCP System Power OK 18 Display Port Data 1 38 GND 58 XDP JTAG TDI 19 SPI Prog Chip Select 39 Serial UART Transmit 59 XDP JTAG Clock 20 GND 40 Display Port HPD 60 XDP JTAG TMS Table 4 6 Debug Port P2 P11 continued Pin Name...

Page 64: ...four USB ports Two for MCP1 and two for MCP2 4 5 3 3 XDP Port Because of the limited number of pins on the debug port the XDP is only designed as the 26 pin version of the XDP debug port however it is represented as the full 60pin XDP plug 9 Lane1 19 GND 10 Lane3 20 VCC 1 5 A fused 3 3 V Table 4 7 Micro Display Port Pinout J3 and J4 continued Pin Name Pin Name Table 4 8 Debug Micro USB Port Pinout...

Page 65: ...NC 26 GND 46 PLTRST 7 GND 27 NC 47 XDP SYSTEM POWER OK 8 GND 28 NC 48 DBR 9 NC 29 NC 49 GND 10 NC 30 NC 50 GND 11 NC 31 GND 51 NC 12 NC 32 GND 52 JTAG TDO 13 GND 33 NC 53 NC 14 GND 34 NC 54 JTAG TRST 15 NC 35 NC 55 NC 16 NC 36 NC 56 JTAG TDI 17 CFG3 37 GND 57 JTAG TCK 18 NC 38 GND 58 JTAG TMS 19 GND 39 Power Good 59 GND 20 GND 40 NC 60 GND Table 4 9 Debug XDP Port Pinout J17 and J18 continued Pin ...

Page 66: ...sf100 to program or read the SPI flash for each MCP complex 4 DTR 5 GND 6 DSR 7 Request To Send 8 Clear To Send 9 NC Table 4 10 Serial Port P5 P6 Pin Name Table 4 11 Debug Port SPI Flash Programming Port Pinout Pin Name 1 SPI 3 3V Supply for SPI Mux and SPI Device Only diode Protected 2 GND 3 Chip Select 4 CLOCK 5 Master In Slave Out MISO 6 Master Out Slave In MOSI 7 NC 8 NC ...

Page 67: ...ation data Boot configuration for a flexible boot order The BIOS Setup program is required to configure the hardware of the card This configuration is necessary for operating the card and the peripherals connected to it The configuration data is stored as part of a boot flash since the configuration data storage needs to be non volatile 5 1 Connecting to the Console The PCIE 7205 allows you to mon...

Page 68: ... the console PCIE 7205 refer the section Access a PCIE 7205 CPU via AMT on page 95 To access BIOS Setup screen press F2 when the message Press F2 to enter BIOS setup appears on the screen The following screen is displayed The menus shown in the figures in this chapter are from a typical system The actual menus displayed on the screen may be different and depend on the hardware and features install...

Page 69: ...wn at the bottom of the menu Additionally an item specific help is displayed on the right hand side of the menu window It displays the help text for the currently selected field If you have performed any unwanted changes or not sure about configuration settings restore the default values To restore default values perform the following steps 1 Press F2 on the keyboard to return to setup 2 Press F9 ...

Page 70: ...ontains the following menu options which are explained in Table 5 2 The default values set become effective only after saving and exiting the BIOS setup Till then they are loaded only for display purposes Table 5 2 BIOS Setup Menu Bar Menu Description Main Configuring the basic system Advanced Setting the advanced features available on the system chipset Security Setting the security password Powe...

Page 71: ...row keys to move the cursor to the desired submenu and then press Enter Incorrect settings can cause the system to malfunction To rectify mistakes use F2 on the keyboard to return to setup and restore the system defaults by pressing F9 Alternatively you can press F2 to return to the BIOS setup and go to the Exit menu and select Load setup Defaults Table 5 3 Legend Keys Key Function F1 Displays gen...

Page 72: ... the related help text of the active selection is displayed 5 2 4 General Help You can press F1 on the keyboard in any menu context to invoke the general help window The general help window describes the legend keys and their alternates as shown in the followingfigure Thescrollbarontherightsideofanywindowindicatesthatthereismorethan one page of information in the window Figure 5 2 General Help Men...

Page 73: ...is section provides BIOS configuration in each of the menu options 5 3 1 Main Menu To view the Main menu select the Main tab from the menu bar To modify menu screen items scroll down the Main screen The following screen appears By default the Main tab is selected on the BIOS Setup screen Figure 5 3 Main Menu ...

Page 74: ... their default values 5 3 2 Advanced Menu To view Advanced menu select Advanced tab from the Menu bar The following screen appears Table 5 4 Main Menu Selection Options Format Description Language English French Chinese Japanese Set the setup language System Time HH MM SS Set the system time System Date MM DD YYYY Set the system date Figure 5 4 Advanced Menu ...

Page 75: ...e list of configurations that can be performed in the Advanced menu 5 3 2 1 Boot Configuration The following figure shows the Boot Configuration submenu Table 5 5 Advanced Menu Feature Description Boot Configuration Select the boot configuration Console Redirection Change console redirection parameter Serial IO Configuration Change device options to enable the debug UART Figure 5 5 Boot Configurat...

Page 76: ...table provides information about options in the Boot Configuration submenu and their default values The values shown in the tables enclosed within brackets indicate the default settings Table 5 6 Boot Configuration Feature Options Description Numlock On Off Enables or disables Numlock ...

Page 77: ...orts if selected Individual submenus are available if there is a need for separate port configuration ThefollowingtableprovidesinformationaboutthefeatureoptionsintheConsoleRedirection Setup submenu and their defaults values Figure 5 6 Console Redirection Setup Table 5 7 Console Redirection Setup Feature Option Description Console Serial Redirection Enabled Disabled Enables or disables the Console ...

Page 78: ...Bits Selects the data bits Parity none Even Odd Selects the parity Stop Bits 1 Bit 2 Bits Selects the stop bits Flow Control None RTS CTS XON XOFF Selects the flow control Information Wait Time 0 Second 2 Second 5 Second 10 Second 30 Second Selects the information screen display time C R After Post Yes No Selects if the Console Redirections is enabled after Post Table 5 7 Console Redirection Setup...

Page 79: ... AutoRefresh Disabled Enabled Selects if the terminal will be refreshed after a console is detected FailSafeBaudRate Disabled Enabled Selects if the baud rate automatically changes to one of the terminals it can be detected ACPI SPCR Table Disabled Enabled Selects if the SPCR ACPI table will be included for Windows EMS Table 5 7 Console Redirection Setup continued Feature Option Description ...

Page 80: ...le the UART0 serial port for debug purposes The following table provides information aboutSerial IO Configuration submenu options and their default settings Figure 5 7 Serial IO Configuration Table 5 8 Serial IO Configuration Feature Option Description DMA Controller Disabled Enabled Enable or disable the PCI DMA controller UART0 Controller Disabled Enabled EnableordisablethePCIUART0controller ...

Page 81: ...from the menu bar Use the legend keys to make a selection and exit from the Security menu TheSecurity menuappearsas showninthe following figure The following table provides other options in the Security menu and their defaults Figure 5 8 Security Menu The values shown in the tables enclosed within brackets indicate the default settings ...

Page 82: ... Power menu is displayed which looks similar to the following figure The following table provides other options in the Power menu and their defaults Table 5 9 Security Menu Feature Option Description Set Supervisor Password Sets the password Figure 5 9 Power Menu Table 5 10 Power Menu Feature Options Description Advanced CPU Control Select CPU features ...

Page 83: ... table provides options in the Advanced CPU Control submenu and their defaults Figure 5 10 Advanced CPU Control Table 5 11 Advanced CPU Control Feature Options Description HT Support Auto Disabled Enables or disables the Hyper Threading Excute Disable Bit Disabled Enabled Enables or disables the CPU feature to classify areas of memory where code can or cannot be executed ...

Page 84: ...erformance Mode Max Non Turbo Performance Max Battery Turbo Performance Selects the performance state the BIOS left behind before entering the OS Turbo Mode Disabled Enabled Enables or disables the CPU Turbo Mode Energy Efficient P state Disabled Enabled Enables or disables the Energy Efficient P state feature Table 5 11 Advanced CPU Control continued Feature Options Description ...

Page 85: ...le provides options in the Boot menu and their default settings Figure 5 11 Boot Menu Table 5 12 Boot Menu Feature Option Description Boot Type Dual Boot Type Legacy Boot Type UEFI Boot Type Selects the boot type Quick Boot Enabled Disabled Enables or disables the quick boot feature which skip certain tests to decrease the boot time Quiet Boot Enabled Disabled Enables or disables the booting in te...

Page 86: ... Selects the supported ACPI version USB Boot Enabled Disabled Enables or disables USB boot support EFI Device First Disabled Enabled Selects if UEFI if enabled or Legacy if disabled is the first boot device Timeout 2 Selects the timeout in seconds before the first boot attempt Automatic Failover Disabled Enabled Selects if another boot devices is used after the first one failed EFI Change EFI boot...

Page 87: ...lar to the figure below The following table provides Exit menu features and their description Figure 5 12 Exit Menu Table 5 13 Exit Menu Feature Description Exit Saving Changes Exits the setup and saves the changes Save Changes Without Exit Saves the changes without exiting Exit Discarding Changes Exits the setup and discards the changes Load Setup Defaults Loads the default setup parameter Discar...

Page 88: ...wo different forms of BIOS updates are supported BIOS region only update This is the recommended update mechanism Full BIOS update This updates the BIOS and Intel ME regions A provisioning of AMT is required for console access after a full BIOS update For information on updating the BIOS on the PCIE 7205 card refer to the section BIOS Update on page 104 ...

Page 89: ...em It is recommended to install the CentOS 7 1 Linux Desktop distribution on the host system A Linux OS based on Ubuntu 14 04 x is also available for the PCIE 7205 which can be used on a host system running either CentOS 7 x or Ubuntu 14 04 x The Setup and use of the Ubuntu Linux package is described in the documents included in the Ubuntu Linux package The following sections describe the setup an...

Page 90: ...rewall configuration changes are required Log in to the host as root and run the following commands firewall cmd permanent zone public add service dhcp firewall cmd permanent zone public add service tftp 6 1 1 2 SELinux Configuration By default SELinux is set to enforcing which prevents DHCP TFTP from working properly To change the SELinux configuration 1 Log in to the host as root 2 Modify the fi...

Page 91: ...estart xinetd service 6 cp usr share syslinux pxelinux 0 tftpboot 6 1 1 4 pci7207 Utility Installation To install the pci7207 utility 1 Copy the pci7207 utility to the host system to root 2 Log in to the host system as root 3 Run the following commands cd root mkdir tmp cd tmp unzip pci7207 zip cp pci7207_ version centos7 usr local bin pci7205 cd rm rf tmp Obtain the latest version of the pci7207 ...

Page 92: ...sr local bin pci7207 cg etc dhcp dhcpd conf usr local bin pci7207 ci tmp pcie7205IPs sh chmod x tmp pcie7205IPs sh tmp pcie7205IPs sh systemctl restart dhcpd service 3 Configure the host system to automatically run the pcie7205start when the OS starts chmod x etc init d pcie7205start restorecon etc init d pcie7205start chkconfig add etc init d pcie7205start 4 Disable the NetworkManager service sys...

Page 93: ... default pcie7207 pxelinux cfg default The default file would normally contain DEFAULT pcie7207 vmlinuz 3 10 0 229 1 2 36242 MSSr5 el7 centos x86_64 initrd pcie7205 initramfs 3 10 0 229 1 2 36242 MSSr5 cpio gz rdinit sbin init console tty0 console ttyS0 115200n8 acpi_enforce_resources no rd luks 0 rd lvm 0 rd md 0 rd dm 0 After completion of the above configuration steps each PCIE 7205 CPU boots w...

Page 94: ...face For example a host system with three 3 PCIE 7205 cards installed would have an internal network similar to details provided in the following table 6 3 2 Log on to a PCIE 7205 CPU To log on to a PCIE 7205 CPU it is necessary to log in to the host system first then to the PCIE 7205 CPU 1 Log in to the host as root 2 ssh root 172 20 card id cpu 100 3 Enter the Password as root Table 6 1 PCIE 720...

Page 95: ... been verified to work with the PCIE 7205 amtterm The amtterm version is not available from the CentOS 7 repositories but the amtterm version available from CentOS 6 5 works in CentOS 7 An updated source version could be downloaded from www senseless info downloads html it would need to be compiled The updated amtterm is the best option 6 3 3 1 Installing amtterm To install amtterm in a CentOS 7 1...

Page 96: ... password for host 172 20 11 100 amtterm NONE CONNECT connection to host ipv4 172 20 11 100 172 20 11 100 16994 open amtterm CONNECT INIT redirection initialization amtterm INIT AUTH session authentication amtterm AUTH INIT_SOL serial over lan initialization amtterm INIT_SOL RUN_SOL serial over lan active serial over lan redirection ok connected now use to escape CentOS Linux 7 Core Kernel 3 10 0 ...

Page 97: ...ge 91 to replace the existing utility with the new version To upgrade the PCIE 7205 OS image obtain the new version of the PCIE 7205 image using the SWORDS download server available from the Artesyn Customer Resource Center Website and follow the procedure in the section PCIE 7205 OS Installation on page 93 to install the new PCIE 7205 OS image 6 5 Software Removal To remove the PCIE 7205 OS and t...

Page 98: ...Software Installation SharpStreamer Mini PCIE 7205 Installation and Use 6806800U01A 98 4 Remove the pcie7205start startup script chkconfig del pcie7205start rm etc init d pcie7205start ...

Page 99: ...7205 CPU on a specific card Generate a DHCP configuration file The utility searches the system for PCIE 7205 devices For each device it determines the MAC address of the each port and adds 4 to determine the PCIE 7205 CPU MAC address The generated dhcpd conf output is based on the MAC address of each PCIE 7205 CPU It assumes a network configuration as follows For each PCIE 7205 CPU there is a sepa...

Page 100: ...m If only the card id is provided it will power cycle all CPUs for the card indicated r reset CPU t temperature of CPU e execute BIOS Crisis Recovery for the specified CPU The following commands are independent of Card Id and CPU g generate a dhcp conf i output ifconfig commands for each interface l list installed PCIE 7207 cards Display utility version pci7207 v pci7207 version 1 0 10 Backwards C...

Page 101: ...14 d4 5e enp1s0f1 2 1 02 00 0 0xf7300000 0x100000 ec 9e cd 15 e9 c9 enp2s0f0 2 2 02 00 1 0xf7200000 0x100000 ec 9e cd 15 e9 ca enp2s0f1 Generate a DHCP configuration file dhcpd conf The output of the utility is to stdout but could be redirected to etc dhcp dhcpd conf to replace any existing dhcpd conf file pci7207 cg Sample etc dhcp dhcpd conf allow bootp allow booting authorative ddns update styl...

Page 102: ... 172 20 22 100 Generate ifconfig statements to initialize the local interfaces pci7207 ci ifconfig enp1s0f0 172 20 11 1 netmask 255 255 255 0 ifconfig enp1s0f1 172 20 12 1 netmask 255 255 255 0 ifconfig enp2s0f0 172 20 21 1 netmask 255 255 255 0 ifconfig enp2s0f1 172 20 22 1 netmask 255 255 255 0 Reset a PCIE 7205 CPU pci7207 s1 n1 cr Power down a PCIE 7205 CPU pci7207 s1 n1 cd Power up a PCIE 720...

Page 103: ... have the name pcie7205Pkg fd The BIOS recovery procedure takes several minutes to complete and the user should wait until the procedure completes before performing any other actions on the board pci7207 s1 n1 ce WARNING BIOS Crisis Recovery for Card 1 CPU 1 Selected Did you insert a uSD card with the BIOS Crisis Recovery Image in the CPU uSD Slot Enter Y N Y Starting BIOS Crisis Recovery for Card...

Page 104: ... of BIOS updates are supported BIOS region only update This is the recommended update mechanism Full BIOS update This updates the BIOS and Intel ME regions A provisioning of AMT is required for console access after a full BIOS update To perform a BIOS region only update on a PCIE 7205 CPU 1 Copy the latest version of PCIE 7205 BIOS image to the host system 2 Log in to host system as root 3 Copy th...

Page 105: ...ow CARD 1 CPU 1 are used scp pcie7205_ BIOS release _signed bin 172 20 11 100 root amtterm pP ssw0rd 172 20 11 100 cd opt InsydeBios H2OFFTx64 sh root pcie7205_ BIOS release _signed bin The procedure takes few minutes A CPU power cycle might be required after completion of the BIOS update Provisioning AMT is also required for AMT console access 7 2 3 AMT Provisioning The PCIE 7205 OS image contain...

Page 106: ...Utilities and Applications SharpStreamer Mini PCIE 7205 Installation and Use 6806800U01A 106 ...

Page 107: ...eased products you can also visit our Web site for the latest copies of our product documentation 1 Go to www artesyn com computing support product technical documentation php 2 Under FILTER OPTIONS click the Document types drop down list box to select the type of document you are looking for 3 In the Search text box type the product name and click GO Table A 1 Artesyn Embedded Technologies Embedd...

Page 108: ...Related Documentation SharpStreamer Mini PCIE 7205 Installation and Use 6806800U01A 108 ...

Page 109: ......

Page 110: ...esyn and the Artesyn Embedded Technologies logo are trademarks and service marks of Artesyn Embedded Technologies Inc All other product or service names are the property of their respective owners 2016 Artesyn Embedded Technologies Inc ...

Reviews: