background image


Matrix Beam 5.5 


                  User Guide 

Professional Entertainment Technology 


1A 


TABLE OF CONTENTS 


1. Safety Instructions 

2. Technical Specifications 

3. Installation 

4. How to set the unit 

5. How to control the unit 

6. DMX512 Configuration 

7. DMX512 Connections 

8. Troubleshooting


9. Fixture Cleaning


Summary of Contents for Matrix Beam 5.5

Page 1: ...l Entertainment Technology 1A TABLE OF CONTENTS 1 Safety Instructions 2 Technical Specifications 3 Installation 4 How to set the unit 5 How to control the unit 6 DMX512 Configuration 7 DMX512 Connections 8 Troubleshooting 9 Fixture Cleaning ...

Page 2: ...uch any wire during operation and there might be a hazard of electric shock To prevent or reduce the risk of electrical shock or fire do not expose the fixture to rain or moisture The housing must be replaced if they are visibly damaged Do not look directly at the LED light beam while the fixture is on There are no user serviceable parts inside the fixture Do not open the housing or attempt any re...

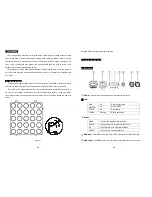
Page 3: ...res so that movement won t happen and jointing become more conveniently Secondly use L type Hexagon wrench to counter clockwise rotate connection lock to the end until lock tongue returns back for direction please see arrow showed in figure 1 and the next step use Hexagon wrench clockwise rotate connection lock to the end see arrow Figure 1 1 2 5A Finished fixture jointing is showed as follows 4 H...

Page 4: ... required one is shown on the display Select the function by ENTER button and the display will blink Use DOWN and UP button to change the mode Once the required mode has been selected press ENTER button to setup or it will automatically return to the main functions without any change after idling 30 seconds Back to the functions without any change press MENU button The main functions are shown bel...

Page 5: ...MENU button up to when the is shown on the display Pressing the 9A ENTER button Use the DOWN and UP button to select the Random show or show 1 or Show 2 or or show8 Once selected press the ENTER button to store or automatically exit menu mode without any change after 60 seconds To go back to the functions without any change press the MENU button Manual Mode Press the MENU button up to when the is ...

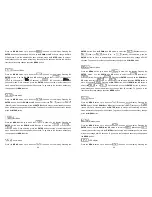
Page 6: ...y DMX controller 11A No need to turn the unit off when you change the DMX address as new DMX address setting will be affected at once Each time you turn the unit on it will show on the display After that the unit will be ready to receive DMX signal or run the built in programs 5 1 Master Slave Built In Preprogrammed Function By linking the units in master slave connection the first unit will contr...

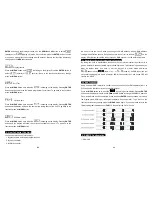
Page 7: ... to fast 024 031 effect03 slow to fast 016 023 effect02 slow to fast 008 015 effect01 slow to fast 0007 007 no function 2 1 Line effect 236 255 To count forwards 0 up to 9 from slow to fast 216 235 To count forwards 0 up to 9 from slow to fast 196 215 Number 9 176 195 Number 8 156 175 Number 7 136 155 Number 6 116 135 Number 5 096 115 Number 4 076 095 Number 3 056 075 Number 2 036 055 Number 1 016...

Page 8: ...14A 7 DMX512 Connections mode connection 15A mode connection ...

Page 9: ...connector 17A B Not responding to DMX controller 1 DMX LED should be on If not check DMX connectors cables to see if link properly 2 If the DMX LED is on and no response to the channel check the address settings and DMX polarity 3 If you have intermittent DMX signal problems check the pins on connectors or on PCB of the fixture or the previous one 4 Try to use another DMX controller 5 Check if the...

Reviews: