65
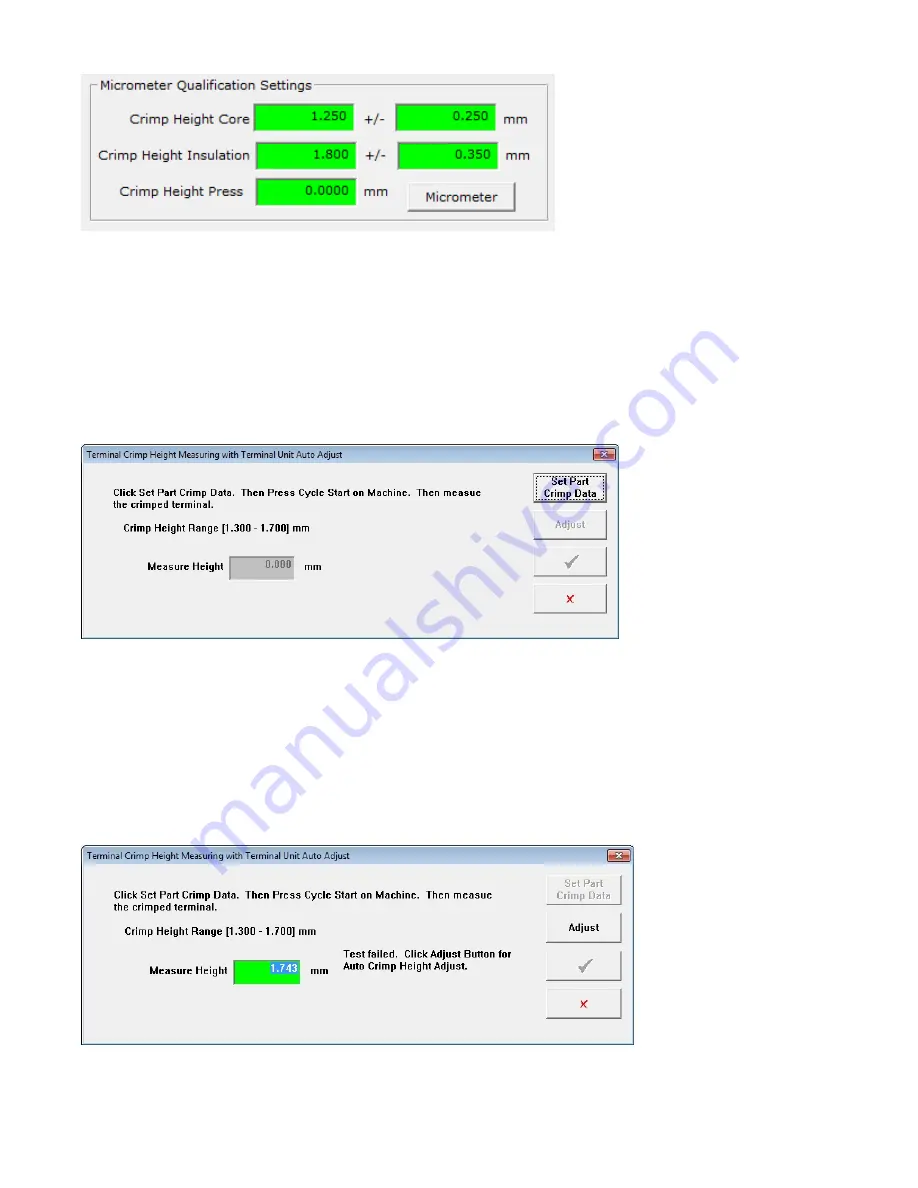
Crimp Height Core
- This is the required height measurement for the core crimp and the tolerance allowed.
Entering a 0 in this field indicates that you do not wish to qualifiy this measurement, if qualification is enabled on
the machine.
Crimp Height Insulation
– This is the required height measurement for the insulation crimp and the tolerance
allowed. Entering a 0 in this field indicates that you do not wish to qualifiy this measurement, if qualification is
enabled on the machine.
Crimp height press
– See section “Cross Section and Crimp Height” above.
Micrometer –
Click on this will open a window so you can see the data being sent from the micromer, if a
micrometer is installed on the machine.
Using micrometer to set crimp height
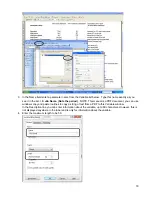
To check the Crimp Height Core, click on the Micrometer button and window below will appear.
If you do not already have a part made, click
Set Part Crimp Data
. Then press
Cycle Start
on Machine.
Measure the crimped terminal and press the orange button on the Micrometer to automatically transfer the
measurement to the screen.
If the test passes you can choose to green check box to exit the screen. If the machine has automatic crimp
height you can choose to optimize the crimp height by clicking the Adjust button. This will move the crimp height
mechanism by the distance of measured height verses the Crimp Height Core dimension programmed in the
crimping settings screen.
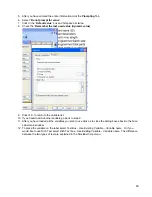
If the
Measure Height
is out of the
Crimp Height Range
, the Micrometer test will
FAIL
.
If the crimp height fails you need to make necessary changes to the Applicator. If the machine is equipped with
Automatic crimp height adjust you can have the machine change the crimp height, by clicking the Adjust
button. This will move the crimp height mechanism by the distance of measured height verses the Crimp Height


