background image

ARTURIA – ORIGIN – USER’S MANUAL 

148 

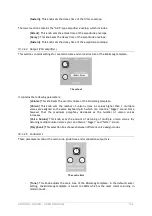
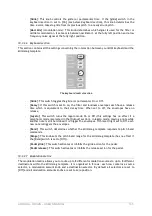
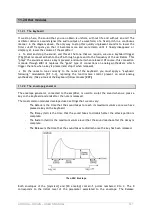
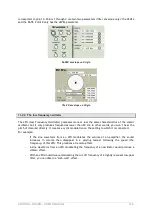
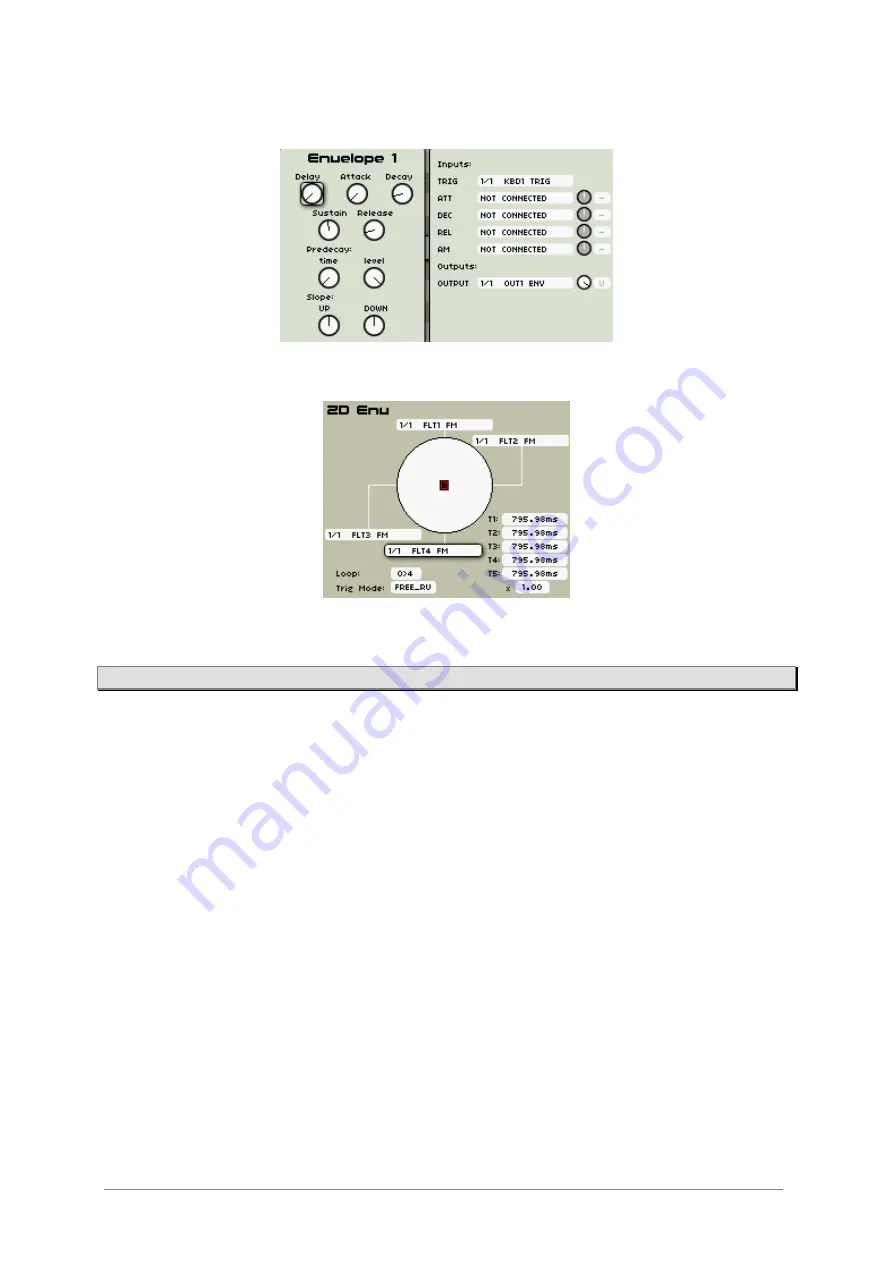
corresponds to point 4. Points 1 through 4 contain two parameters (filter envelope only): the LEVEL 
and the RATE. Point 0 only has the LEVEL parameter. 


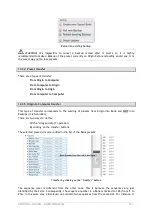
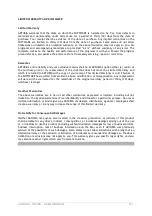
DADSR envelope on Origin 


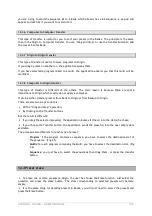
The 2D envelope on Origin 

11.2.3


The low frequency oscillator 

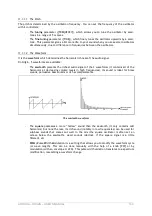
The  LFO  (

Low  Frequency  Oscillator

)  possesses  more  or  less  the  same  characteristics  of  the  classic 

oscillator  but  it  only  produces  frequencies  lower  than  20  Hz.  In  other  words,  you  won’t  hear  the 
pitch of its sound directly. It creates a cyclic modulation on the setting to which it is connected. 

For example:  

-


If  the  sine  waveform  from  an  LFO  modulates  the  volume  of  an  amplifier,  the  sound 
increases  in  volume  then  disappear  in  a  varying  manner  following  the  speed  (the 
frequency) of this LFO. This produces a tremolo effect. 

-


A sine waveform from an LFO modulating the frequency of an oscillator would produce a 
vibrato


effect. 

-


With an LFO sinusoid wave modulating the cut-off frequency of a lightly resonant low-pass 
filter, you can obtain a “wah-wah” effect. 

Summary of Contents for TAE ORIGIN

Page 1: ...ARTURIA ORIGIN USER S MANUAL 1 U US SE ER R S S M MA AN NU UA AL L O OR RI IG GI IN N ...

Page 2: ...ure agreement The license agreement specifies the terms and conditions for its lawful use No part of this manual may be produced or transmitted in any form or by any purpose other than purchaser s personal use without the explicit written permission of ARTURIA S A All other products logos or company names quoted in this manual are trademarks or registered trademarks of their respective owners ARTU...

Page 3: ...l Flash Loïc Biarez AV Trade Gérard Buracchini MANUAL Jean Michel Blanchet Thomas Koot Houston Haynes Antoine Back SPECIAL THANKS TO Charles Malka Carl Conrad Francis Martin OSEO ANVAR Philippe Girard Buttoz Gilles Benhamou Asteel Flash Cédric Veslot AVNET Christian Faure Jessica Denis Labrecque Analog Devices Frank Orlich Athan Billias Yamaha Benoît Widemann Christophe Martin de Montagu Pierre Co...

Page 4: ... 1 3 Joystick section 16 4 1 4 Analog section 17 4 1 4 1 Oscillator section 17 4 1 4 2 Filter section 17 4 1 4 3 LFO section 17 4 1 4 4 Envelope section 17 4 1 5 Screen section 17 4 1 6 Sound Select section 18 4 1 7 Mixer section 18 4 1 8 Effects section 18 4 1 9 Sequencer section 19 4 2 Rear panel 19 5 Connections 21 5 1 Connecting the AC DC power supply 21 5 2 Connecting Origin to headphones 22 ...

Page 5: ...y 42 8 Editing pages 44 8 1 Home page 44 8 1 1 Overview 44 8 1 2 MAIN tab 45 8 1 3 Demo tab 46 8 1 4 The SYSTEM tabs 47 8 1 4 1 The MIDI tab 48 8 1 4 2 The global SETTING tab 48 8 1 4 3 Reset button 50 8 1 4 4 SYSTEM HOME button 50 8 2 Preset page 50 8 2 1 Overview 50 8 2 2 The three types of presets Program Multi and New 51 8 2 2 1 Program Preset 52 8 2 2 2 MULTI Preset 52 8 2 2 3 NEW Preset 53 8...

Page 6: ... The sequencer s hardware real time controllers 84 8 5 10 2 Edit a sequence 85 8 5 10 3 Edit a sub sequence 86 8 5 10 4 The Global settings of the sequencer 88 8 5 10 5 Save and Save as a sequence 89 8 5 10 6 The Swap option 90 8 5 10 7 Delete a sequence pattern 90 8 5 11 The Arpeggiator 90 8 6 Effects FX page 91 8 6 1 Overview 91 8 6 2 FX page layout navigation and general control 92 8 6 3 Effect...

Page 7: ...25 9 1 2 6 Joymixer 126 10 The Minimoog template 128 10 1 What is a template 128 10 2 Minimoog story 128 10 3 Using the Minimoog template 128 10 3 1 Minimoog structure 129 10 3 2 The interface 130 10 3 2 1 Oscillator Bank 131 10 3 2 2 Mixer 132 10 3 2 3 Filter Modifiers envelopes 133 10 3 2 4 Output VCA amplifier 134 10 3 2 5 Controllers 134 10 3 2 6 Keyboard section 135 10 3 2 7 Modulation matrix...

Page 8: ...New sound banks 155 12 3 3 Backup 155 12 3 3 1 Creating new Backup 155 12 3 3 2 Reloading Existing Backups 156 12 3 4 Preset transfer 157 12 3 5 Origin to Computer transfer 157 12 3 6 Computer to Computer transfer 158 12 3 7 Origin to Origin transfer 158 12 3 8 Computer to Origin transfer 158 12 4 Preset erase 158 12 5 Origin update 159 13 ARTURIA ORIGIN SOFTWARE LEGAL INFORMATION 160 13 1 SOFTWAR...

Page 9: ... the time of printing However ARTURIA reserves the right to change or modify any of the specifications without notice or obligation to update existing units IMPORTANT Always follow the basic precautions listed below to avoid the possibility of serious injury or even death from electrical shock damages fire or other risks The product used either alone or in combination with an amplifier headphones ...

Page 10: ...C adaptor 8 Make sure the line voltage in your location matches the input voltage specified on the AC DC power adaptor 9 Do not open and insert anything on the instrument which may cause fire or electrical shock 10 Do not splash any kind of liquid onto the instrument 11 Always take the instrument to a qualified service center You will invalidate your warranty if you open and remove the cover and i...

Page 11: ...ibilities Origin contains 400 Program factory programs and 600 user editable program locations Each program consists of a number of modules oscillators filters mixers envelopes LFOs etc their connections and their routing to one or more of the up to four VCAs This structure allows you to create incredibly rich sounds Each program can be played by the step sequencer or the arpeggiator and connected...

Page 12: ...duction of totally aliasing free oscillators in all contexts PWM FM without extra processing costs Linear frequency spectrum of an existing well known software synthesizer Linear frequency spectrum of the ORIGIN oscillator made with TAE 2 3 2 A better reproduction of analog oscillator waveforms The waveforms produced by the oscillators in analog synthesizers are marked by the presence of a capacit...

Page 13: ...r mode can vary with the temperature and other environmental conditions we find one of the characteristics that contributed to the typical sound of vintage synthesizers TAE reproduces the instability of oscillators bringing a fatter and bigger sound 2 3 3 Direct filter circuit modeling Due to advances in DSP processing power Origin can now employ direct filter modeling techniques to achieve unprec...

Page 14: ...l instruments and the one it is emulating These harmonics are characteristic for analog filters and are due to the non linear behavior inherent to its analog circuitry The harmonics generated add to the richness and warmth of the sound produced by the filter As a result of the direct recreation of this analog circuitry the same characteristics of the sound are present thus giving the user a truly ...

Page 15: ...o wood sides and the hand rest of the instrument Screw the Origin s ears into a rack cabinet Unscrew the two wood sides and the hand rest 3 2 How to set the screen orientation As the Origin synthesizer can be used in various work conditions on stage on a rack on a table etc you can set the exposure and the contrast of the screen for a more convenient visualization and use Unscrew the right wood si...

Page 16: ... panel 4 1 Front panel 4 1 1 Output section You can find all of the output volume controls in the output section The Master Level knob adjusts the volume of the Main output The Headphones Level knob adjusts the overall volume of the headphone output 4 1 2 Input section The Input Level knob adjusts the input volume The Input bar graph shows the level of the signal at Origin s audio inputs 4 1 3 Joy...

Page 17: ...ent Program preset 4 1 4 3 LFO section The Frequency knob controls the frequency of the selected LFO module The Waveform encoder selects the waveform of the selected LFO module The Select encoder selects the LFO module to edit in the current Program preset 4 1 4 4 Envelope section The Attack knob controls the attack time of the selected envelope module The Decay knob controls the decay time of the...

Page 18: ... Exit button exits from a screen section menu or pop up box The Enter button confirms a selection or edited value 4 1 6 Sound Select section In this area you can find the dedicated features and controllers for preset and value selection The key pads 0 9 abc allow the selection of presets by numbers or cycling through letters for creating a new preset s name The jog dial allows selecting a preset i...

Page 19: ...ion mode The Assign button opens the assign pop up of the selected sub sequence The Hold button locks the currently playing sequencer step The sequencer is stopped and keeps sending its current modulation values until the lock button is pressed again The Trig button activates the key trigger on the current step of the selected sub sequence The Accent button triggers the accent envelope on the curr...

Page 20: ...ple MIDI devices Footswitch Pedal input Works with any standard normally open or normally closed momentary footswitch It is usually used for sustain pedal controller Expression Pedal input This input can be connected to a standard expression pedal Auxiliary outputs 1 8 These eight audio auxiliary balanced outputs are independent of the MAIN audio outputs This way you can process each of the progra...

Page 21: ...on all units If you don t you may damage your speakers the Origin synthesizer or other audio equipment Please use caution 5 1 Connecting the AC DC power supply Connect the included AC DC power supply to the Origin synthesizer After you ve connected the AC DC power supply to Origin plug it into an AC outlet ...

Page 22: ...ed to the Auxiliary Outputs 3 and 4 the output of channel 3 of the Multi mixer is connected to the Auxiliary Outputs 5 and 6 the output of channel 4 of the Multi mixer is connected to the Auxiliary Outputs 7 and 8 In Program mode the main stereo outputs of the program are directed to the Auxiliary Outputs 1 and 2 NOTE To take full advantage of Origin s capabilities we recommend that you output in ...

Page 23: ...ME page and press the System contextual menu button Set the Global MIDI channel to the desired value using the cursors or the data dial Confirm by pressing the Enter button 5 7 Connecting your computer Origin provides both MIDI connectors and a USB connector Both can transmit and receive MIDI data in the same way Use the type of connection that is most appropriate for your setup Using the USB conn...

Page 24: ...onnected to up to three effect slots The Multi preset allows you to assign up to four Programs for layering sounds as well as to assign a specific MIDI channel to each Program for four parts of multitimbral operation The global Origin architecture 6 2 The program preset The Program preset includes the modular synthesis structure which is the main part of the Origin instrument You can access this a...

Page 25: ...es Up to 8 ADSR and special AR envelopes Up to 4 LFOs Up to 4 independant keyboard followers 1 Ring modulator 1 Bode frequency shifter 1 Keyboard trigger 1 Joystick The graphically displayed preset below is an example of a basic synthesizer structure including 4 oscillators including a sync connection between the oscillators 1 and 2 1 mixer 1 filter 1 VCA 3 LFOs 2 envelopes 1 Key follow and 1 keyb...

Page 26: ...ding a stereo delay chorus ensemble phaser distortion and reverb The Program architecture 6 3 The Multi preset The Multi preset allows you to use up to four Programs simultaneously Each program can be assigned to a specific MIDI channel for up to four parts of multi timbral operation Alternatively you can assign all programs to the same MIDI channel to set up layering or keyboard split patches An ...

Page 27: ...l The ORIGIN synthesizer contains several demo songs numerous programs and a wide range of advanced features and functions For a quick introduction to all this fun follow along with this Quick Start guide 7 1 Turning on the power and adjusting the volume After connecting the AC DC power adaptor set the rear panel Power On Off switch to On The start up screen appears in the display when the machine...

Page 28: ...t them on the Headphones jack on the rear panel and adjust the Headphones Level knob Set the volume to an appropriate level 7 3 Demo playback ORIGIN contains several demo songs that take advantage of its rich sounds and expressive potential On the Home page press the Demo contextual button located in the top of the central screen to go to the Demo page Use the jog dial to select the first demo son...

Page 29: ...1 by turning the jog dial or using the or buttons located in the Sound Select section Select the preset on the Home page thanks to the jog dial Alternatively you can type the numbers manually using the numeric key pad in the Sound Select section NOTE For listening to the current preset before loading you can use the Preview option To do this press the jog dial to start the preview When you press t...

Page 30: ...key pad 7 5 Editing the preset To edit a preset we are going to start with a basic example Edit the brightness of the Reso_Pad sound with the Cutoff knob of the filter To do this turn the knob located in the Filter slot on the Analog section to the right or the left The timbre of the sound becomes more or less bright Change the knob to your liking Change the cutoff of the sound In the same way you...

Page 31: ...tivity by using the ON OFF switches 7 6 Saving your Program By making just a few modifications you have already edited the Program Reso_Pad You can now save the sound you ve just created Origin allows you to create up to 600 User Programs Their numbers begin at 400 and proceed to 999 To choose another destination number for the sound simply click the Save button This button is located in the botto...

Page 32: ...nd make all the needed connections between them to make your sound This way you will explore one of Origin s most interesting features allowing you to create an infinite variety of sounds To have access to these features go to the Edit page by pressing the button of the same name under the LCD screen The Edit page displays all the modules that make up the currently selected program The Edit page o...

Page 33: ...audio output of the oscillator will be connected to the mixer You can set the range and the pitch of the oscillator by selecting the Range Coarse or Fine parameters with the dedicated knobs on the Oscillator panel of the Analog area You can set the audio input mix of the three oscillators by opening the Minimixer 1 module To do this select the desired Gain 1 2 or 3 knob by using the arrows or turn...

Page 34: ...esentation of the original Minimoog Before we dive into the features accessible though the LCD screen let s just play the template first using the dedicated hardware buttons The Minimoog template interface There is already a sound loaded so you can start playing straight away To modify the sound a bit more to our personal taste try turning the Cutoff and Resonance knobs on the Filter section of th...

Page 35: ...he Select encoder on the Oscillator section This way you can browse through the different oscillators to select them for editing When the LCD screen displays the oscillator you wish to edit press the Select encoder Now the hardware knobs in the Oscillator section are assigned to the oscillator you ve just selected When the overall sound is the way you want it to be you can start shaping its amplit...

Page 36: ...s using the jog dial or the cursors The Filter settings Go to the Modulation Matrix section and press the data dial or the Enter button You will be presented with a pop up allowing you to route 8 different modulation sources to 8 different targets Using the jog dial move to the left slot of the upper row and press the data dial From the pop up menu select the Velocity control Now go to the right s...

Page 37: ...on of both using no more than 4 programs To add some breath to our current preset Reso_Pad preset n 0050 we ll use the MULTI mode to layer it with a flute Open the MULTI page by pressing the MULTI button under the LCD screen On the first mixer slot the current sound is Reso_Pad Select the second slot by using the button and press the value dial A pop up screen appears asking you to transform the c...

Page 38: ... sound Let s choose the n 002 3 Osc Program preset This is a Minimoog bass sound We ve already programmed all the connections with the sequencer for you feel free to reroute the connections to anywhere you want later The pitch of the oscillators is connected on the first sub sequence The cutoff frequency of the filter is routed to the second sub sequence What s more the trigger of the filter envel...

Page 39: ...ation section select Bank I and Pattern 1 As you can see all sub sequences are empty A blank sequence page Press the Edit Seq1 Seq2 Seq3 pattern switch on the Sequencer panel to select Seq 1 By moving one of the 16 knobs at the bottom of the Sequencer section you can set an integer value for the corresponding step of sub sequence 1 This value is the amount of semitones added or subtracted from the...

Page 40: ... the Decay and or Sustain parameters on the analog panel to hear a better result within the current sequence Now let s save your sequence and associate it with the current program preset Press the Save button on the bottom right of the Sequencer s page A dialog box appears allowing you to save your sequence Select the current I bank and the 01 sub bank for your sequence If you wish to save your se...

Page 41: ...rn the amount knob of LFO X to its right most position and adjust the waveform and speed to your liking Connect Filter 1 FM on Galaxy Following the steps above select a parameter for LFO Y for example Oscillator 1 FM and adjust the LFO to your liking LFO X and LFO Y now act as two independent LFOs When you now dial in the amount of LFO Phi and set its frequency all three LFOs start to interact whi...

Page 42: ...th of the Chorus by turning the Depth knob Set the Depth of the Chorus 7 12 2 The delay The Delay brings a stereo echo effect that adds space to your sound It possesses independent settings for speed and the number of repetitions on the right and left channel Therefore it is possible to create a big number of rhythmic combinations between the repetitions The delay times can be synced to the MIDI t...

Page 43: ...E You can set the volume of the three effects directly with the Return knobs located in the effect panel on the right of the Origin interface In this area you can also directly open the desired effect slot by pressing the Edit switches and bypass their activity by using the ON OFF switches ...

Page 44: ...page you can press the or buttons to select the desired section and press the jog dial to validate the selection this one is highlighted in red Then turn the jog dial to set the parameter 8 1 Home page 8 1 1 Overview The Home page is the starting point for navigating through Origin s LCD screens Here you can browse select and preview any of the available presets In the Demo tab you can find factor...

Page 45: ...n a number it automatically loads the corresponding preset after 1 second Another method is pressing the Sound Select key pad By pressing the numbers you can directly jump to the preset of your choice If you press a 4 digit number the corresponding preset can immediately be loaded When you press a 3 2 or 1 digit number the number you ve just typed blinks in red and loads within two seconds For exa...

Page 46: ...ted preset If the PROGRAM uses a step sequencer preset the PREVIEW trigs the sequenced pattern To listen to a PREVIEW simply load a preset as described above and press the jog dial or the Enter button The PREVIEW plays until it completes or it can be manually stopped by again pressing the jog dial or the Enter button on the front panel This is a very good way to gain a quick first impression of th...

Page 47: ...ted multi preset ID as well as the program presets used within the multi This can be helpful in identifying individual sounds that may spark your interest or provide you with inspiration to create your own sounds The song info 8 1 4 The SYSTEM tabs The SYSTEM tab contains several sub tabs of its own which are shown at the top of the LCD screen when the SYSTEM tab has been selected These include th...

Page 48: ...fault value is 1 Global MIDI Channel 1 16 The global MIDI channel only concerns program presets it determines to which MIDI channel the program presets responds For the Multi presets the MIDI input channel is set on the per program basis within the Multi page The default value is 1 Global Synchro Inter MCloc The global synchronization can either be controlled internally or through MIDI Clock data ...

Page 49: ...lti The default value is 0 Global Tune 420 to 460 The Global Tune allows you to set Origin s main tune to a value other than the A 440Hz that is common practice today This setting affects all presets on the Origin Again like the Global Transpose value above this control is separate from the Voice Unison Detune controls on the program level The default value is 440 Last Preset ON ON OFF When set to...

Page 50: ...ed by pressing the second button from the right along the top of the LCD screen The Reset button 8 1 4 4 SYSTEM HOME button This is a context sensitive button that changes to SYSTEM when the user is in the HOME page and HOME when in the SYSTEM settings The SYSTEM tab allows the user to navigate to the SYSTEM SETTINGS tabs and the HOME tab returns the user to the primary screens for the HOME page T...

Page 51: ...me in the lower right corner of the display area Likewise you will see a graphic representation of the program template that is selected For individual programs you can see PGM in the lower left corner of the display area and one graphic that represents the type of synthesizer template used as the basis for the patch When a multi is selected you can see Multi in the lower left corner of the displa...

Page 52: ...generation and real time control functions Additionally each program can have a linked sequence or arpeggiator plus individual settings for the Galaxy 2D envelope and LFOs The Program preset tab 8 2 2 2 MULTI Preset A MULTI consists of a selection of up to four Program presets along with various settings for use in both live performance and host sequencing recording situations In a Multi the FX as...

Page 53: ... tool for tweaking your favorite synthesizer straight away without having to create it from scratch The Minimoog template is the first template included in the initial firmware version of Origin Other synthesizer templates the ARP 2600 the CS 80 and the Jupiter 8 will be offered with future updates of the Origin Select a new Minimoog template A third category of template is directly dedicated to c...

Page 54: ...Sequencer page 8 2 3 Loading a Preset Scrolling through the presets on the preset page works mostly the same way as on the home page By turning the jog dial you can quickly scroll through the list of presets The current selected preset is highlighted in black To load the preset you want highlight it and press the jog dial or the Enter button on Origin s front panel Another method is pressing the S...

Page 55: ...tegory for one field it is not available in the other key field Below is a listing of the Key categories and their respective values Synth Origin Minimoog future firmware versions will offer more ARTURIA Classic Analog Synth templates Type Ambient Arpeggio Bass Bell Brass FM FX Guitar Keyboard Lead Pad Percussive Sequence String Other Project a range of Factory and User created projects for repres...

Page 56: ...ction of presets to specific Projects Once that value is set the number of Multi presets is narrowed down to the appropriate selection MULTI filter 8 2 4 3 Delete a preset You can delete a User Program any preset location above 0399 or Multi location above 0999 by pressing the Delete button on the upper right corner of the Preset page ...

Page 57: ...ram PGRM page contains a range of functions settings and values that have overall impact on the selected preset Some of the controls available on this page are duplicates of hardware controls that are on the front panel of the Origin such as the audio and Fx MIXER sections The program page ...

Page 58: ...arallel mode Origin s FX mixer works in a send return configuration often found on mixing desks For each VCA you can control the amount of signal sent to all individual effects The outputs of all the effects are mixed with the dry output signals and then sent to the Main output In this mode the knobs function as follows FX 1 2 3 These knobs control the amount of signal sent to the corresponding ef...

Page 59: ...d the pre post switch are grayed out since they have no effect and the Ret knobs change to D W see below Pan These knobs control the panoramic placement of the VCA This knob controls the same parameter as the pan knob found on the corresponding VCA module in the Edit page The VCA volume slider at the bottom sets the volume of the corresponding VCA This knob controls the same parameter as the volum...

Page 60: ... a preset on the voice program and global level The advanced 2D Envelope To choose a modulation destination for the four modulation slots select the desired connection box thank to the jog dial and the buttons Press on the jog dial again or on the Enter button to open the destination menu Choose a destination VCF1 FM for example using the jog dial and press on it again to validate this choice ...

Page 61: ...velope to the next with a multiplier to extend the range of values between stages To position the four points select the center of the joystick using the jog dial the value 0 is indicated at first and slide the joystick to choose a position for this point Make the same for the other points from 1 to 4 Slide the joystick to choose a position for the points From there the only modifiable parameters ...

Page 62: ...ving on the A axis of an A B plane Likewise the LFO B output can be thought of as a point moving on the B axis in the same plane When we combine these two points we can construct a point floating through the plane which has its A coordinate described by LFO A and its B coordinate described by LFO B Galaxy The Galaxy Output X is the projection of this point on the X axis of an X Y plane Output Y is...

Page 63: ...of the respective LFO The galaxy LFOs offer four waveforms sawtooth saw square sine and triangle tri The middle selection box sets the frequency of the corresponding LFO The lower Amount knob sets the amplitude of the corresponding LFO Output connections Output Y The Y projection modulation output Output X The X projection modulation output To choose a modulation destination for the Output Y and O...

Page 64: ...is knob determines the delay time between a trigger at the Trig input see below and the beginning of the LFO action This does not restart the LFO phase Fade in This knob sets the transition time between the end of the delay and the point where the LFO reaches its normal amplitude When this knob is set to zero the LFO directly applies full modulation when delay time is over The fade in can be used ...

Page 65: ...lation signals PWM input This input modulates the pulse width or symmetry of the LFO This input is only active when the square of triangle waveform is selected Set the output connections Output This is the output of the LFO you can connect it to the modules you want to be modulated by the LFO The Program LFOs connections 8 3 6 Common section The common area is located on the right side of the disp...

Page 66: ...eans that if two notes are presented at the same time it is the lowest note that is played Mono High Mono mode with priority to the higher note This means that if two notes are presented at the same time it is the higher note that is played Mono Last Mono mode with priority to the last note This means that if two notes are presented at the same time it is the last note that is played NOTE The fiel...

Page 67: ... primitives i e the basic functions and controls that are available within the Edit page Specific descriptions of the modules will be covered in chapter 8 of this manual One thing in particular that deserves attention when working with the Edit page while most pages within the Origin firmware use the row of buttons above the LCD screen as tabs for navigating sub pages and sub menus the Edit page i...

Page 68: ...the organization of the preset but the visible rack controls also provide an indication of the modules configuration All rack view parameters visually track the movement of the hardware controllers that relate to them This can be very helpful in providing a quick snapshot view of a program s relative settings for rapid selection and detailed editing of various modules Aside from using the rack vie...

Page 69: ...greater flexibility in positioning the modules to make things such as control and audio routing a bit easier to visualize As such there are additional controls in the patch view that are not available in the rack view the move and view controls which will be described below In the patch view the modules have no visible controls you have to open the module to see its state 8 4 3 Editing Functions T...

Page 70: ...is the first module that is configured by default for any program This is an example of what happens when you have reached the maximum number of instances for an individual module that a program can support Below is a summary listing of the modules available within the Add menu 1 Keyboard module The Oscillators up to 9 oscillator modules simultaneously Origin ARP 2600 CS 80 Minimoog Jupiter 8 Wave...

Page 71: ...responding module This can save a great deal of time by allowing you to access the most important parameters for certain modules directly from their dedicated front panel controls First you must ensure that the front panel controls have selected the module you wish to edit Use the Select encoder to focus the front panel controls to the desired module Once that is done whether you are in the genera...

Page 72: ...ion using the jog dial or or buttons on the front panel and either press the jog dial or press the Enter button on the front panel to commit the change Where similar routing and settings can be preserved the new module adopts all of the settings and routing of the old module 8 4 3 4 Move The Move function is only available in the patch view When pressing the Move button you can move the currently ...

Page 73: ...ation press the Move button which will then return to its normal state Note that moving modules has no effect in the Rack view nor does it has any impact on the sound or functioning of you patch 8 4 3 5 Remove The second button along the top of the LCD panel allows you to delete a module from the view Simply highlight the targeted module using the jog dial or or buttons on the front panel of the O...

Page 74: ...that your program currently consumes It is located in the option bar above the Edit interface As you add remove or change modules this percentage adjusts The number is based not only on the DSP required to generate the modules for a program preset but also accounts for the complexity of the routing and overall polyphony setting that s controlled through the Program page The CPU indicator 8 4 4 Sav...

Page 75: ...e button you are automatically directed to the Save Program Multi As screen to commit your changes to a new User preset memory location Any existing User Preset location cannot be overwritten You can select the preset memory slot by activating the Save as box using the cursors Confirm this selection by pressing the Enter button This directs you to the location number of the new preset Turn the jog...

Page 76: ...igner value for this preset is saved automatically from the Owner Name field of the SYSTEMS SETTINGS page 8 5 MULTI page 8 5 1 Overview The MULTI page allows you to configure a group of up to four Origin Program presets for a variety of uses for example live performance using several programs in layering or split combinations as well as MIDI sequencing and recording Each program can have its own s...

Page 77: ...igate to the Preset page and press the MULTI tab The left section of the preset page now displays all multi presets on your Origin To create your own simply navigate to an Empty preset and load it You can now start adding programs to this new multi in the program page see below To create a new multi from a program preset first load the program preset you want to use for your new multi When this pr...

Page 78: ...TI preset on your computer using the Origin software 8 5 3 Adding programs presets 0000 0999 to a multi To add a program to your current Multi go the MULTI page On the top of each of four slots in the multi mixer the name and number of the program used in that slot is displayed shows none if no program is loaded Navigate to the slot of interest and press the selection menu displaying None Alternat...

Page 79: ...default value is C 2 Hi C 2 G8 the selection box sets the highest note the program responds to You can use it to set up keyboard splits The default value is G8 8 5 5 The different uses of the Multi The MULTI page offers three possibilities to configure a group of up to four Origin Program presets for a variety of uses layering split combinations and MIDI sequencing and recording 8 5 5 1 Layering T...

Page 80: ... 8 5 6 Volume and front panel mixer in Multi mode The audio level for each Program preset within the Multi is represented in the Multi MIXER screen by the slider displayed at the bottom of each slot NOTE The audio output signal of each Multi slot is directed automatically to its own Auxiliary outputs jacks The audio output of the first slot goes to the Auxiliary outputs 1 2 the second slot goes to...

Page 81: ...ll as FX and individual program parameters Likewise when switching between slots in the Multi the context of the active screen in the LCD display is preserved For instance if you are looking at the Galaxy settings for PGM 1 and then select the Edit button for the PGM 2 on the Origin front panel the focus of the Origin front panel shifts to the settings that correspond to the second slot and the Ga...

Page 82: ...d you are prompted to save the step sequencer pattern to a new memory location 8 5 9 Saving a Multi as You can change the location place or and the name of the current multi preset by using the Save As option Select the Save As box using the cursors Confirm this selection by pressing the Enter or the jog dial buttons Select the Save as box and select a new location number This directs you to the l...

Page 83: ...for the project Press the Save button again to validate the save function 8 5 10 The Step Sequencer The step sequencer uses up to 32 steps It allows the creation of several melodic lines when one of the three available modulations is affecting the frequencies of the VCO as well as creation of dynamic modulations of other parameters such as the cutoff frequency of a VCF or on the square waveform wi...

Page 84: ...3 Act buttons activate or deactivate sub sequence 1 3 The Edit Seq1 Seq3 Pattern button selects the corresponding sequence for editing or when Pattern is selected activates pattern selection mode The Assign button opens the assign pop up of the selected sub sequence The Seq1 3 Act Edit and Assign buttons The Trig button activates the key trigger on the current step of the selected sub sequence NOT...

Page 85: ...de these buttons select a pattern preset 1 16 The step sequencer buttons and encoders 8 5 10 2 Edit a sequence The editable parts of the sequencer are located on the Sequencer page and its sub tabs These can be reached by pressing the Seq button under the LCD screen The parameters on the sequencer page allow you to edit several advanced parameters that cannot be accessed on the front panel Three t...

Page 86: ...line The Quantized Not Quantized option allows you to activate the quantization of the steps by semi tones The Amount knob allows setting the modulation level of the sub sequence The B for bipolar or U for Unipolar selector allows you to set the polarity of the selected modulation The connections and amount settings 8 5 10 3 Edit a sub sequence The sub sequence edition screens allow you to go deep...

Page 87: ... connecting one or several modulation input s to the selected sub sequence output The Trig menu allows connecting a trig signal to the selected sub sequence Actually the keyboard trig output The sub sequence output can be connected to any modulation inputs in this way Go to the connection menu s box using the jog dial or the or the buttons Press the jog dial or the Enter button to open the menu an...

Page 88: ... knob sets the length of the pulses for the gates this setting affects all the steps of the selected sub sequence The modulation settings of the sub sequence 8 5 10 4 The Global settings of the sequencer The Global settings include The memory location of the current pattern 8 Factory Banks named from A to H and 8 user Banks named from I to P Each bank contains 16 patterns 1 16 The number of steps ...

Page 89: ...each To save the current edited pattern select the Save button on the bottom of the Global section using the jog dial or using the buttons Then press on the jog dial or on the Enter button to open the Save box The Save option allows to save directly the current pattern on its own memory The Save option WARNING This option is not enabled for the Factory patterns The Save as option allows to the cur...

Page 90: ... saved settings of the selected pattern Select the Erase button on the bottom of the Global section using the jog dial or using the buttons This action opens the Erase box Then press again on the jog dial or the Enter button to erase the pattern and close the Erase box 8 5 11 The Arpeggiator This section shows the connections that are necessary to make the arpeggiator work It allows performance of...

Page 91: ...io across two octaves 3 transposes the arpeggio across three octaves 4 transposes the arpeggio across four octaves 5 transpose the arpeggio across five octaves NOTE The arpeggiator settings are saved when you save your current Program 8 6 Effects FX page 8 6 1 Overview The Effects FX section of Origin is as integral to its sound as any of its other features and capabilities Aside from the exceptio...

Page 92: ...her times dramatic role that the effects can play in any given scenario The FX page 8 6 2 FX page layout navigation and general control The FX page display is divided into two areas The left side of the display shows details of the selected FX tab The right side of the display shows summary information on the selected effect for FX 1 3 Use the top left buttons above the display to access specific ...

Page 93: ...t Rate This parameter sets the base rate of LFO modulation for both channels Spread This parameter varies the delay between channels It is like the Width control where positive settings for this slightly increase the gap between Delay time in the right and left channel creating a wider effect Delay This parameter sets the amount of time before the modulated signal is introduced back into the sound...

Page 94: ...setting In this case you can also control this parameter using the Return knobs in the Effects section on Origin s front panel If the mixer is configured in parallel setting the dry wet knob is grayed out always 100 wet Sync If set to ON the delay time of both channels synchronize to multiples of either the internal clock or MIDI clock depending on the SYSTEM SETTINGS tab of the HOME page If this ...

Page 95: ...ut always 100 wet 8 6 3 4 Distortion This particular effect has the simplest set of controls of all FX within the Origin Yet it can have a profound impact on the sound You can use this to add a bit of edge to a pad or you can go full bore and turn a lead sound into a screaming monster The distortion Drive This knob sets the amount of drive distortion of the effect Higher values yield a more distor...

Page 96: ...nual for more information If this setting is set to OFF the delay times can be set independently Dual mode If this switch is set to ON the two phasers are configured in a serial connection i e the output of phaser 1 is fed into phaser 2 When set to OFF both phasers work in parallel 8 7 Live page 8 7 1 Overview The Live page is the place where you can set macro level edits for each area of the anal...

Page 97: ...he far right corner of the display The Live page 8 7 2 The Live tab The Live tab shows an overview of all the front panel assignations of the current program By itself it has no functions and is only intended to give an overview The Live page details This page is divided into three sections The far left and right sections show the assigned parameter of the 8 individual live encoders ...

Page 98: ... way to the right until the display shows Macro oscillator and press the Select button When you now turn the Frequency or Tune knob all oscillators affected by macro control tracks the movement of the knob The following sections of this manual will describe how to configure the macro edit modes for each area of the analog section of the front panel of your Origin 8 7 3 2 Oscillator Tab This screen...

Page 99: ... This screen allows you to decide which LFO module in the current Program is affected by the LFO macro mode setting The LFO macro edit page To select or unselect a module jog to the corresponding module and select deselect it You are able to control up to 6 LFOs simultaneously depending on the number of LFOs that are selected for your program preset 8 7 3 5 ENV Tab This screen allows you to decide...

Page 100: ... set the individual controllers that are routed to the various destinations within the Program preset The MIDI edit page The process for selecting output for a MIDI control is similar to the method used to set input and output destinations within modules 8 7 4 Advanced Joystick 8 7 4 1 Overview The Joystick tab is where the destination of the X and Y axis of each joystick mode is selected and edit...

Page 101: ...e joystick is similar to the method used to set input and output destinations within modules in the Edit page Simply highlight the desired axis for a given mode and either press the jog dial or the Enter button on the front panel to open up a context sensitive list of modulation control destinations Select the desired destination and note that it is not listed in the axis field Once you have selec...

Page 102: ...allow you to access many other useful features from the front panel 8 7 5 2 Assigning Live Encoders from the front panel The primary method for assigning a Live Encoder to a parameter is to use the front panel controls directly The Live Encoders operate much like the jog dial in that it is both a rotary control and a selection control by pressing on the knob To assign a Live Encoder simply navigat...

Page 103: ...e green and yellow and when you select a particular destination it changes to the color that corresponds to the control that is assigned to it Also note that when you return to the Live tab on the Live page the new assignment is now reflected in the location of the display corresponding to that Live Encoder ...

Page 104: ...uttons to select the desired knob of dialog box and press the jog dial to validate the selection highlighted in red Then turn the dial to set the parameter NOTE If you wish to manually edit an oscillator filter VCA LFO and envelope modules you can use the hardware dedicated knobs or encoders situated included on the analog control panel on the left of the LCD screen Each module has audio and modul...

Page 105: ...nt for the creation of a sound on a synthesizer The VCO for Voltage Controlled Oscillator is the generic word used for the oscillator module in subtractive synthesis The oscillator generates a sound signal that is characterized by its waveform We can think of the oscillator s waveforms as a violin string that always resonates You can set the frequency of the oscillator using its pitch parameters a...

Page 106: ...s in high frequencies Its sound is ideal for brass sounds bass sounds or rich lead and pads The square possesses a more hollow sound that the sawtooth It only contains odd harmonics with lower amplitudes for higher harmonics This waveform can be used for sub bass sounds that comes out well in the mix the square oscillator is often set an octave below that of the sawtooth wood sounds clarinet if th...

Page 107: ...ve when the square waveform is selected It allows you to modify the waveform cycle with for example an envelope or LFO The pulse width modulation creates spectrum modifications comparable to a chorus effect if you use an LFO The Amount knob allows you to set the depth of the selected modulation The Bipolar or Unipolar selector allows you to set the polarity of the selected modulation The Output co...

Page 108: ...FM routings The triangle can be considered as a filtered and soft square signal It contains only odd harmonics at very low amplitudes Use this waveform for example for sub basses and flute sounds The white no white noise waveform produces acoustic energy across a broad spectrum of frequencies with no discernible fundamental or harmonic signature For this reason the noise module is used to create d...

Page 109: ...ss sounds or rich lead and pads The square possesses a more hollow sound that the sawtooth It only contains odd harmonics with lower amplitudes for higher harmonics This waveform can be used for sub bass sounds that comes out well in the mix the square oscillator is often set an octave below that of the sawtooth wood sounds clarinet if the square signal is a little filtered etc The sine is the pur...

Page 110: ...s for Fears Ultravox Michael Jackson used on his Thriller album Moby David Bowie and Alicia Keys The Jupiter 8 oscillator has one of the most surgical sound from all the VCO s for Voltage Controlled Oscillator All the waveforms are very close to the mathematical waveforms we can have in laboratory oscillators Its tune is also very stable contrary to most of other analog VCOs modules The Jupiter 8 ...

Page 111: ...tput of the oscillator You can use for example a LFO to create tremolo effects or an envelope to control the output level over time NOTE The high frequency modules outputs such as oscillators are not available at the AM input If you wish to generate non harmonic frequency components like metallic sounds you can use the dedicated Ring modulator module PWM This input allows you to modulate the pulse...

Page 112: ...monics at decreasing volume levels in high frequencies Its sound is ideal for brass sounds bass sounds or rich lead and pads The square possesses a more hollow sound that the sawtooth It only contains odd harmonics with lower amplitudes for higher harmonics This waveform can be used for sub bass sounds that comes out well in the mix the square oscillator is often set an octave below that of the sa...

Page 113: ...is reset to its starting phase When the two oscillators are not in tune this phase reset causes sudden jumps in the waveform which generates the typical sharp sync sound The Amount knobs allow you to set the depth of the selected modulation The Bipolar or Unipolar selector allows you to set the polarity of the selected modulation The Output connections Audio This is the audio output of the oscilla...

Page 114: ...u to set the depth of the selected modulation The Bipolar or Unipolar selector allows you to set the polarity of the selected modulation The Output connections Audio This is the audio output of the oscillator You can for example connect this output to a mixer module to mix the oscillator signal with other audio modules Alternatively you can connect it directly to a filter or VCA module NOTE The os...

Page 115: ... particular sound thanks to its ladder structure The resonance response is also sounding more smooth than an ARP s one for example Without any resonance the sound is one of the fattest ever The Minimoog filter The Frequency knob sets the cut off frequency of the filter The Emphasis knob also called resonance or Q sets the amplification amount of frequencies close to the cut off frequency The other...

Page 116: ...e a lot of resonance The ARP filter The Filter Freq slider sets the cut off frequency of the filter The Fine Tune slider allows you to tune the cutoff frequency more precisely This setting is mostly effective when the filter is self oscillating see below The Resonance slider sets the amplification amount of frequencies close to the cut off frequency The other frequencies are either unchanged below...

Page 117: ...lter on the first and a low pass filter on the second filter The CS 80 filter The green Frequency slider sets the cut off frequency of the filter The red slider sets the resonance RES amount of the filter The Type The selection box under the Frequency slider selects the type of filter It offers you 2 types both have a 12dB Oct slope LPF Low pass filter This filter progressively attenuates frequenc...

Page 118: ...e determines the amount of amplification of frequencies close to the cut off frequency The other frequencies are either unchanged below the cut off frequency or reduced above the cut off frequency The Types The Type selection box selects the filter type It offers three types 4P LP or 2P LP Low pass filter In this mode the filter progressively attenuates frequencies above the cut off frequency 4P L...

Page 119: ...lter type It offers a wide variety of filter types 4P LP or 2P LP select a low pass filter In this mode the filter progressively attenuates frequencies above the cut off frequency 4P LP selects a 4 pole 24dB Oct slope 2P LP selects a 2 pole 12dB Oct slope 4P HP 2P HP or 1P HP select a high pass filter This filter acts as the inverse of a low pass filter It progressively attenuates frequencies belo...

Page 120: ...sets the overall volume of the audio signal NOTE The output volume parameter can be also controlled real time with the dedicated hardware Volume knobs located in the Mixer section on the top right of the front panel The Pan determines the panoramic placement of the audio signal The Input connections Env This is the dedicated input for the envelopes Output 1 is automatically connected to Envelope 1...

Page 121: ...dulations on your audio modules like envelopes LFOs or joystick 9 1 2 1 Keyboard following The Keyboard following module is one of most important for use with a keyboard This module first scales the input signal according to the keyboard s basic range setting Then it quantizes the scaled input signal to the closest exact semitone which fits in the semitone scale following the well tempered scale s...

Page 122: ...ction parameters The ADSR envelope is composed of four successive sequential periods Attack time Decay time Sustain voltage and the Release time When you send the signal for the note by pressing the key on the keyboard the envelope begins the sequence beginning with Attack then Decay and stays in the Sustain as long as the note is active When the note is released the envelope finishes with the Rel...

Page 123: ...onnections Trigg Input trigger signal connection for the envelope Att Modulation Input connection for the attack time of the envelope Dec Modulation Input connection for the Decay time of the envelope Rel Modulation Input connection for the Release time of the envelope The Amount knob allows you to set the depth of the selected modulation The Bipolar or Unipolar selector allows you to set the pola...

Page 124: ...s modulation changes the pulse width of the square signal or the phase of the triangle and the sawtooth waves The Amount knob allows you to set the depth of the selected modulation The Bipolar or Unipolar selector allows you to set the polarity of the amount of modulation The Output connections Output This is the output connection of the LFO 9 1 2 4 Ring modulator The ring modulator multiplies two...

Page 125: ...mix of the two the mix is set with the Mix button The translation rate which is to say the difference in frequencies is set with the frequency button Following the selected scale scale selector the button gives a different gap The scale also influences the amplitude and type of modulation In the exponential position the translation goes from 2Hz to 1 024Hz the modulation being exponential In the o...

Page 126: ...e or buttons and press the jog dial to validate the selection highlighted in red Move the joystick to the place you want The first point of the joystick moves on the screen value 4 is indicated at first Select the second point by pressing the or buttons and do the same for the other points From there the only modifiable parameters are the durations of the movements of the joystick between each poi...

Page 127: ...e Amount knob allows you to set the depth of the selected modulation The Bipolar or Unipolar selector allows you to set the polarity of the amount of modulation The Output connections Output This is the output connection of the JoyMixer ...

Page 128: ...s synthesizer was a small 44 notes portable keyboard with a pre wired synthesis structure Though it didn t offer as many possibilities as the modular systems it did offer the great and warm sound Moog was already famous for Due to the fact that it was practical affordable relatively simple and most of all sounded very good it became it great success and was played by the likes of Pink Floyd Herbie...

Page 129: ...efault the amplitude envelope is selected for editing To change this turn the Select encoder in the Envelope section When the LCD screen displays the envelope you want to edit press the Select encoder Now we will use some of the features included in the template which are not found on the original Minimoog We ll modulate the filter frequency using the velocity so that when we strike a key hard the...

Page 130: ... also be used as a modulation signal The mix between these two signals can be set with the Mod Mix knob and the amount of modulation is controlled by the modulation wheel The modulation of the filter and oscillators can be independently switched On and Off The external LFO which is added to the original Minimoog structure can be routed to virtually any destination within the Minimoog template usin...

Page 131: ...ed screen section press the jog dial or the Enter button This opens a pop up on top of the Minimoog interface which allows you to modify its containing parameters Open the oscillator bank You can press the exit button anytime to return to the main interface of the Minimoog template only works on the Edit page Below is a detailed description of each screen section of Origin s Minimoog template 10 3...

Page 132: ...1 Fine These knobs control the fine tuning of the corresponding oscillator only available on oscillator 2 and 3 Coarse These knobs control the coarse tuning of the corresponding oscillator only available on oscillator 2 and 3 Waveform The three selection boxes in the column below waveform at the far right set the waveform of each oscillator The following waveforms are available TRI triangle TRI SA...

Page 133: ...tivates or deactivates the modulation of the filter cutoff by oscillator 3 Filter Control These two switches control the modulation of the filter cutoff by the keyboard follow There are four different settings for the keyboard follow When both switches are set to off the filter is not modulated by the keyboard follow If only the upper switch is set to on the filter cutoff tracks the keyboard frequ...

Page 134: ...og template Unison This knob sets the number of unison voices At values higher than 1 multiple voices are assigned to the same keyboard pitch which can create a bigger sound Note however that the maximum polyphony decreases as the number of unison voices increases Voice Detune This knob sets the amount of detuning of multiple unison voices By detuning multiple unison voices you can obtain a bigger...

Page 135: ...to off the envelopes have no release Legato This switch turns the legato mode On or Off this settings has no effect if a polyphonic mode is selected in the Output section In legato mode playing a note while another note is still held doesn t retrigger the envelopes If this setting is set to Off each new note retriggers the envelopes Bend This switch determines whether the Minimoog template respond...

Page 136: ...e modulation the right positions a positive modulation The right Destination selectors are drop down menu s that allows you to select a destination to be modulated by the designated source Select a destination connection 10 3 2 8 LFO This section contains the settings for the mono LFO of the Minimoog template It was not available on the original Minimoog The Minimoog s LFO Rate This knob sets the ...

Page 137: ... waveforms Sine triangle Tri sawtooth Saw Square and Random Sync This selection box allows you to sync the LFO to the internal or external clock When sync is On turning the Rate knob chooses only frequencies that are integer multiples or divisions of the master tempo When sync is set to Off the Rate knob has its own logarithmic scale ...

Page 138: ...ldy forms of synthesis techniques such as additive or granular to name but two As a basic overview to subtractive synthesis one may consider any sound created either in nature or on your synthesizer of choice as consisting of a number of sine waves or harmonics grouped together In subtractive synthesis we start with a harmonically rich sound such as a saw wave and through filtering we remove the s...

Page 139: ... presents the richest audio signal of the 3 waveforms it contains all of the harmonics at decreasing volume levels in high frequencies Its sound is ideal for brass sounds percussive bass sounds or rich accompaniments The sawtooth waveform The square possesses a more hollow sound than the sawtooth it only contains odd harmonics but none the less its rich sound notably in low frequencies can be used...

Page 140: ... in harmonics odd only and is very useful for creating sub basses flute sounds etc The triangle waveform The sinusoid is the purest of them all It is a single harmonic and produced a very damped sound It can be used to reinforce the low frequencies of a bass sound or as a frequency modulator in order to create harmonics that don t exist in the original waveforms ...

Page 141: ...te random cyclic variations On hard wired synthesizers the noise module is either integrated into the oscillator its audio output being placed to compliment the waveform outputs or within the mixer directing the signals towards the filter Waveforms on Origin s Oscillator 11 1 1 3 Synchronization The synchronization of an oscillator with another creates more complex waveforms If for example you syn...

Page 142: ...V if you turn the modulation rate ring you can obtain a sound richer in harmonics If you introduce a square or sawtooth signal the result can be quickly distorted but interesting for enharmonic sonorities like bell sounds or special effects for example Example of Frequency Modulation FM 11 1 2 The Mixer The audio signal generated by an oscillator the waveform is generally directed towards a filter...

Page 143: ...or VCF Voltage Controlled Filter It is this module that we use to control the sound by filtering by removing or subtracting certain frequencies which explains the name given to this type of synthesis the harmonics situated around a cut off frequency It can be considered to be a sophisticated equalizer that reduces depending on the filter type the high or low frequencies of a sound The removal of u...

Page 144: ...he type of filtering that you can mostly find on synthesizers that use subtractive synthesis It can be found on most of the recent analog and digital synthesizers Low Pass Filter The high pass HP filter acts symmetrically to that of the low pass filter It eliminates frequencies below the cut off frequency High Pass Resonant Filter The band pass BP filter is the combination of a low pass filter and...

Page 145: ...liment the cut off frequency the resonance you can also find it called emphasis or Q for Quality of filtering The resonance amplifies frequencies close to the cut off frequency The other frequencies remaining are either unchanged below the cut off frequency or reduced above the cut off frequency When you increase the resonance the filter becomes more selective the cut off frequency is amplified an...

Page 146: ...r with the frequency of the oscillators The Origin s Filter module 11 1 4 The amplifier or VCA The amplifier VCA for Voltage Controlled Amplifier receives the audio signal coming from the filter or directly from the oscillator if it is not being filtered to be adjusted before the volume is sent to the speakers The Origin s VCA In conclusion here is a diagram that should help you to understand the ...

Page 147: ...y is pressed and stop it when released For the notes to tune correctly to the notes of the keyboard you must apply a keyboard following modulation KF 1 4 replacing the 1volt octave control present on most analog synthesizers Take a look at the Keyboard follow module KBF 11 2 2 The envelope generator The envelope generator connected to the amplifier is used to sculpt the sound when we press a key o...

Page 148: ...s lower than 20 Hz In other words you won t hear the pitch of its sound directly It creates a cyclic modulation on the setting to which it is connected For example If the sine waveform from an LFO modulates the volume of an amplifier the sound increases in volume then disappear in a varying manner following the speed the frequency of this LFO This produces a tremolo effect A sine waveform from an ...

Page 149: ...late the frequency of oscillator A or the cutoff frequency of the filter which we have also provided The connections of these modulations are available in the POLY MOD module 11 3 Complements to Wavetable Synthesis The Origin synthesizer uses the wave table synthesis technology on the same principles as subtractive synthesis The difference resides in the type of oscillators used the Wavetable ...

Page 150: ...lder synthesizers using generators of the sawtooth sine and square waved form These samples were recorded from different acoustic instruments voice or electronic noise atonal sounds basic wave forms sources and allow you to enrich the sonic pallet offered in the analog oscillators while remaining complementary The wavetable oscillator of Origin ...

Page 151: ...ants Contrarily it is impossible to add or delete presets in a Backup A Sound Bank is divided in three levels Multis Programs Sequences Each level is independent For instance if you add a multi into a Sound Bank you will not find the programs that this multi uses in the Program level these programs are saved with the Multi and you can t access them In this way you will be sure to get exactly the s...

Page 152: ...2 Interface Description 12 2 1 Main panel This figure shows the Origin Connection s main panel It is composed of two sub panels Each panel can be a description of the computer data Computer panel or the Origin data Origin panel When the user launches the application a Computer panel is showed on the left and an Origin panel on the right There is a status bar at the bottom which gives some info to ...

Page 153: ... a simple description of the buttons Computer switch to a Computer or Origin Panel Program Multi Sequences these three buttons allow users to overview among Program Multi or Sequence folders to find presets on those categories Refresh refreshes the data showed in the panel Useful if this seems to be out of sync Search 1 2 these two buttons are key search buttons It allows users to select among key...

Page 154: ...tion of the buttons Origin Computer switch to an Origin or Computer panel Search 1 2 key search buttons idem than this type of button in Origin panel Refresh refreshes the content of the panel Delete deletes the selected items The list of dumps and banks in the Computer panel corresponds to the file in the directory Backups and Sound Banks in the user preset folder On each one you will find all yo...

Page 155: ...cted the Origin panel will be automatically disabled and no transfer between the computer and Origin is possible Nevertheless it is possible to make transfer between Backups and Sound Banks You have to click on the machine s switch button 12 3 2 New sound banks To create a new Bank click on the menu Action Create new Sound Bank and choose the name of the new Bank Then the bank appears in the compu...

Page 156: ...avigator Backup in the Computer navigator 12 3 3 2 Reloading Existing Backups To reload an existing Backup on Origin you have to click on the menu Action Reload Existing Backup Choose Backup to be able to reload all Dumps When the OK button is clicked the process starts The process time is approximately the same as the backup time ...

Page 157: ...igin to Computer transfer This type of transfer corresponds to the sending of presets from Origin into Bank and NOT into Backups it is forbidden There are two ways to do this With a drag and drop operation By clicking on the transfer buttons The selected preset s is are added in the list of the Bank presets Transfer by clicking on the transfer button The sequence level is different from the other ...

Page 158: ...er It can be either transfer presets from Bank to Origin or from Backup to Origin There are also two ways to do this With a drag and drop operation By clicking on the Transfer buttons But the result is different If you drag the selected preset s the application locates it them into the slot s he chose If you choose the Transfer button the application sends the preset s into the next empty slots av...

Page 159: ...of Origin you have to go in the menu Action Origin Update Then select the update file through a file browser Instructions are displayed on the computer s screen to be followed The firmware update generally takes about 20 minutes but it may take more time depending on the computer s performance The firmware update menu WARNING Never interrupt the update process once the operation starts It could pr...

Page 160: ...authorized copying of the SOFTWARE including those instances where the SOFTWARE has been modified merged or included with other Software or of the printed or written materials for any reason is expressly forbidden Licensee may be held liable for copyright infringement which results from such unauthorized copying Restrictions on Use Licensee may physically transfer the SOFTWARE from one computer to...

Page 161: ...accident abuse modification or misapplication Any replacement software will be warranted for the remainder of the original warranty period or thirty 30 days whichever is longer No other Warranties The above warranties are in lieu of all other warranties expressed or implied including but not limited to the implied warranties of merchantability and fitness for a particular purpose No oral or writte...

Page 162: ...lectronic devices Compliance with FCC regulations does not guarantee that interferences will not occur in all the installations If this product is found to be the source of interferences which can be determined by turning the unit OFF and ON please try to eliminate the problem by using one of the following measures Relocate either this product or the device that is affected by the interference Use...

Page 163: ...able sub sequences Step sequencer Play modes One shot loop forward backward forward and backward Arpeggiator Play modes Forward backward forward and backward random Number of Programs 1000 programs 400 Factory and 600 User Programs Programs Program structure 1 synth modular or template Minimoog structure 3 effect slots 1 sequence Number of Multis 256 100 Factory and 156 User multis Multi Multi str...

Page 164: ...O Pitch bend O X O Control Changes 0 32 O O Program change 1 O X O Modulation Wheel 2 O O Breath Controller 4 O O Foot Controller 6 O O Data Entry 7 O O Main volume 10 O O Panpot 11 O O Expression 64 O O Damper 65 O O Portamento 71 74 O O Resonance Brilliance 82 O O Foot Switch 98 99 O O RRPN LSB MSB Program Change 0 127 0 127 System Common Song Position X X Song Select X X Tune X X System Interna...

Reviews: