INSTALLATION
7
Installing
the
cooker
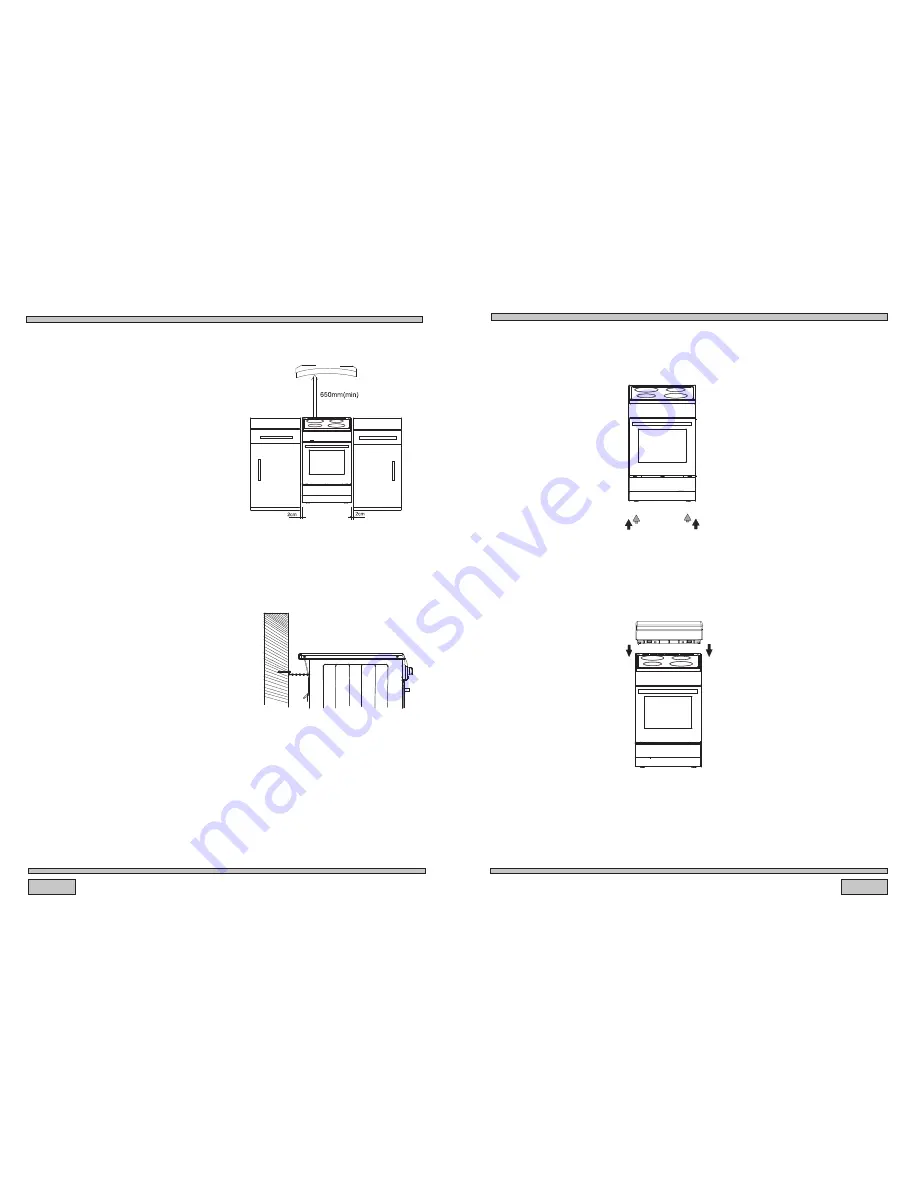
The kitchen should be dry and airy
and have effective ventilation
according to the existing technical
The room should be equipped with a
ventilation system that pipes away
exhaust fumes created during
combustion.This system should
consist of a ventilation grid or hood.
Hoods should be installed according
to the manufacturer’s instructions.
The cooker should be placed so as to
ensure free access to control
elements.
Coating or veneer used on fitted
furniture must be applied with a heat
resistant adhesive (100
℃
). This
prevents surface deformation or
detachment of the coating. If you
resistance, you should leave
approximately 2 cm of free a pace
around the cooker. The wall behind
the cooker should be resistant to
high temperatures.During operation,
its back side can warm up to around
50
℃
above the ambient temperature.
The cooker should stand on a hard,
even floor (do not put it on a base.)
provisions.
are unsure of your furniture’s heat
8
INSTALLATION
Before you start using the cooker it should be leveled,which is particularly Important for
fat
distribution in a frying pan. To this purpose,adjustable feet are accessible after
removal of the dra
wer. The adjustment range is +/-5mm.
Fix the cooker to the back wall with 2 chains
Anti tilt chains are located at the rear of the
appliance and must be secured to the wall
behind the appliance to prevent accidental
tipping/tilting. The chain length must be as
short as practicable to avoid appliance tilting
forward and also diagonal to avoid appliance
moving sideways.
Install the cover. Take the cover and cooker out of the packaging. Select a
proper place, and steadily level the cooker.
To fit the rear panel/splashback, slide the lugs on the bottom of the panel into the
matching slots on the rear of stove and fix with screws provided.


