background image

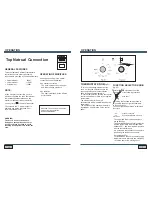
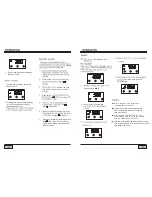
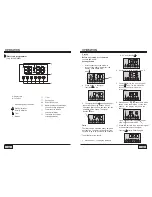
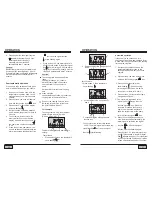
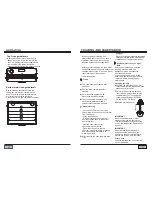
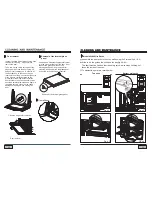
To avoid damage to the lower trim please note the following instructions.
The lower trim is designed to allow for good air circulation and the correct opening of

To ensure the trim is not damaged due to the appliance being placed on the floor. the 

After installation the appliance door should be slowly opened to ensure no damage has 

No responsiblity for lower trim damage will be accepted if these instructions have not 

 the oven door.

appliance should be suitably supported as in above illustrations.

occured.

been followed.

IMPORTANT:

INSTALLATION

INSTALLATION

IMPORTANT


The appliance should be installed by a QUALIFIED

INSTALLATION TECHNICIAN.

The appliance must be installed in compliance with regulations in force.

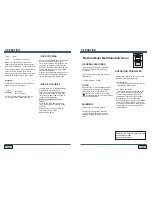
You need the following housing area to fit your oven correctly.
The double oven is designed to fit into a cabinet of 600 mm width.
The double oven can be built in the kitchen units, but you must ensure that it is properly
ventilated.
In the diagram the appliance is ventilated by means of the space in the top of the kitchen  
cabinet.
Lift the appliance into position onto the shelf, taking care NOT to lift it by the door handles.
If you open the oven doors, you will see some screw holes.

Remember the housing should not be free standing but be secured to the wall and/or

 adjacent fitting.

Adjust the hinges of furniture door adjacent to the double oven to allow a 5-7 mm gap
between the furniture door and the oven frame.

Dimensions (mm)

Height

Width

Depth

Oven

Housing

888

595

545

877

565

555 min.

WARNING

We would point out that the adhesive
which bonds the plastic laminate to the 

furniture must withstand temperatures not

less than 150

°


C to avoid delamination.

The appliance must be housed in heat 

resisting units.
The walls of the units must be capable

of resisting temperatures of 75

°

C

above room temperature.

WARNING

When correctly installed, your product
meets all safety requirements laid down

for this type of product category.

However special care should be taken

around the rear or the underneath of the

appliance as these areas are not
designed or intended to be touched and

may contain sharp or rough edges, that
may cause injury.

The oven should then be secured to the housing by fitting screws into these holes.

Summary of Contents for CAO888B

Page 1: ...artusi com au CAO888X 1 Do not use the oven until you have read this instruction manual INSTRUCTION MANUAL CAO888W CAO888B CAO888X Cod 0040303114...

Page 2: ...recommendations within this booklet are for your own safety and that of others They will also provide a means by which to make full use of the features offered by your appliance Please preserve this...

Page 3: ...0 OFF position Keep children away form the double oven during use Household appliances are not intended to be played with by children Children or persons with a disability which limits their ability...

Page 4: ...ing and maintenance traces of grease and smell from the components Let the oven cool down switch off the electrical supply then clean the inside of the Do not operate the appliance barefooted Do not a...

Page 5: ...the top of the kitchen cabinet Lift the appliance into position onto the shelf taking care NOT to lift it by the door handles If you open the oven doors you will see some screw holes Remember the hous...

Page 6: ...rounding wire must be longer than the other wires Caution Remember to connect the safety circuit to the connection box terminal marked with The electricity supply for the oven must have an all pole di...

Page 7: ...produced by the upper and lower heating elements b by radiation The heat is radiated by the infrared grill elements Attention The oven door becomes very hot during operation Keep children away THERMO...

Page 8: ...closed Grill with the oven door closed and for no longer than 30 minutes at any one time Attention the oven door becomes very hot during operation Keep children away OPERATION OPERATION The heating a...

Page 9: ...perature To set the temperature turn the thermo stat control knob indicator mark to the required temperature The elements will turn on or off automat ically which is determined by the ther mostat The...

Page 10: ...sh cakes and meat can be cooked The only precautions required are the close as possible with a maximum dif ference of 20 25 between the dif With the function selector in position the ventilated oven a...

Page 11: ...g time Press any button the alarm signal and the icon go off will Or the alarm after 2 minutes turned signal will be off automatically 2 Press the function button to adjust the cooking time End of coo...

Page 12: ...00 1 2 3 1 2 3 If the cooking time set to be 0 or the end of cooking time set to be the current time the auto function will be off 1 and 3 1 and 3 end of cooking time 1 and 3 end of cooking time End o...

Page 13: ...3 the current time using buttons 5 and 6 5 seconds after the time has been set the new data will be saved The signal function is on Timer The timer can be activated at any time and any function The ti...

Page 14: ...the cooking time to 0 or set the auto function will be off The current time is 2 00 the maximum 2 00 10 00 12 00 1 Press button 2 then the display will the switch off time to the current time switch...

Page 15: ...ion is off function goes out 5 seconds after setting the auto function is on When it up to 7 00 the oven will begin to work and the signal function is on and the signal starts flashing Set the switch...

Page 16: ...sition Do not start cleaning until the oven has Oven The oven should be cleaned after each use Cool the oven completely before cleaning Never clean the appliance with pressurized hot steam cleaner The...

Page 17: ...the safety catch is not set it may cause damage to the hinge when closing the To do this tilt the safety catch part of the hinge upwards Close the door lightly lift and pull it out towards you In ord...

Page 18: ...cake in the tables use the similar type of cake Baking with upper and lower elements Use only a single guide level This baking position is especially teacakes Use dark baking pans Light suitable for...

Page 19: ...p regarding roasting pans For best results use light enamel the heat they are not recommended oven will remain clean The roast will be cooked quicker if it be placed directly on the grid with juices a...

Page 20: ...grill heat may quickly burn your food and Do not let the children in the vicinity of preparation of low fat sausages meat and and crisping the roast skin provoke fire the grill fish fillets and steak...

Page 21: ...4 grill sausages 2 slices of meat cheese 1 chicken halved Fish Salmon fillets Fish in aluminium foil Toast 4 slices of white bread 2 slices of whole meal Toast sandwich Meat pourltry Chicken Pork roas...

Page 22: ...lt in All Wine coolers All Dryers Freestanding Cookers Gas and Electric Models in 50cm 54cm and 60cm Widths Portable Appliances Benchtop Models and Portable Gas Models 2 What is not Covered by the War...

Page 23: ...r a breach of any express or non excludable implied term condition or warranty is limited at the option of Worldwide Appliances to i replacing or repairing the defective part of the artusi product ii...

Reviews: