Configuring the ClearPass Hardware Appliance
The initial setup dialog starts when you connect a terminal, PC, or laptop running a terminal emulation program
to the Serial port on the ClearPass hardware appliance.
To configure the ClearPass Policy Manager hardware appliance:
1.
Connect the Serial port
.
a. Connect the Serial port to a terminal using a null modem cable.
b. Power on the hardware appliance.
The hardware appliance is now available for configuration.
2.
Configure the Serial port
.
l
Bit Rate
: 9600
l
Data Bits
: 8
l
Parity
: None
l
Stop Bits
: 1
l
Flow Control
: None
3.
Log in
.
Use the following preconfigured credentials to log in to the hardware appliance.
(You will create a unique appliance/cluster administration password in Step 5.)
n
login:
appadmin
n
password:
eTIPS123
This initiates the Policy Manager configuration wizard.
4.
Configure the ClearPass hardware appliance
.
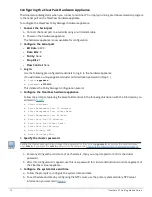
Follow the prompts, replacing the placeholder entries in the following illustration with the information you
entered in
Table 5
:
n
Enter hostname:
n
Enter Management Port IP Address:
n
Enter Management Port Subnet Mask:
n
Enter Management Port Gateway:
n
Enter Data Port IP Address:
n
Enter Data Port Subnet Mask:
n
Enter Data Port Gateway:
n
Enter Primary DNS:
n
Enter Secondary DNS:
5.
Specify the cluster password
.
Setting the cluster password also changes the password for the CLI user
appadmin
, as well as the Administrative
user
admin
. If you want the
admin
password to be unique, see
Changing the Administration Password on page 18
.
a. Enter any string with a minimum of six characters, then you are prompted to confirm the cluster
password.
b. After this configuration is applied, use this new password for cluster administration and management of
the ClearPass virtual appliance.
6.
Configure the system date and time
.
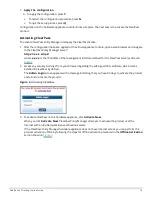
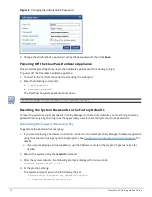
a. Follow the prompts to configure the system date and time.
b. To set the date and time by configuring the NTP server, use the primary and secondary NTP server
information you entered in
Table 5
.
15
ClearPass 6.7 Getting Started Guide

