Manual Offset
Press
Channel.
Input the offset value. The value is entered in 0.1
ppm increments. Positive and negative values are accepted.
With a 10 MHz input signal, +0.1 ppm causes a change of
1 Hz. Press
Menu/OK
to save and leave the calibration routine.
Automatic Calibration with 10 MHz Reference
Press
Mode.
The display will show
"CONNECT 10MHz > A".
Connect the 10 MHz reference signal to Channel A and press
Menu/OK
.
During calibration,
"CALIBRATION..."
is shown. If no
valid signal was recognized,
"CAL ERROR, VALUE NOT SAVED!"
will be shown, otherwise
"CALIBRATION DONE VALUES
SAVED"
. Press
Menu/OK
to leave the calibration routine.
Note: there is only one calibration value, so performing automatic
calibration overwrites a manually entered offset value.
Power Meter
A precise signal source is required that allows accurate
adjustment of power and frequency to calibrate the power
meter.
The calibration routine consists of two parts: the absolute
values, and the frequency correction factors used by the
FREQ
menu setting.
The calibration starts by displaying
"CONNECT xx dBm"
(Value
depends on installed module). Connect a 1 MHz, -20 dBm
signal (AE204015) or a 10 MHz, -40 dBm signal (AE204014)
41
Summary of Contents for AE20401
Page 23: ...Finished Component Side Finished Solder Side without the LCD LCD Mounting 17 ...
Page 31: ...Operation Functions Menu Structure 25 ...
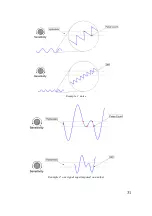
Page 37: ...31 Example 1 noise Example 2 one signal superimposed on another ...
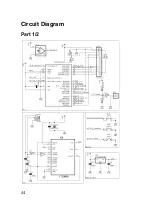
Page 50: ...Circuit Diagram Part 1 2 44 ...
Page 51: ...Part 2 2 45 ...
Page 63: ... Nr of valid counts depends on range 57 ...
Page 64: ...ASCEL ELECTRONIC www ascel electronic de 2015 ...

