Maintenance & Repair Manual
SECTION 3
VIRTUOSO 5460P
10
110057 REV K
3.
Use a Phillips screwdriver to remove the three (3) screws that secure the skirt to
the lower landing gate.
4.
Use a 5/32" hex key to remove the two (2) button head cap screws and washers
that secure the skirt guide tubes to the skirt base. Hold the skirt guide tubes
stationary with pliers if necessary while removing the screws.
5.
Use a Phillips screwdriver to remove the four (4) screws (two (2) on each side)
that secure the skirt guide tube brackets to the lower landing gate and pull the
brackets downward, out of the gate. The skirt can now be removed from the
gate.
To reinstall the
gate skirt
, perform the above steps in reverse order.
To remove the
lift car skirt
, perform all of the following steps. If the skirt only needs to
be retracted, performing only Steps 2 & 3 will provide access to most of the components
behind the skirt.
1. If the whole skirt is to be removed, raise or lower the lift car so that the lift car floor is
approximately 15" off the ground.
2. Use a Phillips screwdriver to remove the 28 pan head screws that secure the sides
of the skirt to the lift car at the top and to the lift base at the bottom.
3. Use a 5/16" combination wrench to remove the four (4) hex head screws that secure
the top of the skirt to the lift car, one (1) at each corner. Remove the small skirt
support brackets that are freed when these screws are removed.
4. Use a Phillips screwdriver to remove the pan head screw that secures the back of
the skirt to the base.
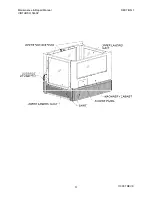
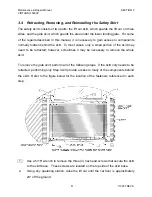
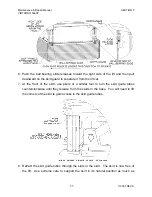
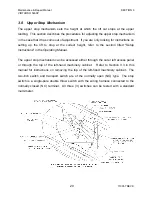
5. In the back, retract the skirt around the ball-bearing slides as shown in the figure at
the top of the following page. You will need to hold each skirt panel approximately
horizontal to move it past the restraining tab.

