Maintenance & Repair Manual
SECTION 3
VIRTUOSO 5460P
32
110057 REV K
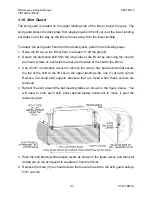
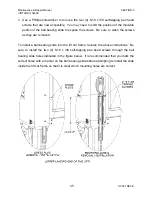
7. Use a 3/32 hex key to remove the two (2) 8-32 x 3/16 button head cap screws that
secure the ball bearing slide rails to the skirt guard. The guard can now be freed
from the safety skirt.
To reinstall the skirt guard, perform the following steps. If necessary, refer to the figures
in the skirt guard instructions above for identification of components.
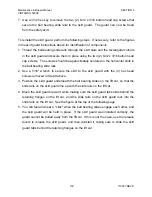
1. Thread the ball bearing slide rails through the skirt slots and the rectangular cutouts
in the skirt guard and secure them in place using the two (2) 8-32 x 3/16 button head
cap screws. The screws should be approximately centered in the horizontal slots in
the ball bearing slide rails.
2. Use a 5/16" wrench to secure the skirt to the skirt guard with the (3) hex head
screws removed in Step 6 above.
3. Position the skirt guard underneath the ball bearing slides on the lift car, so that the
slide rails on the skirt guard line up with the slide rails on the lift car.
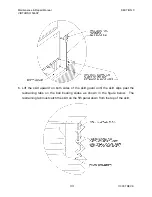
4. Move the skirt guard upward, while making sure the skirt guard tabs slide behind the
retaining flanges on the lift car, and the slide rails on the skirt guard lock into the
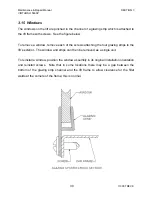
slide rails on the lift car. See the figure at the top of the following page.
5. You will feel and hear a "click" when the ball bearing slides engage each other, and
the skirt guard will be held in place. If the skirt guard was installed correctly, the
guard cannot be pulled away from the lift car. If this is not the case, use the release
levers to release the skirt guard, and then reinstall it, taking care to slide the skirt
guard tabs behind the retaining flanges on the lift car.

