X-3D-BL User’s Manual
2.3.8 Mounting a different receiver
The X-3D-BL was designed for the European market.
Unfortunately, ACT-Europe does not offer any 72
MHz receivers with the convenient digital interface
used in the X-3D-BL. To enable people in countries,
where 35 and 40 MHz R/C models are not allowed,
to fly the X-3D-BL as well, we implemented an
interface for a standard PPM-receiver (cf.
1.1.2,
connector no. 4). However, as a normal receiver
has an output multiplexer to distribute the incoming
signal to the independent servo control channels, you
have to modify the receiver to make it compatible
to the X-3D-BL. Be aware that you do such a
modification at your own risk! By trying to modify a
receiver its warranty will be void!
Almost any receiver can be used, as long as you are
able to find and to access the combined PPM-Signal
before it is split up into several channels by the output
multiplexer. A digital storage oscilloscope is a handy
tool to find the signal.
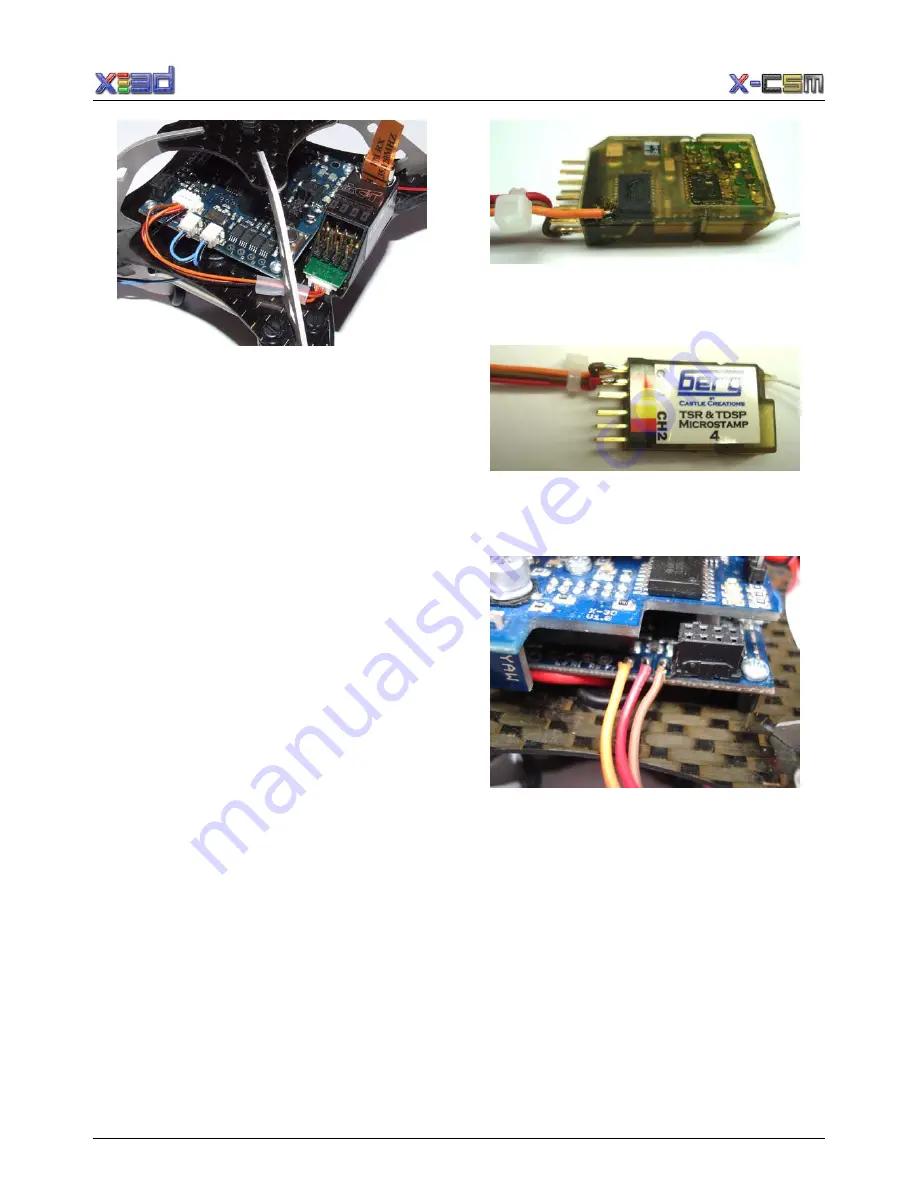
Here is an example of how to modify the ”BERG Mi-
crostamp 4” full range receiver. This receiver is cast
in some soft plastics. The combined PPM signal can
be found at the outer most pin of the PIC processor.
To reach it you have to use a cutting knife to carefully
cut away a little part of the molding material. Careful-
ly solder a wire to the outer most pin of the processor
as shown in the following photograph.
Then connect the GND and VCC wires to any of the
four GND and VCC connectors:
Finally, connect the cables to connector no. 4 of the
X-Base exactly as seen in the next picture.
Please make sure you upload the ”X-Base Vx.x for
X-BL and PPM receiver.xbs” firmware as described
in 3.1.3.
2.3.9 Mounting the X-3D or
X-3D-FunPilot
The X-3D(-FunPilot) is simply plugged to the X-Base
and fastened using three screws. To do so, you have
to remove the top cover of the X-CSM Core.
www.x3d-shop.de
- 17 -
www.asctec.de


