background image

22

GEBRUIKSAANWIJZING  


Geachte klant,   

hartelijk dank voor de aankoop van een luchtreiniger van ons bedrijf. 

Lees deze gebruiksaanwijzing zeer zorgvuldig. Leer de voordelen en het gebruiksgemak  

van onze luchtreinigers in detail kennen. 

Hartelijk dank. 

Uw asecos-team

INHOUD

1.  PRODUCTINFORMATIE . . . . . . . . . . . . . . . . . . . . . . . . . . . . . . . . . . . . . . . . . . . . . . . . . . . . . . . . . . . . . . . . . . . . 23

1.1.  Belangrijke opmerkingen over de behandeling . . . . . . . . . . . . . . . . . . . . . . . . . . . . . . . . . . . 23
1.2.  Apparaateigenschappen  . . . . . . . . . . . . . . . . . . . . . . . . . . . . . . . . . . . . . . . . . . . . . . . . . . . . . 23

2.  OPSTELLING • INGEBRUIKNAME  . . . . . . . . . . . . . . . . . . . . . . . . . . . . . . . . . . . . . . . . . . . . . . . . . . . . . . . . . . . . 24

2.1.  Opstelvoorwaarden . . . . . . . . . . . . . . . . . . . . . . . . . . . . . . . . . . . . . . . . . . . . . . . . . . . . . . . . . 24
2.2.  Installatie van de filters . . . . . . . . . . . . . . . . . . . . . . . . . . . . . . . . . . . . . . . . . . . . . . . . . . . . . . 25
2.4.  Installatie van de bevochtigingseenheid  . . . . . . . . . . . . . . . . . . . . . . . . . . . . . . . . . . . . . . . . 25
2.5.  Aansluiting op de stroomvoorziening . . . . . . . . . . . . . . . . . . . . . . . . . . . . . . . . . . . . . . . . . . . 26

3.  FUNCTIE 

 . . . . . . . . . . . . . . . . . . . . . . . . . . . . . . . . . . . . . . . . . . . . . . . . . . . . . . . . . . . . . . . . . . . . . . . . . . 26

3.1.  Bedieningspaneel en bedrijfsmodi . . . . . . . . . . . . . . . . . . . . . . . . . . . . . . . . . . . . . . . . . . . . . 26
3.2.  PM-waarde-correspondentietabel  . . . . . . . . . . . . . . . . . . . . . . . . . . . . . . . . . . . . . . . . . . . . . 27
3.3.  Afstandsbediening . . . . . . . . . . . . . . . . . . . . . . . . . . . . . . . . . . . . . . . . . . . . . . . . . . . . . . . . . . 27

4.  FILTERINFORMATIE • FILTERVERVANGINGSINTERVALLEN . . . . . . . . . . . . . . . . . . . . . . . . . . . . . . . . . . . . . . . . 27

4.1.  Voorfilter . . . . . . . . . . . . . . . . . . . . . . . . . . . . . . . . . . . . . . . . . . . . . . . . . . . . . . . . . . . . . . . . . . 27
4.2.  Meer-componenten-filtereenheid 1  (koud katalysatorfilter en actief-koolfilter)  . . . . . . . 28
4.3.  Meer-componenten-filtereenheid 2  (antibacterieel katoenfilter en Hepa-filter)  . . . . . . . 28
4.4.  Anionen-eenheid . . . . . . . . . . . . . . . . . . . . . . . . . . . . . . . . . . . . . . . . . . . . . . . . . . . . . . . . . . . 29
4.5.  Reiniging van de deeltjessensor . . . . . . . . . . . . . . . . . . . . . . . . . . . . . . . . . . . . . . . . . . . . . . . 29
4.6.  Steriliserend UV-licht . . . . . . . . . . . . . . . . . . . . . . . . . . . . . . . . . . . . . . . . . . . . . . . . . . . . . . . . 29

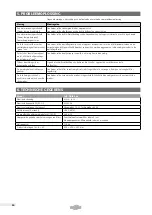
5.  PROBLEEMOPLOSSING . . . . . . . . . . . . . . . . . . . . . . . . . . . . . . . . . . . . . . . . . . . . . . . . . . . . . . . . . . . . . . . . . . . . 30
6.  TECHNISCHE GEGEVENS . . . . . . . . . . . . . . . . . . . . . . . . . . . . . . . . . . . . . . . . . . . . . . . . . . . . . . . . . . . . . . . . . . . 30

Summary of Contents for PURIFIAIR.488

Page 1: ...ftreiniger PURIFIAIR 488 OPERATING MANUAL PURIFIAIR 488 air purifier GEBRUIKSAANWIJZING Luchtreiniger PURIFIAIR 488 MANUEL D UTILISATION Purificateur d air PURIFIAIR 488 MANUAL DE INSTRUCCIONES Purificador de aire PURIFIAIR 488 DE EN NL FR ES DE ...

Page 2: ...RIEBNAHME 4 2 1 Aufstellbedingungen 4 2 2 Installation der Filter 5 2 3 InstallaTion der Befeuchtereinheit 5 2 4 Anschluss an die Stromversorgung 6 3 FUNKTION 6 3 1 Bedienfeld und Operationsmodi 6 3 2 PM Wert Entsprechungstabelle 7 3 3 Fernbedienung 7 4 FILTERINFORMATION FILTERWECHSELINTERVALLE 7 4 1 Vorfilter 7 4 2 Mehrkomponenten Filtereinheit 1 Kaltkatalysatorfilter und Aktivkohlefilter 8 4 3 M...

Page 3: ...sgemäßer Betrieb ist nur bei Netzspannung von 230V 50 Hz gewährleistet Öffnen Sie den Rahmen nicht und reparieren Sie dieses Produkt nicht selbst Die Reparatur sollte von Fachleuten durchgeführt werden Gießen Sie kein Wasser andere Flüssigkeiten oder brennbares Reinigungsmittel in das Produkt um Produktschäden oder Brände durch Stromschläge zu vermeiden Reinigen Sie das Gehäuse nicht mit Lösungsmi...

Page 4: ...aus empfohlen separate Steckdosen für Luftreiniger und Radio Fernsehgeräte zu verwenden Andernfalls können Bild und Tonstörungen auftreten Der Luftreiniger sollte direkt auf einer Fläche auf dem Boden aufgestellt werden so dass Pollen und Staub in Bodennähe aufgenommen werden können 30 cm 30 cm 30 cm 30 cm Für eine effektive Luftzirkulation sollte das Gerät mindestens 30 cm Freiraum zu allen Seite...

Page 5: ...niert werden 2 3 INSTALLATION DER BEFEUCHTEREINHEIT 1 2 3 4 ca 1L 5 6 7 ACHTUNG Wenn Wasser in den Wassertank gegeben wird startet automatisch der Befeuchtungsprozess Der Befeuchtungseffekt hängt mit der Ventilationsgeschwindigkeit zusammen und funktioniert besser wenn die Maschine in einem höheren Gang arbeitet Wenn der Wasserstand niedrig wird blinkt die Anzeigelampe während die Maschine normal ...

Page 6: ...schaltet das Gerät in den Standby Modus Die Maximaldauer beträgt 12 Stunden Der Timer wird mit einer 13 Berührung ausgeschaltet Anionen Reinigungseinheit Wenn das Gerät eingeschaltet ist wird durch Drücken der Taste ANIONEN der Anionen Modus aktiviert und durch erneutes Drücken deaktiviert Resettaste Funktion 1 Der Luftreiniger verfügt über eine regelmäßige Erinnerungsfunktion für die Filterreinig...

Page 7: ...et Bei längerer Nicht nutzung nehmen Sie die Zelle heraus Zwischen den Tasten auf der Fernbedienung und dem Bedienfeld besteht eine Eins zu Eins Entsprechung Die Funktionen und Betriebsmethoden sind im Allgemeinen gleich Achtung Entfernen Sie zum ersten Gebrauch die Batterieabdeckung z B mit einer Münze und entfernen Sie den Schutzfilm der Zelle Setzen Sie danach Abdeckung wieder auf Hierbei ist d...

Page 8: ...G Nicht zu viel Sonneneinstrahlung aussetzen Der Filter ist empfindlich Drücken Sie beim Staubsaugen nicht zu fest auf den Filter Verwenden Sie kein Wasser um diesen Filter zu reinigen 4 3 MEHRKOMPONENTEN FILTEREINHEIT 2 ANTIBAKTERIELLER BAUWOLLFILTER UND HEPA FILTER Antibakterieller Baumwollfilter Der antibakterielle Filter ist ein Präzisionsfilter der Partikel mit einem Durchmesser von 5 Mikrome...

Page 9: ...rste aus dem Belüftungsfenster über dem Anionenemissionskopf ein Entfernen Sie regelmäßig den Staub um den Emissionskopf herum 4 5 REINIGUNG DES PARTIKELSENSORS ca einmal alle zwei Monate auszuführen Entfernen Sie die Abdeckung des Partikelsensors Wischen Sie die Linse regelmäßig mit einem trockenen Wattestäbchen ab um Schmutz zu entfernen Feuchtigkeit oder Tabakrauch können die einwandfreie Funkt...

Page 10: ...anzeigelampe rot Prüfen Sie ob der Partikelsensor verunreinigt ist und reinigen Sie ihn gegebenenfalls Während des Betriebs gibt es knisternde Geräusche Öffnen Sie die Luftauslassabdeckung auf der Oberseite des Geräts und entfernen sie eventuelle Staubpartikel Die gereinigte Luft riecht unangenehm Prüfen Sie ob der Filter verunreinigt ist oder seit längerer Zeit nicht gewechselt wurde Reinigen und...

Page 11: ...11 ...

Page 12: ...nstallation requirements 14 2 2 Installing the filter 15 2 3 Installing the humidifier unit 15 2 4 Connecting to the power supply 16 3 FUNCTION 16 3 1 Control panel and operating modeS 16 3 2 PM value equivalent table 17 3 3 Remote control 17 4 FILTER INFORMATION FILTER EXCHANGE INTERVALS 17 4 1 Pre filter 17 4 2 Multi component filter unit 1 cold catalytic filter and activated carbon filter 18 4 ...

Page 13: ...r operation is only ensured at a mains voltage of 230V 50 Hz Do not open the frame and do not complete repairs on this product yourself Repairs should be completed by a professional technician Do not pour water other liquids or flammable cleaning agents into the product to avoid product damage or fires due to electric shock Do not clean the housing with solvents or liquid chemicals in order to avo...

Page 14: ...ol Furthermore we recommend using separate outlets for the air purifier and radios TVs Otherwise the video and or audio signals may be disrupted The air purifier should be set up directly on an area of the floor so that pollen and dust close to the floor can be collected 30 cm 30 cm 30 cm 30 cm The device should have at least 30 cm of clearance on all sides in order to ensure effective air circula...

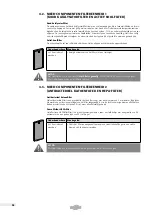
Page 15: ... 3 INSTALLING THE HUMIDIFIER UNIT 1 2 3 4 ca 1L 5 6 7 CAUTION When water is added to the water tank the machine will automatically generate steam The humidification effect is dependent on the ventilation speed and will work better if the machine works at a higher speed level If the water level becomes low the indicator light will flash for as long as the machine continues to work normally If the w...

Page 16: ... of the air purifier by 1 hour After this time the device will switch to Standby mode The maximum duration is 12 hours Pressing the button a 13th time shuts off the timer Anion cleaning unit When the device is switched on pressing the ANION button will activate Anion mode Pressing it again will deactivate this mode Reset button function 1 The air purifier has a regular reminder function for cleani...

Page 17: ...ll batteries Please remove the batteries if the remote control is not in use for a long period of time The buttons on the remote control match those on the control panel The general functions and operating methods are the same Note Remove the battery cover before initial use for instance with a coin and remove the protective film over the batteries Then replace the cover Ensure that the symbol is ...

Page 18: ... every 2 months Clean the front of the filter using a vacuum cleaner CAUTION Do not expose to excessive sunlight The filter is sensitive Do not push on the filter too hard during vacuuming Do not use water to clean this filter 4 3 MULTI COMPONENT FILTER UNIT 2 ANTIBACTERIAL COTTON FILTER AND HEPA FILTER Antibacterial cotton filter The antibacterial filter is a precision filter that collects partic...

Page 19: ...or 2 brush to clean Insert the brush from the ventilation window via the anion emission head Regularly remove dust around the emission head 4 5 CLEANING THE PARTICLE SENSOR Clean approx every two months Remove the cover of the particle sensor Wipe the lens regularly using a dry cotton swab to remove dirt Moisture or tobacco smoke could negatively impact the function CAUTION Do not insert the cotto...

Page 20: ...en while the device is running consis tently Check whether the particle sensor is contaminated and clean it if necessary There are crackling noises while the device is in operation Open the air intake cover on the top of the device and remove any dust particles The purified air smells bad Check whether the filter is contaminated or has not been replaced in a long time Clean and replace the filter ...

Page 21: ...21 ...

Page 22: ...en 24 2 2 Installatie van de filters 25 2 4 Installatie van de bevochtigingseenheid 25 2 5 Aansluiting op de stroomvoorziening 26 3 FUNCTIE 26 3 1 Bedieningspaneel en bedrijfsmodi 26 3 2 PM waarde correspondentietabel 27 3 3 Afstandsbediening 27 4 FILTERINFORMATIE FILTERVERVANGINGSINTERVALLEN 27 4 1 Voorfilter 27 4 2 Meer componenten filtereenheid 1 koud katalysatorfilter en actief koolfilter 28 4...

Page 23: ...werking is alleen gegarandeerd bij een netspanning van 230V 50 Hz Open het frame niet en repareer dit product niet zelf De reparatie moet worden uitgevoerd door vakmensen Giet geen water andere vloeistoffen of brandbaar reinigingsmiddel in het product om productschade of brand door elektri sche schokken te voorkomen Reinig de behuizing niet met oplosmiddelen of chemische vloeistoffen om beschadigi...

Page 24: ...en Bovendien wordt aangeraden aparte contactdozen te gebruiken voor luchtreiniger en radio televisie Anders kunnen beeld en audiostoringen optreden De luchtreiniger moet direct op een oppervlak op de vloer worden opgesteld zodat pollen en stof in de buurt van de vloer kunnen worden opgenomen 30 cm 30 cm 30 cm 30 cm Voor een effectieve luchtcirculatie moet het apparaat aan alle zijden minstens 30 c...

Page 25: ...oneerd 2 4 INSTALLATIE VAN DE BEVOCHTIGINGSEENHEID 1 2 3 4 ca 1L 5 6 7 LET OP Wanneer water in de watertank wordt gedaan genereert de machine automatisch stoom Het bevoch tigingseffect hangt samen met de ventilatiesnelheid en functioneert beter wanneer de machine in een hogere versnelling werkt Wanneer de waterstand laag wordt knippert de indicatorlamp terwijl de machine normaal verder werkt Wanne...

Page 26: ...niger met 1 uur Aan het einde van deze tijd schakelt het apparaat naar de stand by modus De maximale duur is 12 uur De timer wordt met een 13e aanraking uitgeschakeld Anionen reinigingseenheid Wanneer het apparaat is ingeschakeld wordt door drukken van de knop ANIONEN de anionen modus geactiveerd en door opnieuw drukken gedeactiveerd Resetknop functie 1 De luchtreiniger beschikt over een regelmati...

Page 27: ...pcellen gebruikt Haal bij langer tijd van niet gebruik de cellen eruit Tussen de knoppen op de afstandsbediening en het bedieningspaneel bestaat een één op één overeenkomst De functies en werkwijzen zijn over het algemeen dezelfde Let op Verwijder voor het eerste gebruik het batterijdeksel bijvoorbeeld met een munt en verwijder de beschermfolie van de cel Plaats dan de afdekking terug Hierbij moet...

Page 28: ... filter met een stofzuiger LET OP Niet blootstellen aan te veel zonlicht Het filter is gevoelig Druk bij het stofzuigen niet te hard op het filter Gebruik geen water om dit filter te reinigen 4 3 MEER COMPONENTEN FILTEREENHEID 2 ANTIBACTERIEEL KATOENFILTER EN HEPA FILTER Antibacterieel katoenfilter Het antibacteriële filter is een precisiefilter dat deeltjes vangt met een diameter van 5 micrometer...

Page 29: ...nr 1 of nr 2 als reinigingsgereedschap Steek de borstel vanuit het ventilatievenster boven in de anionemissiekop Verwijder regelmatig het stof rondom de emissiekop 4 5 REINIGING VAN DE DEELTJESSENSOR ca eenmaal iedere twee maanden uit te voeren Verwijder de afdekking van de deeltjessensor Veeg de lens regelmatig met een droog wattenstaafje om vuil te verwijderen Vocht of tabaksrook kunnen de probl...

Page 30: ...lings indicatielampje rood Controleer of de deeltjessensor vervuild is en reinig hem indien nodig Tijdens de werking zijn er knisperende geluiden Open de luchtuitlaatafdekking aan de bovenkant van het apparaat en verwijder eventuele stofdeeltjes De gereinigde lucht ruikt onaan genaam Controleer of het filter verontreinigd is of sinds lange tijd niet is vervangen Reinig en vervang het filter regelm...

Page 31: ...31 ...

Page 32: ...tallation 34 2 2 Installation du filtre 35 2 3 Installation de l humidificateur 35 2 4 Raccordement à l alimentation électrique 36 3 FONCTIONNEMENT 36 3 1 Panneau de commande et modes de fonctionnement 36 3 2 Tableau de correspondance de la valeur PM 37 3 3 Télécommande 37 4 INFORMATIONS SUR LE FILTRE INTERVALLE DE REMPLACEMENT 37 4 1 Préfiltre 37 4 2 Unité de filtration multicomposant 1 filtre de...

Page 33: ...t conforme n est garanti qu avec une tension secteur de 230 V 50 Hz N ouvrez pas le châssis et ne réparez pas ce produit vous même La réparation doit être réalisée par des spécialistes Ne versez pas d eau d autres liquides ou du produit nettoyant inflammable dans le produit pour éviter les dommages matériels ou les incendies provoqués par des courts circuits Ne nettoyez pas le boîtier avec des sol...

Page 34: ...en outre conseillé d utiliser des prises distinctes pour le purificateur d air et les radios téléviseurs Sinon il peut y avoir des pertur bations d images et de sons Le purificateur d air doit être placé directement sur une surface au sol afin que le pollen et la poussière puissent être capturés près du sol 30 cm 30 cm 30 cm 30 cm Pour une circulation efficace de l air l appareil doit disposer d a...

Page 35: ...ALLATION DE L HUMIDIFICATEUR 1 2 3 4 ca 1L 5 6 7 ATTENTION Lorsque de l eau est versée dans le réservoir d eau la machine produit automatiquement de la vapeur L effet d humidification est associé à la vitesse de ventilation et fonctionne mieux si la machine fonctionne à vitesse élevée Si le niveau d eau est faible le témoin d affichage clignote pendant que la machine continue à fonctionner normale...

Page 36: ... délai écoulé l appareil passe en mode Veille La durée maximale est de 12 heures La minuterie est désactivée par un 13e actionnement Unité de nettoyage aux anions Lorsque l appareil est allumé en appuyant sur le bouton ANIONS le mode Anions est activé et est désactivé en appuyant à nouveau Bouton de réinitialisation fonction 1 Le purificateur d air dispose d une fonction de rappel régulier pour le...

Page 37: ...as d absence d utilisation prolongée retirez les piles Il y a une correspondance totale entre les boutons sur la télécommande et le panneau de commande Les fonctions et les méthodes de fonctionnement sont généralement identiques Attention Lors de la première utilisation retirez le couvercle du compartiment des piles avec une pièce par exemple et retirez le film de protection des piles Remettez ens...

Page 38: ...spirateur ATTENTION Ne pas exposer trop longtemps aux rayons du soleil Le filtre est sensible Lors du nettoyage avec l aspi rateur n appuyez pas trop sur le filtre N utilisez pas d eau pour nettoyer ce filtre 4 3 UNITÉ DE FILTRATION MULTICOMPOSANT 2 FILTRE EN COTON ANTIBACTÉRIEN ET FILTRE HEPA Filtre en coton antibactérien Le filtre antibactérien est un filtre de précision qui capture les particul...

Page 39: ...age Passez la brosse sur la tête d émission d anions par la fenêtre d aération Retirez régulièrement la poussière autour de la tête d émission 4 5 NETTOYAGE DU CAPTEUR DE PARTICULES À effectuer environ une fois tous les deux mois Retirez le couvercle du capteur de particules Essuyez régulièrement la lentille avec un coton tige sec pour éliminer les salissures L humidité ou la fumée de tabac peuven...

Page 40: ...ent Vérifiez si le capteur de particules est encrassé et nettoyez le si nécessaire Il y a des bruits de grésillements pendant le fonctionnement Ouvrez le couvercle de sortie d air sur la partie supérieure de l appareil et éliminez les particules de poussière éventuelles L air purifié a une odeur désagréable Vérifiez si le filtre est encrassé ou s il n a pas été remplacé depuis longtemps Nettoyez e...

Page 41: ...41 ...

Page 42: ...ones de instalación 44 2 2 Instalación de los filtros 45 2 3 Instalación de la unidad de humectación 45 2 4 Conexión del suministro de corriente 46 3 FUNCIÓN 46 3 1 Panel de mando y modos de funcionamiento 46 3 2 Tabla de correspondencia del valor PM 47 3 3 Mando a distancia 47 4 INFORMACIÓN SOBRE LOS FILTROS INTERVALOS DE SUSTITUCIÓN 47 4 1 Prefiltro 47 4 2 Unidad de filtrado multietapa 1 filtro ...

Page 43: ...e un funcionamiento correcto con una tensión de red de 230V 50 Hz No abra el bastidor y no realice trabajos de reparación en el producto por sí mismo Los trabajos de reparación deben ser realizados por personal especializado No vierta agua otros líquidos ni productos de limpieza inflamables sobre el aparato ya que de lo contrario podrían producirse daños en el aparato o un incendio debido a las de...

Page 44: ...zar tomas de tierra separadas para el purificador de aire y los aparatos de radio televisión De lo contrario podrían producirse interrupciones en las imágenes y el sonido El purificador de aire debe colocarse directamente sobre una superficie en el suelo para permitir la captación del polen y el polvo eliminar 30 cm 30 cm 30 cm 30 cm Para garantizar una circulación de aire eficaz el aparato debe d...

Page 45: ... hacia afuera 2 3 INSTALACIÓN DE LA UNIDAD DE HUMECTACIÓN 1 2 3 4 ca 1L 5 6 7 ATENCIÓN Tras verter agua en el depósito de agua el aparato genera vapor automáticamente El efecto de humec tación depende de la velocidad de ventilación y funciona mejor cuando el aparato funciona a una marcha elevada Cuando el nivel de agua es bajo el testigo luminoso parpadea mientras el aparato sigue funcio nando con...

Page 46: ... purificador de aire Al finalizar este tiempo se activa el modo Standby en el aparato El tiempo máximo es de 12 horas El temporizador se desconecta al tocar la tecla 13 veces Unidad de purificación de aniones Con el aparato conectado al pulsar la tecla ANIONES se activa el modo de aniones y al pulsarla de nuevo se desactiva Tecla Reset función 1 El purificador de aire dispone de una función de avi...

Page 47: ...so de no utilizarlo durante un periodo de tiempo prolongado extraiga las pilas Cada tecla del mando a distancia se corresponde con una tecla del panel de mando En general las funciones y los métodos de funcionamiento son idénticos Atención al utilizarlo por primera vez retire la cubierta del compartimento de la pila p ej con una moneda y extraiga la lámina protectora de la pila A continuación vuel...

Page 48: ...olar directa El filtro es sensible No ejerza demasiada presión sobre el filtro durante su limpieza con un aspirador No utilice agua para limpiar este filtro 4 3 UNIDAD DE FILTRADO MULTIETAPA 2 FILTRO DE ALGODÓN ANTIBACTERIANO Y FILTRO HEPA Filtro de algodón antibacteriano El filtro antibacteriano es un filtro de precisión que capta las partículas con un diámetro de 5 micrómetros Simultáneamente se...

Page 49: ...ana de ventilación sobre el cabezal de emisión de aniones Elimine regularmente el polvo alrededor del cabezal de emisión 4 5 LIMPIEZA DEL SENSOR DE PARTÍCULAS Realizar aprox una vez cada dos meses Retire la cubierta del sensor de partículas Limpie regularmente la lente con un bastoncillo de algodón seco para eliminar la suciedad La humedad o el humo del tabaco pueden afectar negativamente a su fun...

Page 50: ...uente el testigo luminoso de contaminación del aire se ilumina en color rojo Compruebe si el sensor de partículas está sucio y límpielo en caso necesario Se escucha un ruido crepitante durante el funcionamiento Abra la cubierta de la salida del aire situada en la parte superior del aparato y elimine las eventuales partí culas de polvo El aire purificado posee un olor desagradable Compruebe si el f...

Page 51: ...51 ...

Page 52: ...7 ES 08130 Santa Perpètua de Mogoda Barcelona 34 935 745911 34 935 745912 info asecos es asecos bv Veiligheid en milieubescherming Tuinderij 15 NL 2451 GG Leimuiden 31 172506476 31 172506541 info asecos nl asecos Safety and Environmental Protection Inc 19109 West Catawba Avenue Suite 200 Cornelius NC 28031 USA 1 704 8973820 49 6051 922010 info asecos com asecos Schweiz AG Sicherheit und Umweltschu...

Reviews: