background image

31


Ubiquity Router family - User’s guide  


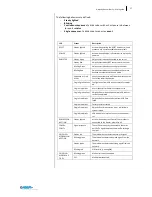
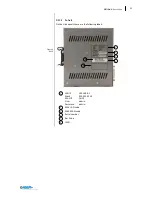
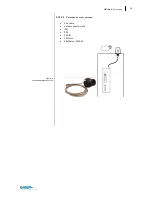
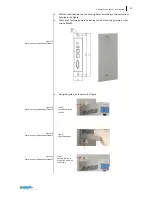
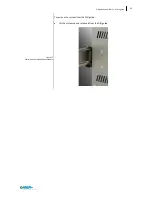
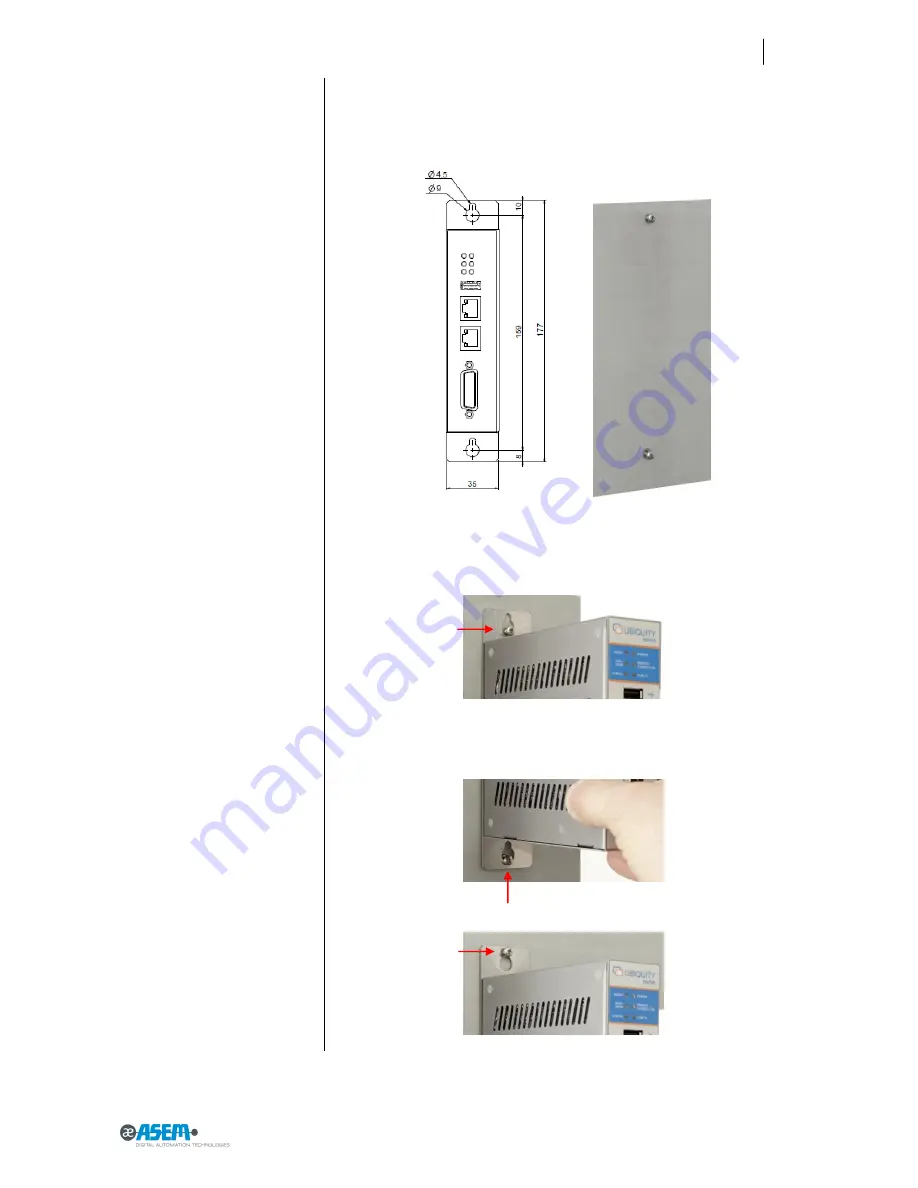
Figure 17 

Wall mounting installation procedure


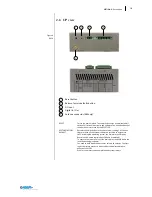
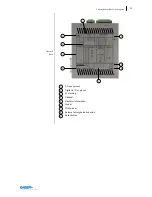
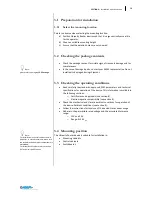
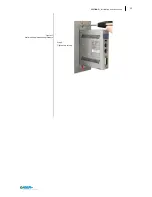
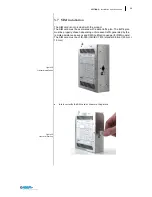
Figure 18 

Wall mounting installation procedure


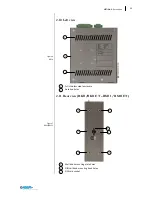
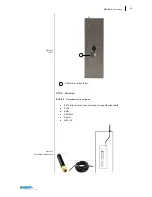
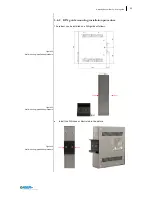
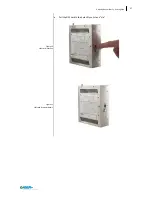
Figure 19 

Wall mounting installation procedure


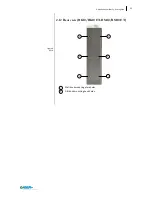
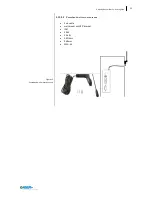
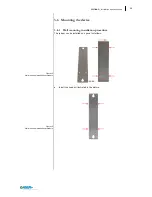
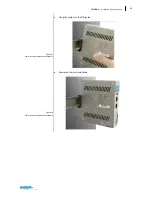
Figure 20 

Wall mounting installation procedure


Drill the required holes on the housing panel according to the instructions 
detailed in the figure. 


There are 2 fastening points. Fastening can be made using stainless steel 
screws M4x20. 


Hang the system as shown in the figure. 


Step 1: 
first lift and insert 
the top. 

Step 2: 
align the bottom 

Step 3: 
Release the top to 
match the slots with 
the screws. 

Summary of Contents for Ubiquity RK10

Page 1: ...ASEM Open Automation Systems USER S GUIDE Code 86060362 Version A02 Date 03 06 2014 Ubiquity router family ...

Page 2: ...amò 18 04 2014 ES Draft Thei Mori Zamò 07 05 2014 ES 01 Thei Zamò 13 05 2014 ES 02 Thei Mori 14 05 2014 ES 03 Thei Mori Zamò 15 05 2014 ES 04 Thei Zamò Marchiol Mantovani 30 05 2014 A00 Thei Ugoni 28 06 2014 A01 Thei Ugoni Mori 03 06 2014 A02 ...

Page 3: ...bels 22 2 12 2 Antenna 24 SECTION 3 27 3 Installation and connection 27 3 1 Preparation for installation 28 3 1 1 Select the mounting location 28 3 2 Checking the package contents 28 3 3 Checking the operating conditions 28 3 4 Mounting position 28 3 4 1 Damage due to overheating 29 3 5 Preparing the mounting 29 3 6 Mounting the device 30 3 6 1 Wall mounting installation procedure 30 3 6 2 DIN gui...

Page 4: ...8 5 5 Recycling and disposal 58 SECTION 6 59 6 Technical specifications 59 6 1 Technical specifications 60 6 2 Certificates and approvals 63 6 3 Dimension drawings 64 6 4 Panel antenna drawing dimensions 66 6 5 Wall mount antenna drawing dimensions 67 6 6 Outdoor panel antenna drawing dimensions 68 6 7 Ports PINOUT 69 6 7 1 COM1 DB15M Serial 69 6 7 2 Digital In Out 69 6 7 3 DC Input 70 ...

Page 5: ...v ...

Page 6: ......

Page 7: ...1 Ubiquity Router family User s guide SECTION 1 1 Preliminary Information ...

Page 8: ... da cui è stato acquista to il prodotto The symbol on the product or in its packaging indicates that this product may not be treated as household waste Instead it shall be handed over the applicable collection point for the recycling of electrical and electronic equipment By ensuring this product is disposed of cor rectly you will help prevent potential negative consequences for the en vironment a...

Page 9: ...lo qual podria ocurrir si este producto no se manípula de forma adecuada Para obtener informació nes mas detalladas sobre el reciclaje de este producto póngase en con tacto con la adMinistraciòn de su ciudad con su servicio de desechos del hogar o con el surtidor donde comprò el producto simbolo no produto ou na embalagem indica que este producto não pode ser tratado como lixo doméstico Em vez dis...

Page 10: ...c Proper transport assembly installation storage commissioning opera tion and maintenance are required to ensure that the product operates safely d The indicated environmental conditions must be observed e The information in this user s manual must be observed 1 8 Purpose of the user s guide a This user s manual contains information based on the requirements de fined by DIN EN 62079 for mechanical...

Page 11: ...1 ET Device for remote assistance and data monitoring by mobile network with extended temperature range ET Extended Temperature 1 12 Safety instructions 1 12 1 Installation according to the instructions Commissioning the Ubiquity Router device is prohibited until it has been absolutely ensured that the system in which the Ubiquity Router device is to be installed complies with all the applicable E...

Page 12: ...ons 1 13 Notes about usage Ubiquity Router devices are approved for indoor use only Ubiquity Router devices may be damaged if operated outdoors 1 14 Applicable standard Please refer to section 6 for details about the relevant standards ...

Page 13: ...7 Ubiquity Router family User s guide SECTION 2 2 Description ...

Page 14: ...WAN mobile network connection RK11 and RM11 models RS 232 RS 485 RS 422 Optical isolated serial port with MPI support up to 187 Kbit s USB 2 0 interface for system configuration and updates Front panel LEDs for device status and operation report 24 VDC Digital input to control Ubiquity Router device WAN connection activation 24 VDC Digital input for Ubiquity Router device software reset Digital ou...

Page 15: ...kage consists of RK RM system RK10 RM10 RK11 RM11 User s guide CD DIN mount kit mounted Wall mount kit n 1 Power supply plug n 1 Isolated IO plug Pentaband Stilo Antenna option al Pentaband Out dor Antenna op tional Pentaband Wall mount Antenna optional Antenna cable ex tension 3 5 m optional ...

Page 16: ...iption Figure 1 RK10 2 4 Front view RK10 Reset LED Yellow Run Stop LED Green Red COM Rx LED COM WAN ETH2 LAN ETH1 USB COM Tx LED Green Remote Connection LED Green Power LED Green 10 9 8 7 6 1 2 3 4 5 1 2 3 10 9 8 7 6 5 4 ...

Page 17: ... because not associated to any Domain Sequence of 2 red blinks connection attempt to a different domain than the first of the initial registration Single 2 green blinks Configuration from USB stick successfully complet ed Single 2 red blinks User credential for Domain access not valid Single 3 green blinks Ubiquity Router device update from USB stick suc cessfully completed Single 3 red blinks Ubi...

Page 18: ...2 Description 2 5 Front view RM10 Reset LED Yellow Run Stop LED Green Red COM Rx LED COM WAN ETH2 LAN ETH1 USB COM Tx LED Green Remote Connection LED Green Power LED Green 10 9 8 7 6 1 2 3 4 5 1 2 3 10 9 8 7 6 5 4 ...

Page 19: ... because not associated to any Domain Sequence of 2 red blinks connection attempt to a different domain than the first of the initial registration Single 2 green blinks Configuration from USB stick successfully complet ed Single 2 red blinks User credential for Domain access not valid Single 3 green blinks Ubiquity Router device update from USB stick suc cessfully completed Single 3 red blinks Ubi...

Page 20: ...t LED Yellow Run Stop LED Green Red COM Rx LED COM WAN ETH2 LAN ETH1 USB COM Tx LED Green 2G 3G 3G Modem Activity 2G 3G 3G Modem Connection RF antenna connector Remote Connection LED Green Power LED Green 10 9 13 12 11 8 7 6 1 2 3 4 5 1 2 3 10 11 8 7 6 5 4 9 13 12 ...

Page 21: ...iguration from USB stick successfully complet ed Single 2 red blinks User credential for Domain access not valid Single 3 green blinks Ubiquity Router device Update from USB stick suc cessfully completed Single 3 red blinks Ubiquity Router device Updated from USB Stick failed Single 4 red blinks Factory restore started Single 5 red blinks Ubiquity Runtime execution error will follow a system resta...

Page 22: ...t LED Yellow Run Stop LED Green Red COM Rx LED COM WAN ETH2 LAN ETH1 USB COM Tx LED Green 2G 3G 3G Modem Activity 2G 3G 3G Modem Connection RF antenna connector Remote Connection LED Green Power LED Green 13 12 11 10 9 8 7 6 1 2 3 4 5 1 2 3 9 13 7 6 5 4 11 10 12 8 ...

Page 23: ...iguration from USB stick successfully complet ed Single 2 red blinks User credential for Domain access not valid Single 3 green blinks Ubiquity Router device Update from USB stick suc cessfully completed Single 3 red blinks Ubiquity Router device Updated from USB Stick failed Single 4 red blinks Factory restore started Single 5 red blinks Ubiquity Runtime execution error will follow a system resta...

Page 24: ... the Ubiquity Router device to factory settings All the set tings are reset all the system software is restored to original ver sions including the operating system the firmware the Ubiquity Runtime and Domain registrations identity is removed To execute the restore turn off the device press and hold down the reset button and give power You need to hold down the button for at least 10 seconds The ...

Page 25: ... selector or by a PLC outputs IN1 This input allows controlling the device restart from outside The operation corresponds to the RESET button Once the command is received a proper feedback is returned by the status LED OUT0 The output turns active when Ubiquity Router device is connected to the associated Domain Note that the simple connection to the server does not activate the output it is requi...

Page 26: ...RK10 Figure 7 RK11 RM11 2 10 Left view Full stainless steel enclosure Aeration holes 2 11 Rear view RK11 RK11 ET RM11 RM11 ET Wall book mounting plate holes DIN rail book mounting hook holes SIM card socket 3 2 1 2 1 1 2 1 1 2 1 1 2 2 3 ...

Page 27: ...21 Ubiquity Router family User s guide Figure 8 RK10 2 12 Rear view RK10 RK10 ET RM10 RM10 ET Wall book mounting plate holes DIN book mounting hook holes 2 1 1 2 1 1 2 1 ...

Page 28: ...gure 9 RK10 2 12 1 Labels On the side panels there are the following labels LAN IP Mask WAN IP User Password 192 168 0 1 255 255 255 0 DHCP admin admin MAC LAN code MAC WAN code Serial number Bar Code IMEI 5 1 6 4 3 2 1 2 3 4 5 6 ...

Page 29: ...ter family User s guide Figure 10 RK10 DC Input pinout Digital In Out pinout CE marking Disposal Electrical information Model COM pinout Restore factory defaults button Reset button 9 8 7 6 5 4 3 2 1 3 4 6 5 9 7 2 1 8 ...

Page 30: ...cription Figure 11 RK11 Figure 12 Pentaband stilo antenna SIM card insertion label 2 12 2 Antenna 2 12 2 1 Pentaband stilo antenna RK11 direct mount or panel mount using extension cable 20W 0dBi 50 Ohms 48mm SMA M 1 1 ...

Page 31: ...25 Ubiquity Router family User s guide Figure 13 Pentaband wall mount antenna 2 12 2 2 Pentaband wall mount antenna 5mt cable wall mount with 90 bracket IP67 50W 2 5dBi 50 Ohms 248mm SMA M ...

Page 32: ...26 SECTION 2 Description Figure 14 Pentaband outdor antenna 2 12 2 3 Pentaband outdor antenna 3mt cable outdoor panel mount IP67 5W 3 2dBi 50 Ohms 48x50mm SMA M ...

Page 33: ...27 Ubiquity Router family User s guide SECTION 3 3 Installation and connection ...

Page 34: ...le signs of transport damage and for completeness In the case of damaged parts contact your ASEM representative Do not install parts damaged during shipment 3 3 Checking the operating conditions Read carefully the standards approvals EMC parameters and technical specifications for operation of the device This information is available in the following sections o Certificates and approvals see secti...

Page 35: ...biquity Router device system is designed for book mounting position both wall book mount and DIN book mount An inclined installation reduces the thermal convection of the device and the maximum permissible ambient temperature for operation Please contact ASEM for details The device may otherwise be damaged and its certifications and warran ty will be void 3 5 Preparing the mounting In order to ens...

Page 36: ...15 Wall mounting installation procedure Figure 16 Wall mounting installation procedure 3 6 Mounting the device 3 6 1 Wall mounting installation procedure The system can be installed on a panel as follows Install the hook as illustrated in the picture ...

Page 37: ...re 20 Wall mounting installation procedure Drill the required holes on the housing panel according to the instructions detailed in the figure There are 2 fastening points Fastening can be made using stainless steel screws M4x20 Hang the system as shown in the figure Step 1 first lift and insert the top Step 2 align the bottom Step 3 Release the top to match the slots with the screws ...

Page 38: ...32 SECTION 3 Installation and connection Figure 21 Wall mounting installation procedure Step 4 Tighten two screws ...

Page 39: ...stallation procedure Figure 23 Wall mounting installation procedure Figure 24 Wall mounting installation procedure 3 6 2 DIN guide mounting installation procedure The system can be installed on a DIN guide as follows Install the DIN hook as illustrated in the picture ...

Page 40: ...34 SECTION 3 Installation and connection Figure 25 Wall mounting installation procedure Figure 26 Wall mounting installation procedure Hang the system to the DIN guide Example of correct installation ...

Page 41: ...35 Ubiquity Router family User s guide Figure 27 Wall mounting installation procedure To remove the system from the DIN guide Lift the system up and release it from the DIN guide ...

Page 42: ...ith the product The SIM card must be associated with a data traffic plan The traffic plan must be properly chosen depending on foreseen traffic generated by the remote assistance sessions and SMS notification usage for RM models The SIM card must be of ID 000 ISO IEC 7810 standard format 25 mm 15 mm Insert correctly the SIM card as shown in the picture ...

Page 43: ...37 Ubiquity Router family User s guide Figure 30 SIM card insertion Figure 31 SIM card inserted datail Pull the SIM card in the hole till you listen a clic ...

Page 44: ...stallation Figure 33 Pentaband stilo antenna installation 3 7 1 Antenna Installation 3 7 1 1 Pentaband stilo antenna For dimension installation please refer to pararagraph 6 4 Drill a 6 5mm hole on the metal Recommended torque for mounting is 0 9 Nm Max thickness 2mm 6 5mm hole ...

Page 45: ...and outdor antenna installation 3 7 1 2 Pentaband wall mount antenna For dimension installation please refer to pararagraph 6 4 For dimension installation please refer to pararagraph 6 5 3 7 1 3 Pentaband outdor antenna For dimension installation please refer to pararagraph 6 6 Drill a 13mm hole on the Metal ...

Page 46: ...40 SECTION 3 Installation and connection Figure 36 Pentaband outdor antenna installation Recommended torque for mounting is 2 94 Nm Maximum torque for mounting is 3 92 Nm Max thickness 5mm ...

Page 47: ...must be steered away from the interface To achieve this goal the following methods can be used 1 Use an equipotential bonding cable 16mm 2 suitable at least 75C to con nect the equipment s ground to the Ubiquity Router device s ground 2 Connect the data cable screens to the equipotential bonding rail on both sides before connecting the cable to the interfaces 3 8 3 Power supply connection The devi...

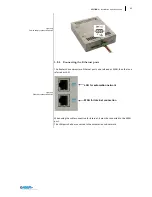
Page 48: ... 4 Connecting the Ethernet ports The Routers have always two Ethernet ports one referred as WAN the other one referred as LAN When using the cable connection for Internet it must be connected to the WAN port The LAN port shall be connected to the automation sub network LAN for automation network WAN for Internet connection ...

Page 49: ...on and testing the Ubiquity Router device Device Connect the power supply cable to Ubiquity Router device Switch the power supply on The green POWER LED will light on Please refer to the Ubiquity Control Center on line help for all the details about how to configure and use Ubiquity Router device ...

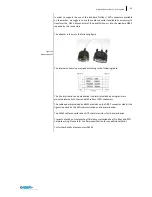
Page 50: ...ion to plant needs ASEM can supply connector adapters as optional parts but user can adapt DB15 connector by himself For further details please contact ASEM 3 9 1 Connecting to MPI or PPI networks The electrical specification of the MPI networks are often referring to the use of DB9 connectors like the one shown in the figure below The connector provides also the pass through DB9 female connector ...

Page 51: ... are made according to the following table The line termination and polarization is normally realized by using resistors mounted internally to the standard Profibus MPI connectors The cable adapter provided by ASEM provides on the DB9 F connector side all the signals required by the MPI communication and line termination The ASEM cable converter does NOT contain resistors for line termination Pres...

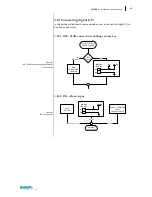
Page 52: ...e example on how to connect the digital I O to key button and lamps 3 10 1 IN0 WAN connection enabling security key DIGITAL IN OUT 1 2 UBIQUITY ROUTER CONFIGURATION IN0 SENSE WAN CONNECTION ENABLED NO DEFAULT IN0 IN0 24V DC YES 3 10 2 IN1 Reset input DIGITAL IN OUT 3 4 RESET BUTTON Processor POR input IN1 IN1 24V DC WD reset REBOOT COMMAND FROM CONTROL CENTER WD reset HW RESET PROCEDURE ...

Page 53: ...tance service running example Figure 48 OUT0 Remote assistance service running example 3 10 3 OUT0 WAN connection enabled signalling DIGITAL IN OUT 5 6 OUT0A OUT0B 24V DC max 200mA DIGITAL IN OUT 5 6 OUT0A OUT0B 24V DC max 200mA 230V AC 3 10 4 OUT0 Remote assistance service running DIGITAL IN OUT 7 8 OUT1A OUT1B 24V DC max 200mA DIGITAL IN OUT 7 8 OUT1A OUT1B 24V DC max 200mA 230V AC ...

Page 54: ...48 SECTION 3 Installation and connection ...

Page 55: ...49 Ubiquity Router family User s guide SECTION 4 4 Commissioning ...

Page 56: ...ity Router device requires for the configuration Ubiquity Control Center version 2 or above Control Center is available for download in the dedicated product section of the www asem it web site 4 1 1 Ubiquity Router RM models Ubiquity Router devices with data monitoring functionality RM models can be additionally configured to run a Premium HMI project for data collection alarm notification and we...

Page 57: ... Device Project to run the applica tion Note the name of the memory are according to the following table Memory Name used by oper ating system Note NAND NANDFlash Internal memory used to store the operating sys tem It is a read only memory MMC MMCMemory Memory to store data and executables Read and Write memory Please refer to Ubiquity software user guide for additional information about how retri...

Page 58: ...arm thresholds according to the application requirements Please see the Premium HMI Studio on lien help for further information about how to setup alarm notification via SMS Note Ubiquity RM models without integrated modem DO NOT support alarm notification via SMS Only notification via email is supported ...

Page 59: ...53 Ubiquity Router family User s guide SECTION 5 5 Maintenance and care ...

Page 60: ...evice is designed for maintenance free operation except for the replacing of the battery backup when necessary Attention Do not use detergents solvents cleaners or objects that could scratch the surface Attention switch off the power before any cleaning operation 5 1 1 Backup battery replacement CR1220 3V Remove the two columns as indicated in figure ...

Page 61: ...55 Ubiquity Router family User s guide Figure 51 Backup battery replacement Figure 52 Backup battery replacement Remove the screw as indicated in figure Locate the battery position ...

Page 62: ...56 SECTION 6 Maintenance and care Figure 53 Backup battery replacement Figure 54 Backup battery replacement Remove the battery ...

Page 63: ...hat works thanks to a set of soft ware components they can be divided in Firmware Ubiquity Runtime Premium HMI Runtime for RM models only All the Ubiquity Router device software components can be changed using a very simple procedure fully automatic safe and fast The software components upgrades are distributed in the format of a single file that works as container for the components to be replace...

Page 64: ... technical support The staff who deal with this handle questions on the entire range of products skillfully quickly and efficiently You can phone our staff in the service department and they will give you com plete prompt advice on how to resolve your problems telephone 39 0432 967250 fax 39 0432 967480 e mail suptec asem it 5 5 Recycling and disposal Ubiquity Router device can be recycled due to ...

Page 65: ...59 Ubiquity Router family User s guide SECTION 6 6 Technical specifications ...

Page 66: ...eds 1 x 100Mbps LAN RJ45 with Link Activity leds 2G 3G 3G modem only for RK RM11 Type provides data service under global GSM GPRS EDGE WCDMA networks 14 4Mbps downlink data rate USB interfaces Type 1 x USB 2 0 TYPE A host port software switch off Mass storage Internal not re movable NAND FLASH 256 MB Read Only for Operative System and other system software eMMC 2 4 GB 8 bit v 4 4 compatible applic...

Page 67: ...andling 20 W Impedance 50 Ohms Connector Straight SMA M Environmental Mechanical Temperature 40 to 85 C Radome color Black Radome material Pu Weight 6 g Wall mount Panel antenna characteristics Cellular Frequency MHz 824 896 880 960 1710 1880 1850 1990 1710 2170 Peak Gain dBi Free Space 0 7 0 9 1 7 2 5 2 2 L Bracket 4 0 3 6 2 8 3 8 3 3 Average Gain dBi Free Space 5 7 5 3 2 2 2 1 2 3 L Bracket 1 7 ...

Page 68: ...Hz 2500 2800MHz Peak Gain 1 2 dBi 3 2dBi 2 5dBi Average Gain 4 5 dB 2 5dB 4 5dB Efficiency 40 55 40 VSWR 3 0 1 Impedance 50Ω Polarization Linear Radiation Properties Omni directional Max Input Power 5 W Mechanical Dimensions mm Height 48mm and Diameter 50mm Cable Length 1m RG316 Casing UV Resistant ABS Base and Thread Nickel plated Copper Connector SMA M Fully Customizable Nut Nut M12 Sealant Rubb...

Page 69: ...or RK RM11 Immunity Conforms to EN 55024 Information technology equipment Immunity characteristics Conforms to EN 61000 6 2 Generic standard immunity for industrial en vironments Conforms to EN 61000 4 2 Electrostatic Discharge ESD Conforms to EN 61000 4 3 Radio Frequency Electromagnetic Field Sus ceptibility Test RS Conforms to EN 61000 4 4 Electrical Fast Transient Burst EFT Conforms to EN 61000...

Page 70: ...64 SECTION 8 Technical specifications Figure 57 Dimensions 6 3 Dimension drawings ...

Page 71: ...65 Ubiquity Router family User s guide Figure 58 Dimensions ...

Page 72: ...66 SECTION 8 Technical specifications Figure 59 Panel antenna drawing dimensions 6 4 Panel antenna drawing dimensions ...
Page 73: ...e 60 Wall mount antenna drawing dimensions 6 5 Wall mount antenna drawing dimensions 1 Main bracket 2 Back bracket 3 3 8L screw 4 Cap 5 4 25L screw 6 6 24L wall mount stud 7 CFD 200 cable 8 SMA M ST 9 Heat shrink tube 10 Housing 11 Flexible whip ...

Page 74: ...ecifications Figure 61 Outdoor panel antenna drawing dimen sions 6 6 Outdoor panel antenna drawing dimensions 1 Housing top 2 Housing bottom 3 Gasket 4 Multi tooth washer 5 Nut M12 6 RG316 7 Heat shrink tube 8 SMA M ST 9 O ring ...

Page 75: ...eady IN 7 Isolated Ground 8 Data Terminal Ready OUT 9 Carrier Detect IN 10 Transmit Data Receive Data RS 485 RS 422 I O 11 Transmit Data Receive Data RS 485 RS 422 I O 12 Ring Indication RS 232 IN 13 Receive Data RS 422 IN 14 Receive Data RS 422 IN 15 N C Any polarization or termination resistor connected to RS422 485 channel if required it has to be provided by the user 6 7 2 Digital In Out PIN S...

Page 76: ...70 SECTION 8 Technical specifications Table 12 DC Input 6 7 3 DC Input PIN Signal 1 Vin 2 Vin 3 EARTH ...

Page 77: ...nsertion 36 Figure 30 SIM card insertion 37 Figure 31 SIM card inserted datail 37 Figure 32 Pentaband stilo antenna installation 38 Figure 33 Pentaband stilo antenna installation 38 Figure 34 Pentaband wall mount antenna installation 39 Figure 35 Pentaband outdor antenna installation 39 Figure 36 Pentaband outdor antenna installation 40 Figure 37 Power supply connection detail 41 Figure 38 Power s...

Page 78: ...trical characteristics 60 Table 5 Mechanical characteristics 60 Table 6 Environmental characteristics 61 Table 7 Panel antenna characteristics 61 Table 8 Wall mount Panel antenna characteristics 61 Table 9 Outdor Panel antenna characteristics 62 Table 10 COM1 DB15M Serial 69 Table 11 Digital In Out 69 Table 12 DC Input 70 ASEM S p A Via Buia 4 33011 Artegna UD Italy Tel 39 0432 9671 Fax 39 0432 97...

Reviews: