7
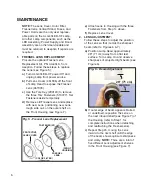
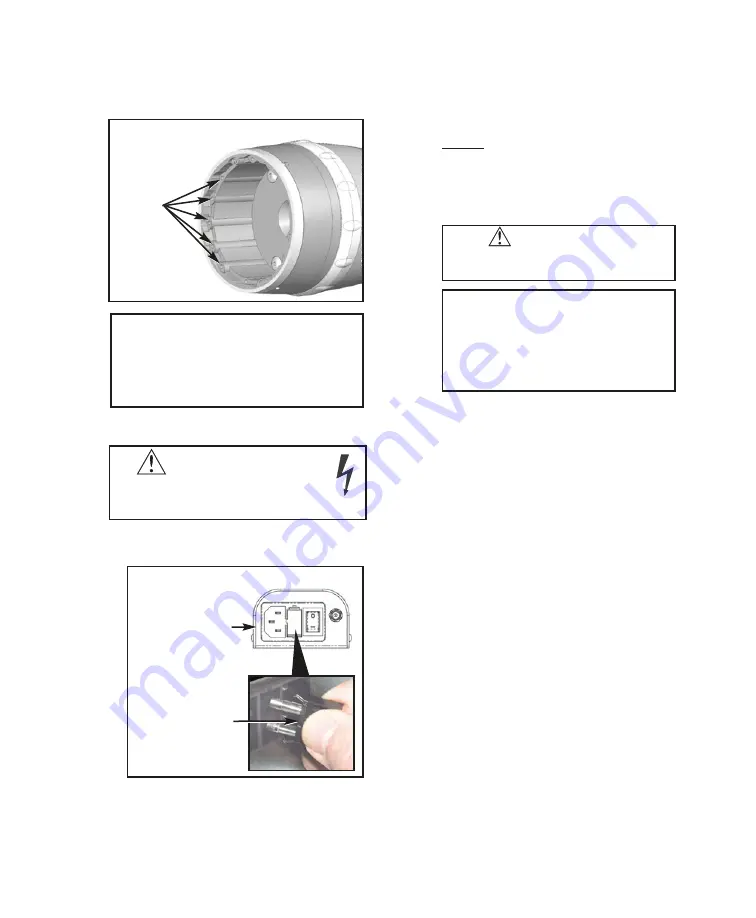
3. FUSE REPLACEMENT:
a)
Remove the Fuse Holder from the
Power Inlet connector (see Figure 8).
b)
Replace the two fuses in Fuse holder.
Replacement Fuses (2):
0.160A, 250V slo-blow fuse
(Fuse size: 5 x 20mm)
c)
Reinstall the Fuse Holder.
NOTE:
The ALU-40LED-CF features
auto-sensing, global voltage
compatibility. The fuses indicated are
correct for 100V-240V 50/60 Hz line
voltages.
4.
CLEANING:
a) Fresnel Lens:
Remove Lens Cover and Fresnel
Lens from Lamp Head. (
IMPORTANT:
Handle the Fresnel Lens by its edges
-- do not handle the active surface of
the Lens.) The acrylic Fresnel lens is
fragile and can be scratched. Dust is
the most common contaminant and
should be removed using compressed
air. If additional cleaning is necessary,
apply a few drops of reagent-grade
isopropyl alcohol, professional lens
cleaning solution, or de-ionized water
with a small amount of dish soap, to a
lint-free lens tissue and gently wipe
Lens. Clean the Lens Cover using the
same method. Reinstall Fresnel Lens
and Lens Cover onto Lamp Head.
b) Metal Components:
The metal exterior may be cleaned by
wiping with a soft cloth moistened with
mild detergent or disinfecting solution
such as isopropal alcohol.
c) Gooseneck & Electrical Cords:
Turn Lamp power Off. Wipe down the
gooseneck and electrical cords with a
cloth moistened with disinfecting
Turn the power off and unplug the
unit before following the steps below.
IMPORTANT
The LED Assembly is a non-serviceable
component of the
ALU-40LED-CF Lamp.
Return the entire Lamp Assembly to
Aseptico if LED repairs are necessary
.
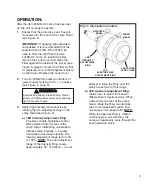
Fig. 7 - Lens Adjustment Shelves
SHELVES
(5)
WARNING
CAUTION:
• Do not use excessive amounts of
fluid when cleaning.
• Do not introduce any fluids to the
inside of the Lamp Head Housing
or the Power Supply Assembly.
WARNING:
Turn the power off and unplug the
unit before following the steps below.
Fig. 8 - Changing Fuses
ALU-40LED-CF
POWER SUPPLY
(BOTTOM VIEW)
FUSE HOLDER


