Page 9
3. Remove media guard and media from the fan guard assembly.
4. Remove the four aftercooler fan bolts.
5. Replace aftercooler fan and reassemble by reversing steps. Secure aftercooler housing bolts with
thread locking compound.
Aftercooler Assembly Replacement
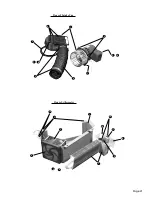
Reference Figure E
Tools:
1/8 and 3/16 hex drive or Allen wrench, flathead screwdriver, 12 in. or smaller crescent wrench,
serviceable thread locking compound and Teflon tape.
1. Remove compressor chassis from case bottom as per the Compressor Chassis Removal section.
2. Loosen the nut of the motor tee fitting which secures the motor/aftercooler tube. Remove the
tubing from the motor tee fitting leaving the nut and ferrule on the tube.
Reference Figure Group C
3. Depress the release ring on the aftercooler push-in elbow then pull free the motor/aftercooler
tube previously loosened in step 2.
4. Remove the tank/aftercooler tube from the push-in elbow fitting on the tank by depressing the
release ring and pulling on the tube. Note the tube routing.
5. Rotate the compressor chassis onto its left side (motor exhaust side). Depress the release ring
on the push-in straight fitting at aftercooler and pull tube straight out.
6. Remove the five aftercooler housing screws, disconnect fan plug and remove aftercooler housing.
7. Slide the aftercooler toward the compressor chassis front (power inlet) and remove.
8. Clamp aftercooler block in vise and remove push-in fittings, straight fitting first, then elbow.
Remove aftercooler manifold block screw and aftercooler cover plate. Minimize handling of the
aftercooler to avoid cracking it.
9. Replace aftercooler assembly and reassemble by reversing steps, being careful to reroute tubing
as noted during removal. Seal threaded ends of aftercooler push-in fittings with Teflon tape or
sealing compound and secure aftercooler housing bolts and aftercooler cover plate bolt with a
serviceable thread locking compound.
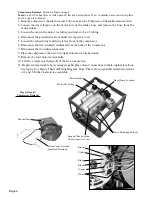
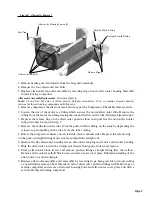
Aftercooler Housing Screws (5)
Fan Plug
Push-In Elbow Fitting
Straight Push-In Fitting
Release Rings
Aftercooler Bolts (4)
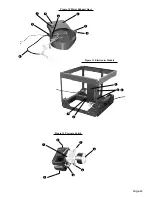
Figure E - Aftercooler Removal


