background image

3

ADC-02

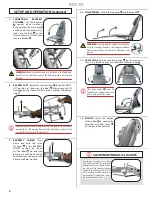
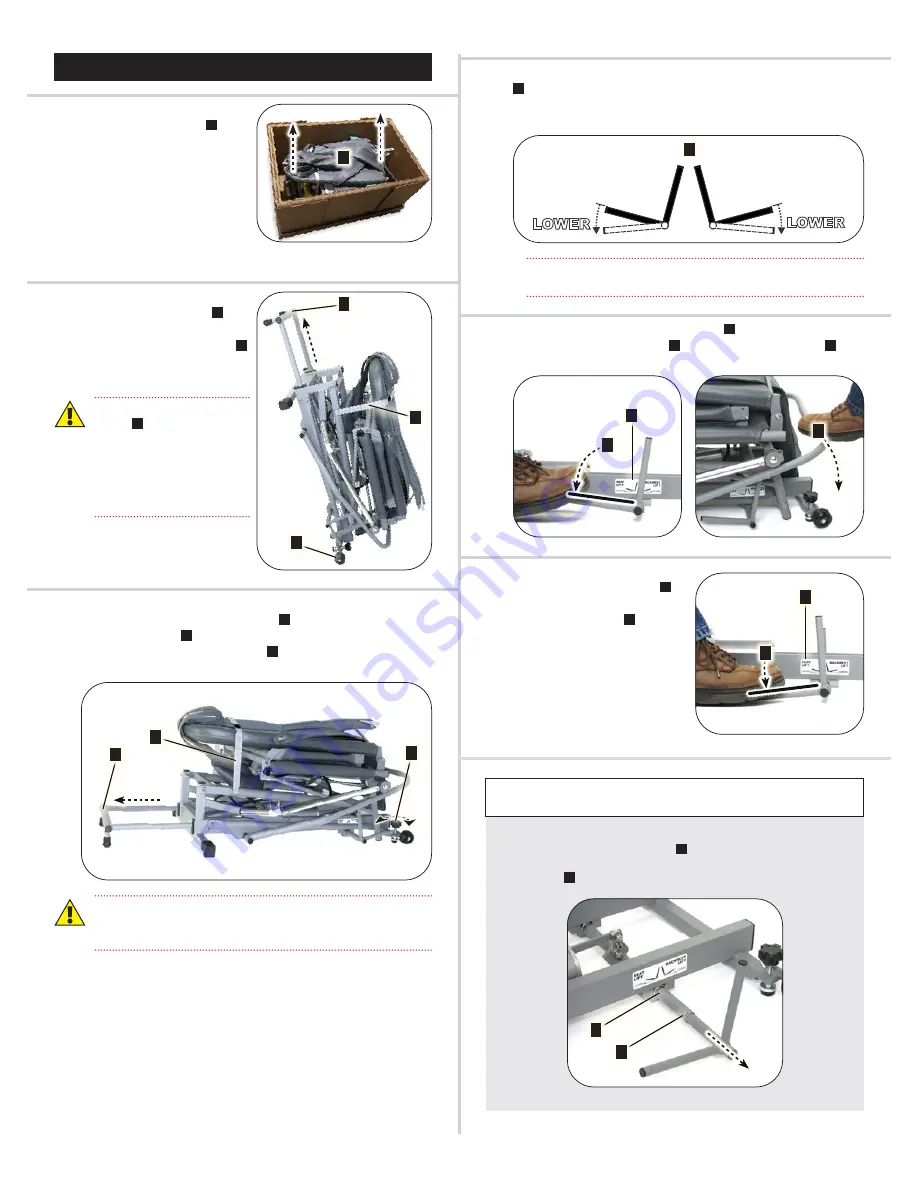
SETUP AND OPERATION

1   UNPACKING:

 Using two 

people, lift the chair 

A

 from 

the shipping box and set it on 

the floor. 

2   MOVING INTO POSITION:


Pull out the stabilizer 

A

 and 

use it as a handle to tilt the 

chair up onto its wheels 

B

then roll the chair to where it 

will be used. 


WARNING:

 The backrest 

strap 

C

 must always be 

securely fastened when 

tilting the chair upright to 

prevent injury or damage 

caused by the backrest 

suddenly opening.

3   CHAIR PREPARATION:

 Set the chair down with its feet on the 

floor. Make sure that the stabilizer 

A

 is fully extended. Adjust 

the leveling foot 

B

 as needed to compensate for an uneven 

floor. Remove the backrest strap 

C

 from the chair and save for 

reuse.  

A

C

B


WARNING:

 The stabilizer must be fully extended and the 

leveling foot properly adjusted to reduce chair tipping hazard. 

The floor under the chair must be hard and level.

4   SELECTOR LEVER LABELS:

 Locate the 2 selector lever labels 

A

 on opposite sides of the chair base. These labels show the 

selector lever positions for lifting and lowering the seat and 

the backrest. 

A

SEAT

LIFT

L O W E R

BACKREST

LIFT

L O W E R


The selector lever can be operated hands-free from either side 

of the chair.

5   SEAT LIFT:

 Rotate the selector lever 

A

 to the SEAT LIFT posi‑

tion (as shown on the label 

B

) then pump the lift lever 

C

 with 

your foot until the chair reaches the desired height.

A

B

C

6   SEAT LOWER:

 Press down and 

hold the selector lever 

A

 in 

the SEAT LOWER position (as 

shown on the label 

B

) to lower 

the chair.

The selector levers can be extended outward to make them easier to 

The selector levers can be extended outward to make them easier to 

reach. Depress the locking button 

reach. Depress the locking button 

A

 on the selector lever tube, then 

 on the selector lever tube, then 

slide the selector lever out until the locking button pops out of the 

slide the selector lever out until the locking button pops out of the 

second hole 

second hole 

B

 on the tube.

 on the tube.

A

B

 EXTENDING THE SELECTOR LEVERS

A

A

B

C

A

B

Summary of Contents for ADC-02

Page 1: ...ADC 02 Portable Hydraulic Dental Chair OPERATION MAINTENANCE MANUAL PARTS LIST...

Page 2: ...N Your new Aseptico ADC 02 portable hydraulic dental chair provides patient seating for field dentistry and is engineered to provide years of reliable service Please read the instructions provided in...

Page 3: ...he 2 selector lever labels A on opposite sides of the chair base These labels show the selector lever positions for lifting and lowering the seat and the backrest A SEAT LIFT L OW E R BACKREST LIFT L...

Page 4: ...st to help it recline 10 CHAIR PANELS Unfold the leg panel A and foot panel B A B WARNING The leg and foot panels must not be used for seating to reduce chair tipping hazard Patients must only be seat...

Page 5: ...position Press down on the lift lever Fig 2 B and hold it there so you can access the rubber bump stop Fig 2 C Remove the rubber bump stop by twisting and pulling on it A B C Fig 2 Fig 2 2b The objec...

Page 6: ...portant during steps 3 and 4 that the lift lever not be pumped while the chair is tipped back Any air in the hydraulic oil reservoir will be near the pump intake and can be drawn back into the pump cy...

Page 7: ...inder Do not remove the other two plugs on the pump doing so will introduce air into the hydraulic lines Fig 10 Fig 10 A 4 Press down and hold the selector lever in the SEAT LOWER position until the s...

Page 8: ...ress and hold selector lever in the SEAT LOWER position until the seat frame touches the floor If the seat frame won t lower all the way press down on the lift lever and selector lever simultaneously...

Page 9: ...38W X 875 L 2 510239 SMS OVALHDPHL 8 X 5 8 CHROME SEMS 2 510251 SPRING PIN STNLS 1 4D X 3 4L 2 510263 HOLE PLUG 3 4 NYLON BLK 6 510295 C S BTNSOC STNLS 1 4 20 X 1 1 4 2 510296 NUT NYLOC 1 4 20 STNLS H...

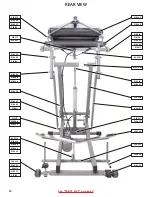
Page 10: ...4 462191 510917 510927 330625 330636 510832 510815 510845 510297 510126 510917 510927 510809 510845 510126 510842 510500 510296 510835 510847 510846 510811 510117 510500 510296 462218 510813 510500 51...

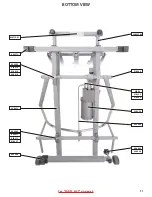
Page 11: ...11 BOTTOM VIEW 330637 08 510263 510119 510356 510500 330629 462249 850042 850044 420715 07 462312 462243 510813 510816 520818 330613 462242 462511 510813 510857 462390 See PARTS LIST on page 9...

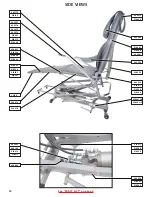
Page 12: ...025 510233 510050 510048 510295 510296 510103 510251 331619 330618 330615 330626 462304 462313 510239 510841 510500 462301 462239 510817 510296 510844 420441 20 420441 19 462289 510817 510500 510296 4...

Page 13: ...10210 450201 PART NO ITEM QTY 330621 CYLINDER SEAT ADC 02 CHAIR 1 330622 CYLINDER BACKREST ADC 02 CHAIR 1 330623 PUMP ADC 02 CHAIR 1 PART NO ITEM QTY 730675 FTN ELBOW STRAIGHTTHREAD 1 4 X 7 16 20 2 73...

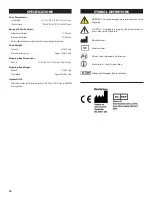
Page 14: ...rox 300 lb 136 kg Shipping Box Dimensions Box Size 27 W x 42 L x 21 H 69 cm x 107 cm x 54 cm Shipping Box Weight Box only 27 lb 12 3 kg Fully Loaded Approx 96 lb 43 6 kg Hydraulic Oil Industrial premi...

Page 15: ...ranty is at its sole op tion and discretion to repair or replace any defective component or product in part or whole Aseptico shall be the sole arbiter of such action In the event of alleged defect un...

Page 16: ...8333 216th Street S E Woodinville WA 98072 P O Box 1548 Woodinville WA 98072 1548 800 426 5913 425 487 3157 www aseptico com info aseptico com P N 421064 Rev D ECO 14925 02 2020 Printed in the USA...

Reviews: