background image

5

AEU-1070-70V / AEU-1070

SYSTEM SETUP

This section provides step-by-step instructions for setting up the unit.


The handpiece, motor/cord assembly, and irrigation tubing  set 

must be sterilized before each procedure as instructed in the


Maintenance and Sterilization

 section (page 10).

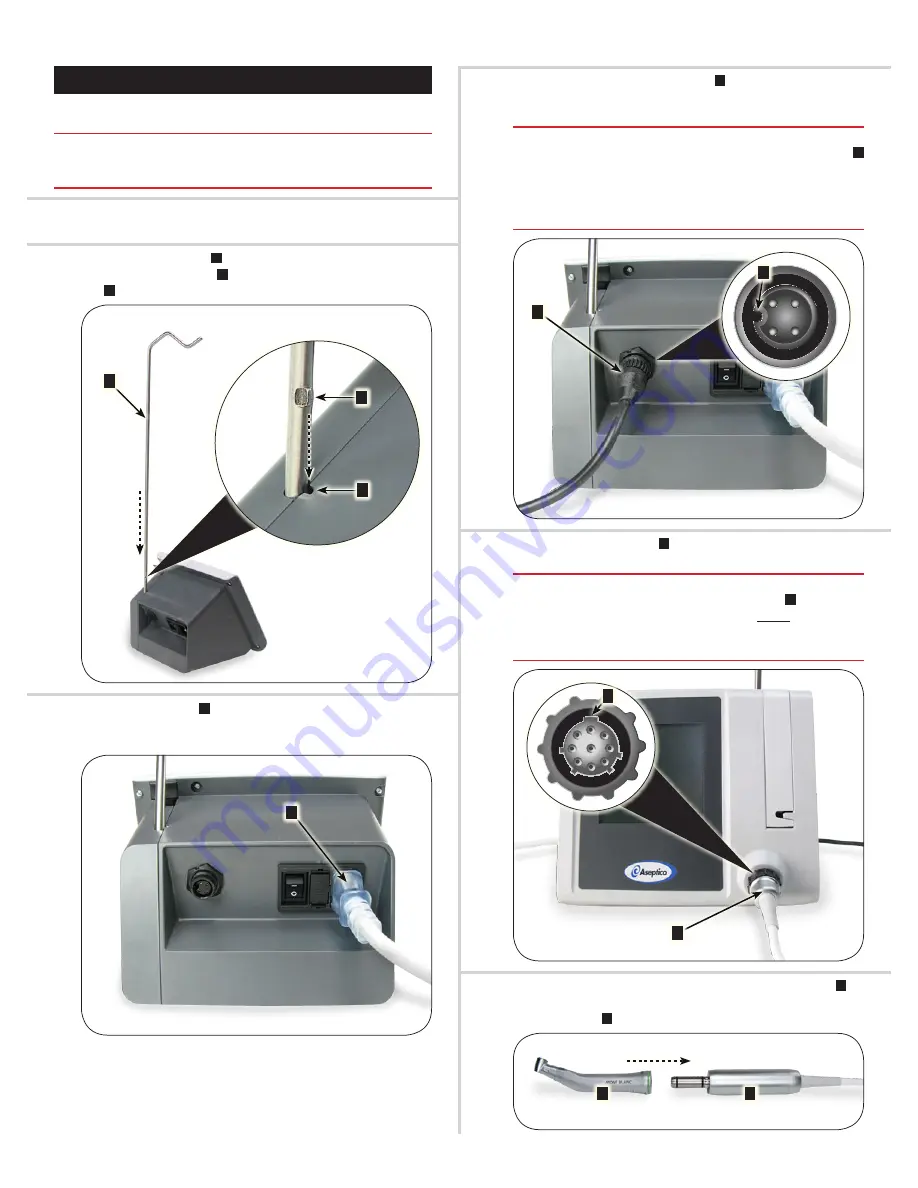
1 . 

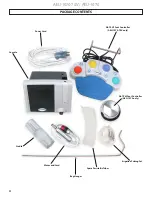
Unpack the unit and identify each of the components shown 

to the left (page 4).

2 . 

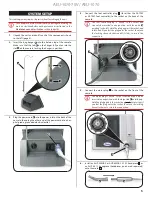
Insert the bag hanger 

A

 into the hole on top of the console. 

Make sure that the tab 

B

 on the hanger fully enters into the 

slot 

C

 on the console, locking the hanger in position.

A

B

C

3 . 

Plug the power cord 

A

 into the power inlet on the back of the 

console, then plug the other end of the power cord into a hos-

pital-grade, grounded electrical outlet.

A

4 . 

Connect the foot controller plug 

A

 (for either the AE-7PM 

or AE-70V2 foot controller) to the socket on the back of the 

console.


The foot controller plug is “keyed” to the socket and 

can only be inserted in one position, with the notch 

B


pointing to the left. Hold the plug against the socket and 

rotate it until you feel the plug enter the socket, then turn 

the locking sleeve clockwise until it clicks to secure the 

connection.

A

B

5 . 

Connect the motor plug 

A

 to the socket on the front of the 

console.


The motor plug is “keyed” to the socket and can only be 

inserted in one position, with the larger tab 

B

 pointing up. 

Hold the plug against the socket and gently rotate it until 

you feel the plug enter the socket, then turn the locking 

sleeve clockwise to secure the connection.

A

B

6 . 

Install an AHP-85MB-X or AHP-85MB-CX 20:1 handpiece 

A

, or 

an AHP-64 1:1 handpiece (handpieces purchased separately) 

onto the motor 

B

A

B

Summary of Contents for AE-70V2

Page 1: ...U 1070 70V AEU 1070 Dental Implant Systems AE 70V2 Included with AEU 1070 70V AE 7PM Included with AEU 1070 AHP 85MB X Shown with optional equipment purchased separately OPERATION AND MAINTENANCE MANU...

Page 2: ...u mentation drills burs etc used in endodontics implantology and other oral surgery applications s CAUTION The irrigation supply system is designed for use with a saline solution or sterile water For...

Page 3: ...stant cabinet design helps prevent liquid spills from entering the internal electronics and allows easy clean up Isolated peristaltic pump chamber prevents leaks from entering the internal electronics...

Page 4: ...0 70V AEU 1070 Power Cord Console Cradle Motor and Cord AE 7PM Foot Controller AEU 1070 only AE 70V2 Foot Controller AEU 1070 70V only Spare Peristaltic Tubes Irrigation Tubing Set Bag Hanger PACKAGE...

Page 5: ...Connect the foot controller plug A for either the AE 7PM or AE 70V2 foot controller to the socket on the back of the console The foot controller plug is keyed to the socket and can only be inserted i...

Page 6: ...nd the small tubing connector E A C D E B 10 Two red arrows A on the pump door show the direction to install the irrigation tubing Start by threading the peristaltic tube segment through the top slot...

Page 7: ...03 clips B provided in the AE 24 tubing set bag A B 15 Hang a saline bag 1000ml max from the hanger with the saline port pointing towards the rear of the console Swing the bag away from the console to...

Page 8: ...ATIO SETTING Press the number 1 or 20 that appears between the and buttons to select the ratio setting RATIO SETTING NUMBER DISPLAYED 20 1 20 1 1 1 Press anywhere on the right side of the screen to re...

Page 9: ...d changes then stop 6 If calibration is successful the CAL button will stop flashing when the motor stops If the CAL button continues to flash after the motor stops calibration has failed Try calibrat...

Page 10: ...d Assembly CAUTION The motor is sensitive to shock Do not drop or impact the motor against a hard surface WARNING Do not oil or lubricate the motor CAUTION Do not allow oil from the handpiece to drain...

Page 11: ...utes B Pre vacuum Dynamic air removal method Time 4 minutes Temperature 132 C 270 F Dry time 40 minutes Flash Sterilization For immediate use only C Unwrapped standard autoclaving Gravity displacement...

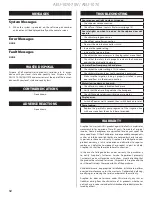
Page 12: ...o setting matches the handpiece Check if handpiece lubricant is draining into motor Display error Switch off power wait 5 seconds then switch back on to reset Pump leaking Replace the peristaltic pump...

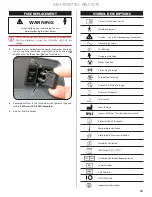
Page 13: ...n the fuse holder with the same type and rating 5 x 20mm 1 6A 250V slow blow 3 Reinstall the fuse holder SYMBOL DESCRIPTIONS Consult Instructions For Use Type B Equipment Caution Consult Accompanying...

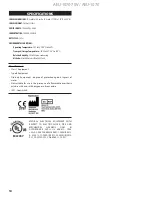
Page 14: ...midity 10 to 90 non condensing Altitude 0 to 3 000 meters 0 to 9 842 feet Classifications Class 1 Equipment Type B Equipment Ordinary Equipment degree of protection against ingress of water Not suitab...

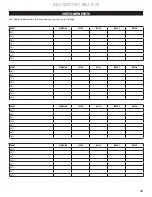
Page 15: ...PRST 1 PRST 2 PRST 3 PRST 4 PRST 5 PRST 6 PRST 7 PRST 8 PRESET DIRECTION SPEED RATIO TORQUE WATER PRST 1 PRST 2 PRST 3 PRST 4 PRST 5 PRST 6 PRST 7 PRST 8 PRESET DIRECTION SPEED RATIO TORQUE WATER PRS...

Page 16: ...548 Woodinville WA 98072 8333 216th Street S E Woodinville WA 98072 Phone 425 487 3157 Toll Free 800 426 5913 Web www aseptico com Email info aseptico com P N 421116 Rev C ECO 14662 02 2019 Printed in...

Reviews: