background image

1.

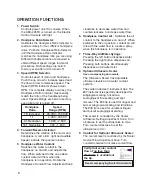
Turn the power switch on the front of the

console to the 'ON' position. The Electric

Control Console will light and the unit will

pressurize.

NOTE:

Whenever the pump turns on, the

HVE vacuum will also come on.

2a. Using the Motor:

Flip the Scaler/Motor Toggle Switch to the

right (Motor) side.

2b.

Attach a sterile handpiece to the motor

and set the Ratio Selector to match the

gear ratio of the handpiece being used

(i.e. 1:5 for a 1:5 increaser handpiece, or

4:1 for a 4:1 reduction handpiece).

2c.

Adjust the up/down arrows on the RPM

display to the desired operating speed on

the RPM readout.

NOTE:

The RPM display indicates true

bur speed when the Ratio Selector is in

the appropriate position. Make sure the

Ratio Selector matches the handpiece

ratio for display accuracy.

2d. Motor Coolant/Irrigation:

Turn the Handpiece Coolant Switch on.

Adjust the Handpiece Coolant Flow Knob

to the desired setting.

2e. Motor Coolant Air/Irrigation:

Turn the Handpiece Coolant Air Switch on

to create spray. Adjust the Handpiece

Coolant Water Flow Knob to the desired

spray setting.

3a. Using the Optional Ultrasonic Scaler:

See accompanying documents.

Flip the Scaler/Motor Toggle Switch to the

left (Scaler) side. Rinse the water line before

attaching tip by pressing the foot switch and

allowing the water to flow for 30 seconds.

3b.

Screw on a sterile Instrument Tip to the

Scaler Handpiece and tighten it firmly.

Turn carefully backwards approx. 1mm.

This will put the tip in a neutral position so

it can move freely.

3c.

Adjust the Scaler Coolant Flow Control

Knob to the desired setting. The coolant

should create a mist around the Scaler tip.

3d.

Adjust the Scaler Ultrasonic Setting Knob

to the desired setting.

4.

Use the 3-Way Air/Water Syringe as

necessary for irrigation or drying. A plastic

dental barrier sheath made for the 3-way

syringe must be used on syringes that

have not been autoclaved.

5.

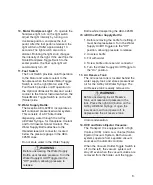
Adjust the vacuum pressure by moving the

valves on both the HVE and saliva

ejectors. 

6.

Press the foot control to activate Motor or

Optional Scaler and begin operation.

7.

Empty the Vacuum Waste Tank when it is

75% full. If the red ‘Full waste container

indicator light’ turns on, the vacuum system

is full. When this occurs, shut down vacuum

system, and empty the waste tank.

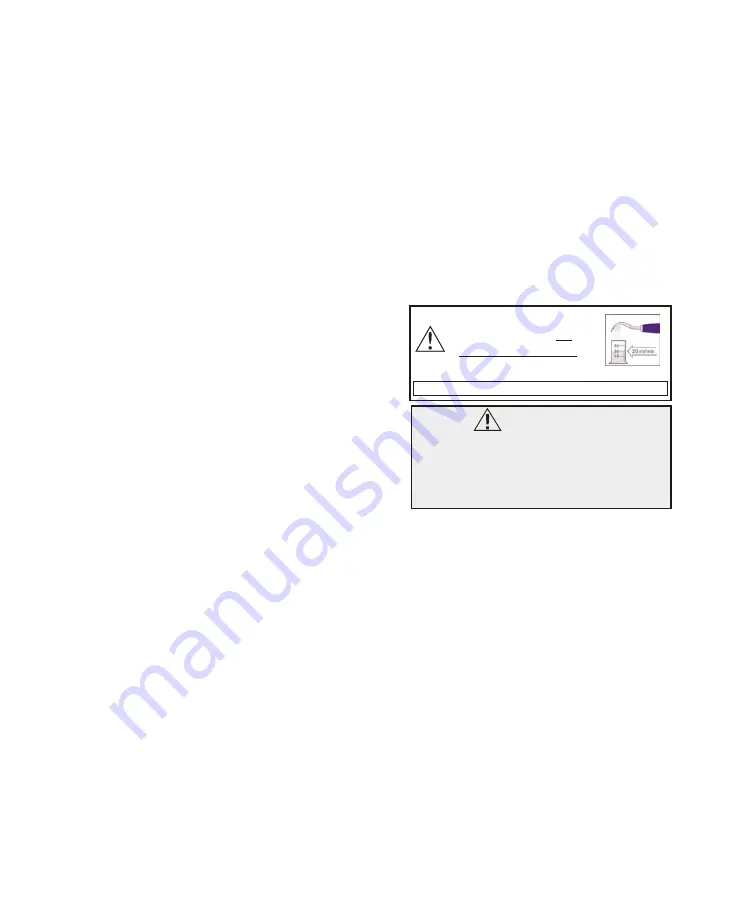
WARNING:

Ensure proper coolant flow before using

Scaler on a patient. Heat emitted by the

Scaler may damage teeth if coolant

water is not atomized at the Scaler tip.

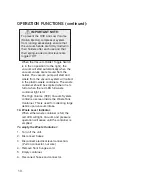
OPERATION:

After the unit has been set up and you have made yourself familiar with the operation functions,

you are ready for operation as follows:

11.

Verify that scaler

coolant flow of no

less than 20ml/min is

available at the tip.

SEE ACCOMPANyING SCALER DOCUMENTS

Summary of Contents for AEU-425 Transport II

Page 1: ...AEU 425FO Transport II Portable Dental System With Fiber Optics OPERATION and MAINTENANCE INSTRUCTION MANUAL...

Page 2: ...eptico com info aseptico com To prevent injury to people and damage to property please heed relevant warnings and remarks They are marked as follows WARNING Serious injury or death may result if ignor...

Page 3: ...many years of reliable service Please read the instructions provided in this manual to receive the best and longest service from your Aseptico equipment Separate manuals may be provided to cover the o...

Page 4: ...Reserve Capacity 45 8 cu in 750 cc Water Reservoir Capacity 25 4 fl oz 0 75 liter Water Flow 6 5 fl oz min 0 192 liters min High Volume Waste Tank Capacity 0 2 gal 0 75 L Low Volume Waste Tank Capaci...

Page 5: ...NG Do not install where there is a risk of an explosion The Transport II is not intended for operation in the presence of flammable anesthetics or gases WARNING CONTRAINDICATIONS The AEU 425FO Transpo...

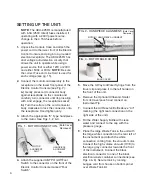
Page 6: ...motor See Figs 1 2 3 4 Attach the supplied AE 7P On Off Foot Switch to the connector on the front of the Electric Control Console marked Foot Switch 5 Move the 3 Way Air Water Syringe from the travel...

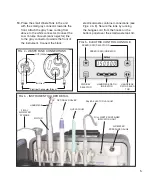
Page 7: ...MENT HOLDER DETAIL FULL WASTE CONTAINER INDICATOR LIGHT 5 10 Place the small Waste Tank in the unit with the small gray connector towards the front Attach the gray hose coming from above to the white...

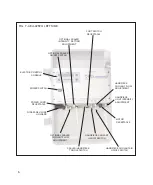
Page 8: ...PTACLE ELECTRIC CONTROL CONSOLE SCALER HANDPIECE TOGGLE SWITCH OPTIONAL SCALER COOLANT FLOW ADJUSTMENT OPTIONAL SCALER ON OFF SWITCH HANDPIECE COOLANT FLOW ADJUSTMENT HANDPIECE COOLANT ON OFF SWITCH O...

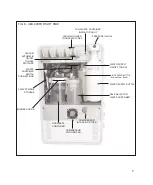
Page 9: ...INER 3 WAY SYRINGE STORAGE COMPRESSOR INTAKE AIR FILTER BUNGEE CORDS COMPRESSOR COOLING FAN WATER SUPPLY ON OFF TOGGLE VACUUM HOLDER TOGGLE SWITCHES PRESSURE GAUGE FULL WASTE CONTAINER INDICATOR LIGHT...

Page 10: ...andpiece Speed Ratio Range RPM 1 5 Increaser 25 000 150 000 1 1 4 000 30 000 4 1 Reduction 1 000 7 500 16 1 Reduction 300 1 800 clockwise to decrease water flow and counterclockwise to increase water...

Page 11: ...in the AEU 425FO case Do not store water in the Water Supply Bottle while transporting the AEU 425FO To refill the Water Supply Bottle 1 Before removing the bottle for refilling it must be depressuriz...

Page 12: ...g large debris upon vacuum intake 14 Waste Level Indicator When either waste container is full the red LED will light Vacuum and pressure operation will cease until the container is emptied To empty t...

Page 13: ...ssing the foot switch and allowing the water to flow for 30 seconds 3b Screw on a sterile Instrument Tip to the Scaler Handpiece and tighten it firmly Turn carefully backwards approx 1mm This will put...

Page 14: ...nd of motor housing and insert dental pick or other small pointed instrument into guide hole at base of bulb see photograph Slide bulb forward until disconnected from socket in motor housing Wipe bulb...

Page 15: ...hose with a soft cloth Use a 45 isopropal and detergent solution DO NOT IMMERSE the handpiece in any fluid or spray any fluid directly on the handpiece WATER LINES Disinfect the water lines weekly Pre...

Page 16: ...as far as it will go Release collar and gently tug on tip before using to ensure that tip is securely locked into socket Syringe Tip Sterilization 1 Remove contaminated syringe tip 2 Remove all visibl...

Page 17: ...t connector 2 Changing the fuse Replacement Fuses 0 63A 250V slo blo fuses Fuse size 5 x 20mm 3 Replace the Fuseholders EXTENSION CORD RECOMMENDATIONS Use only a 3 wire extension cord that has a 3 bla...

Page 18: ...tention consult accompanying documents SYMBOL DEFINITIONS Type B Equipment Protect Against Dripping Water Serial Number IPX1 Scaler Adjustment Switches Toggle Select Switch Foot Switch Handpiece Coola...

Page 19: ...into motor After lubricating set handpiece with head down to let excess lubricant drain out Check bulb Note Do Not Handle Bulb With Fingers Ensure that HVE and Low Volume Saliva Ejector vacuum heads...

Page 20: ...option and discretion to repair or replace any defective component or product in part or whole Aseptico shall be the sole arbiter of such action In the event of alleged defect under warranty the purch...

Reviews: