4
SETTING UP THE UNIT:
1.
Unpack the Console.
2.
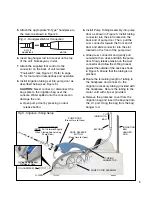
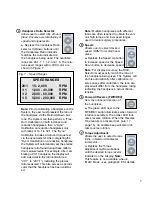
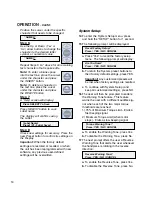
The autoclavable Motor Cradle can be
attached to either side of the Console or
placed flat on any adjacent tabletop surface
or tray. To install the Cradle, mount the
Cradle Bracket into the holes provided on the
bottom of the Chassis with the two screws
provided (see Figure 1). Align the slot on the
bottom of the Cradle with the mounting rail
on the Bracket and snap into place.
3.
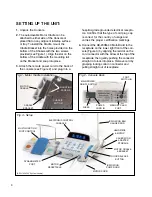
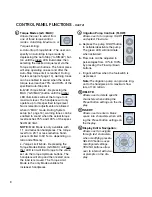
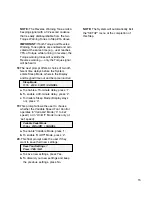
Attach the remote power cord to the back of
the console (see Figure 2) and plug into a
hospital-grade grounded electrical recepta-
cle. Confirm that the type of cord plug cap
is correct for the country of usage and
carries the proper certification markings.
4.
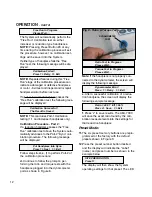
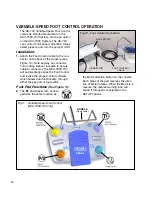
Connect the AE-230M-40 Motor/Cord to the
receptacle on the lower right front of the con-
sole (Figure 3) by aligning the red dot on the
cord connector with the arrow at the top of the
receptacle, then gently pushing the connector
straight in to lock into place. Remove cord by
grasping locking collar on connector and
pulling straight out of receptacle.
Fig.2 - Console Back
POWER
CORD IN
FOOT
SWITCH IN
FUSES
MAIN POWER
ON/OFF SWITCH
MEMORY CARD
PORT
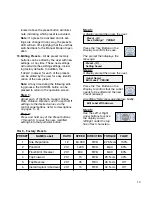
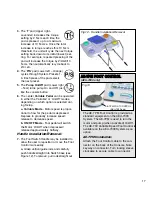
ELECTRONIC CONTROL
CONSOLE
IRRIGATION BAG
HANGER ROD
MULTI-FUNCTION
FOOT CONTROL
HANDPIECE
& MOTOR
MOTOR CRADLE
& BRACKET
MOTOR
RECEPTACLE
Fig.3 - Setup
DYNAMOMETER
PORT
IRRIGATION
PUMP DOOR
DOOR RELEASE
BUTTON
MOTOR CORD
CALIBRATION
ADAPTER
STORAGE
Fig.1 - Motor Cradle Installation
CRADLE
BRACKET
MOTOR
CRADLE
CHASSIS
BOTTOM
MOUNTING
SCREWS
(AEU-7000-70V System shown)


