8
AMC‑15
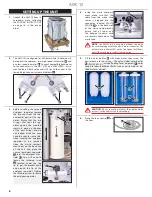
SETTING UP THE UNIT
1.
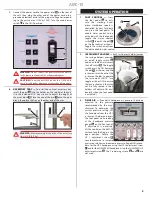
Unpack the AMC-15 from its
cardboard crate following
the PACKING INSTRUCTIONS
on page 16, in the reverse
order.
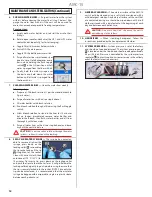
2.
The AMC-15 is configured for 3 Midwest-style (4-hole) non-fi-
ber optic air handpieces: two high-speed (with water)
A
, and
one low-speed (no water)
B
. Connect compatible handpieces
to the connectors in the HP-1, HP-2 and LOW SPEED instru-
ment holders. Attach saliva and HVE tips to the valves in the
low and high vacuum instrument holders
C
.
A
B
C
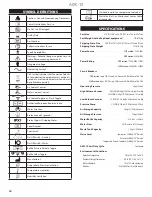
3.
Before installing the
optional
amalgam separator, remove
the two caps from the inlet
and outlet ports of the sep-
arator. Ensure that the two
O-rings that seal the sep-
arator against the manifold
remain in place on the ends
of the port fittings and are
not lodged inside the caps.
Save the caps for reuse later
when sending the amalgam
separator to be recycled.
Open the waste compart-
ment door on the back side
of the cart and place the
optional
amalgam separator
A
into the amalgam man-
ifold
B
. You will need to
loosen the retaining screw
C
located under the top
lid to get the bracket down
and around the lip of the
amalgam separator. Tighten
the retaining screw to secure
the amalgam separator.
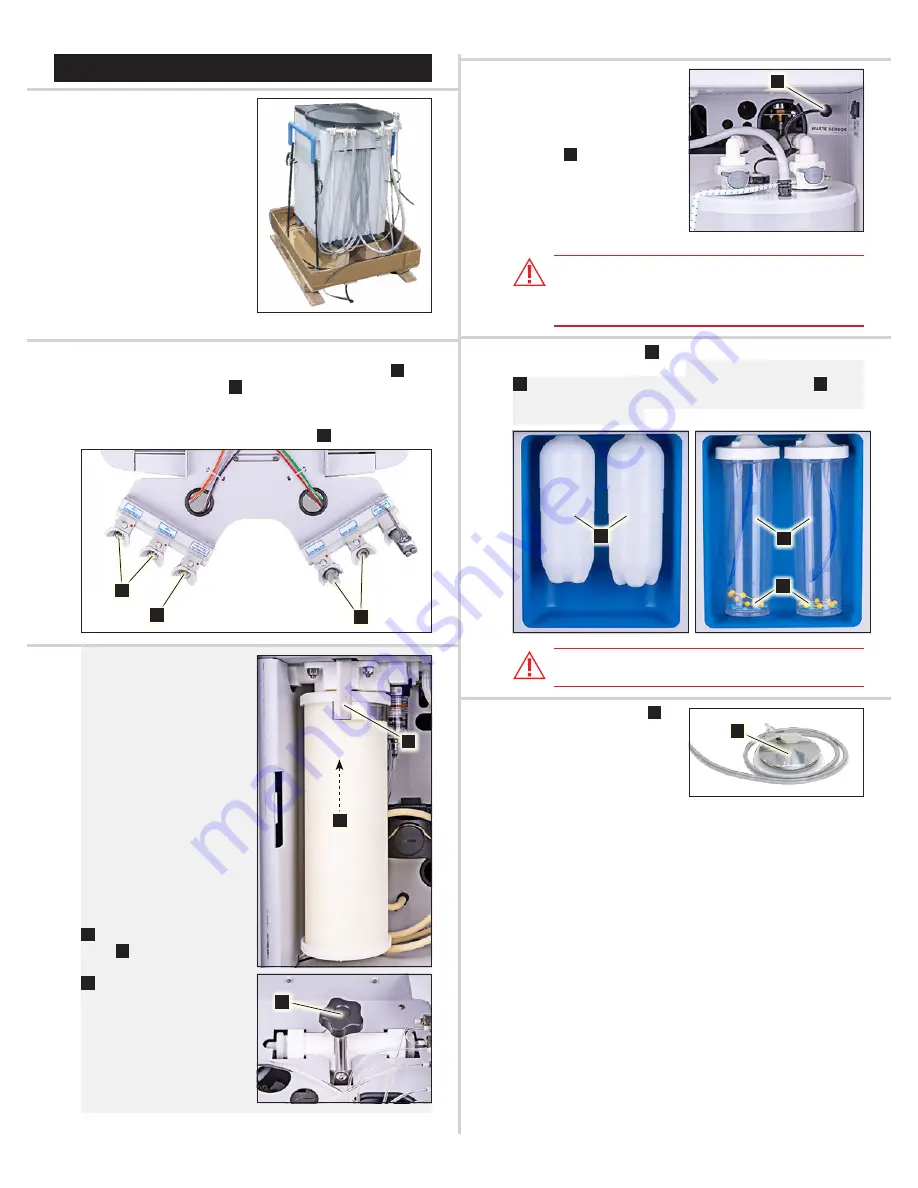
4.
Inside the waste compart-
ment, make sure that the
cable from the waste tank
sensor is plugged into the
connector labeled WASTE
SENSOR
A
on the back wall
of the waste compartment.
Ensure that all tubes and
the bungee tie-down cord
are securely attached to the
waste tank.
NOTE:
The AMC-15 will not operate without the waste
sensor wire plugged into the waste sensor connector. The
yellow waste indicator LED on the front panel will illumi-
nate if the waste sensor cable is disconnected.
5.
Fill the water bottles
A
with clean water, then screw the
bottles back into their fittings. The
optional
clear water bottles
B
(PN 730631-01) include floating level indicators
C
, color
coded to identify different fluids such as sterile water or dis-
tilled water, as desired.
A
C
B
CAUTION:
Do not run saline solutions through the water
system—saline will corrode the plumbing.
6.
Place the foot control
A
on
the floor.
A
C
B
A
A
Summary of Contents for AMC-15
Page 1: ...OPERATION MAINTENANCE MANUAL AMC 15 Mobile Dental Cart...
Page 17: ...17 AMC 15 NOTES...
Page 18: ...18 AMC 15...
Page 19: ...19 AMC 15...

