20.
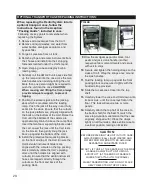
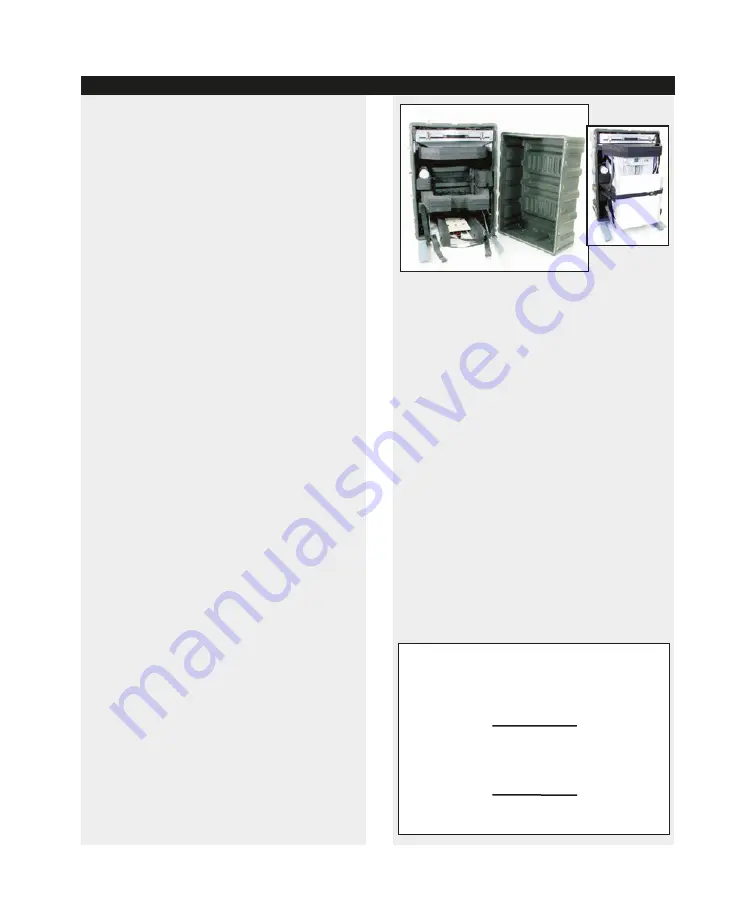
When repacking the Dental System into its
optional transport case, follow the
instructions found in the Aseptico
"Packing Guide", included in case.
Following are key points to remember when
repacking the System:
1
. Remove all accessories from the Cart.
2.
Remove all liquid wastes and water from
water bottles, amalgam separator, and
bypass filter.
3.
Purge air pressure from air tank.
4.
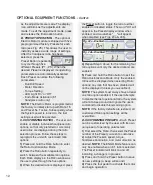
Detach syringe and scaler instruments from
their hoses and install into their shipping
fasteners located under the Cart's top lid.
5.
Open shipping case and deploy built-in
loading ramp.
6.
Carefully roll the AMC-20 unit, back side first,
up the ramp and into the case. Use the two
side handles when pushing/rolling the unit.
More than one person might be required to
push the unit into the case.
CAUTION:
When moving and lifting the Cart, always
provide adequate support, to prevent
tipping.
7.
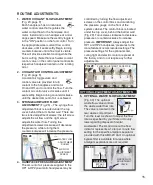
Position the scissors jack into the jacking
dock which is mounted onto the loading
ramp. Push the jack all the way in so it fully
seats into the dock. Ensure that the cutouts
on the jack platform are properly aligned with
the bolts on the bottom of the Cart. Raise the
Cart until the bottoms of the casters are
approximately 3/4-inch above the ramp floor.
Insert the two foam supporting blocks under
the cart. Lower the jack until the Cart rests
on the blocks, then gently snug the jack
back up against the bottom of the Cart.
8.
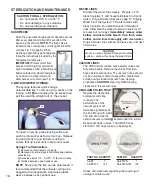
Install the protective foam packing blocks
on the front and top of the Cart. Ensure the
Cart's dental instrument holders are
aligned with the cutouts on the top packing
block (carefully rotate the Cart's pivoting
arms until the holders are aligned with
cutouts). Ensure that the dental instrument
hoses are looped correctly through the
cutouts on the front and back of the
packing block.
9.
Stow the amalgam separator block, foot
pedal, and jack crank handle into their
respective foam compartments and secure
with velcro strips.
10.
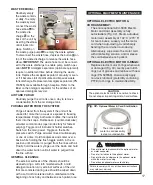
Secure and tighten the holding straps on the
sides of Cart. Wrap the straps once around
the side handles.
11.
Fold the loading ramp up against the front
packing block and secure it tightly with the
buckled strap provided.
12.
Slide the Accessories Case into the top
shelf.
13.
Carefully lower the case and Cart down onto
its back side, until the case lays flat on the
floor. This task will require two or more
people.
14.
Carefully attach the top half of the case to
the bottom half (for the best fit, match the
same top-to-bottom orientation that the case
originally shipped with). Close the clasps
tightly on all four sides. Raise entire case to
a vertical position, resting on its skids.
BEFORE REPACKING THE UNIT INTO ITS CASE,
ALWAYS REMOVE ALL LIQUID WASTES AND
WATER FROM WATER BOTTLES, AMALGAM
SEPARATOR, AND BYPASS FILTER
DO NOT LIFT UNIT AT THE CENTER OF THE SIDE
HANDLES. ALWAYS LIFT UNIT USING A
4-POINT LIFT (AT THE ENDS OF HANDLES
WHERE THEY ATTACH TO THE FRAME).
WHEN TRANSPORTING UNIT, DO NOT PLACE
HEAVY OBJECTS ON TOP OF CASE.
CAUTION:
OPTIONAL TRANSPORT CASE REPACKING INSTRUCTIONS:
FIG. 44

