9
Operating Manual - Pema Protea Equipped Media Amplifier
been previously installed but are currently off-line or unavailable are highlighted in red. Individual devices can be dragged onto
the project canvas to simulate physical rack installation groups. Editing a device can be done from the device tree or an icon on
the canvas. All changes made in software are executed in real time on the device.
The software scans for active devices on start-up. The user can manually scan at any time as well with <Scan For Devices>
at the bottom of the network device tree. All devices broadcast their availability to the software when they start up.
In addition to detecting which models are currently online, any factory installed options within each amplifier are de-
tected. Dante or CobraNet are the only options available for Pema. The software control surface for each device automatically
displays available controls for installed options.
Note: The user can find and verify a single physical device on the network by
right clicking over the unit’s name in the drop down menu or picture on the canvas, and then click <Identify>, which will flash
the Com LED on that unit’s face panel for two seconds.
The project canvas is used to visually represent a sound system installation, and can display any of the networked Ashly
processors, amplifiers, and remotes used in that system. The user can also place an assortment of isolated control objects such
as level faders, single LEDs, meter bars, etc, and map them to specific device functions within that project. Once a control ob-
ject is placed using <Add Items>, right click on the control object to bring up its properties. Lines, rectangles, text, even image
files can be added to create a custom virtual control screen along with individual devices and control objects and be saved in
the project. To see all available canvas tools, right click anywhere over open canvas. Checking <Design Mode> allows placed
objects to be moved around, while unchecking <Design Mode> locks all objects in place.
Once
Protea
ne
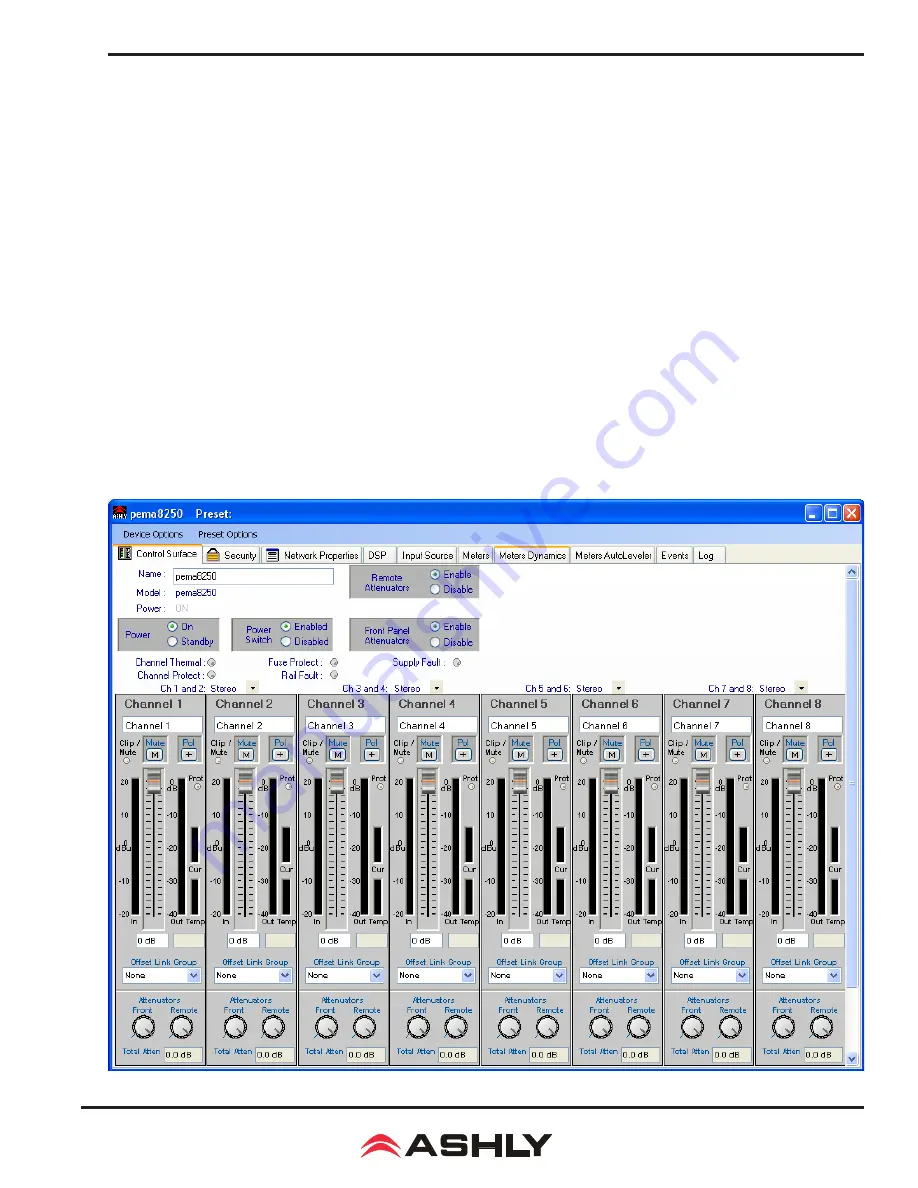
software is installed and devices identified on the network, a new project can be created and saved. A project
file represents the physical hardware installation via canvas items plus all device settings. Individual properties are edited in the
control surface window (shown below) by double clicking on the specific Pema amplifier.
Pema 8250 Main Control Surface


