background image

7

Introducing the Notebook PC    

1

Safety Precautions

The following safety precautions will increase the life of the Notebook PC� Follow 

all  precautions  and  instructions�  Except  as  described  in  this  document,  refer  all 

servicing to qualified personnel. Do not use damaged power cords, accessories, or 

other peripherals� Do not use strong solvents such as thinners, benzene, or other 

chemicals on or near the surface�

IMPORTANT!    Disconnect  the AC  power  and  remove  the  battery  pack(s)  before 

cleaning. Wipe the Notebook PC using a clean cellulose sponge or chamois cloth 

dampened with a solution of nonabrasive detergent and a few drops of warm water 

and remove any extra moisture with a dry cloth.

Battery safety warnings:

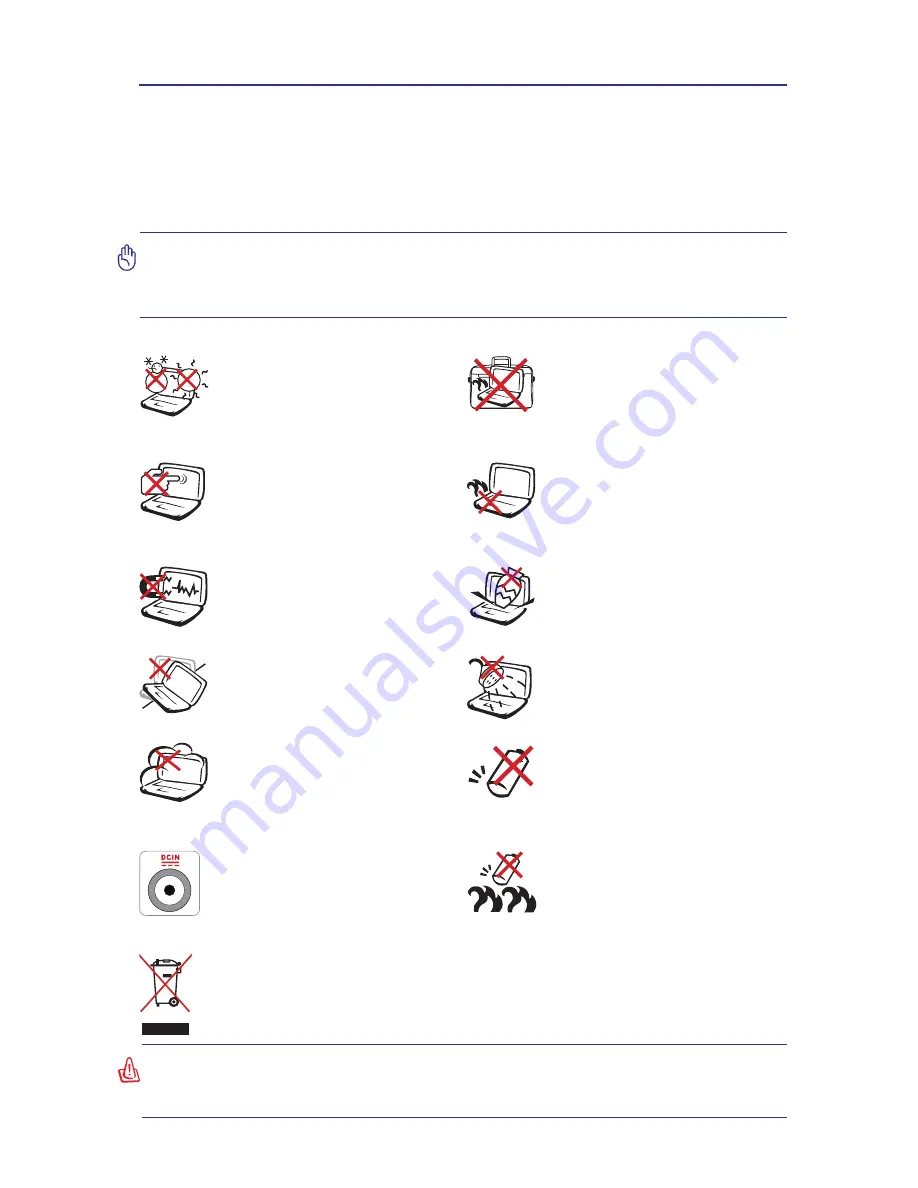
DO NOT throw the battery in fire.


DO NOT disassemble the battery� 

DO NOT short circuit the contacts� 

DO  NOT  handle  damaged  or 

leaking batteries�

DO  NOT  leave  the  Notebook 

PC  on  your  lap  or  any  part  of 

the  body  in  order  to  prevent 

discomfort  or  injury  from  heat 

exposure�

DO  NOT  expose  to  strong 

magnetic or electrical fields. The 

electromagnetic field may cause 

the computer to malfunction�

DO NOT place or drop objects 

on  top  and  do  not  shove  any 

foreign objects into the Notebook 

PC� Do not block air vents�

DO  NOT  throw  the  Notebook 

PC in municipal waste� Check 

local regulations for disposal of 

electronic products�

DO  NOT  carry  or  cover  a 

Notebook  PC  that  is  powered 

ON with any materials that will 

reduce air circulation such as a 

carrying bag�

CAUTION! Danger of explosion 

if battery is incorrectly replaced� 

Replace only with the same or 

equivalent  type  recommended 

by the manufacturer�

DO NOT expose to dirty or dusty 

environments� DO NOT operate 

during a gas leak� DO NOT use 

cut  or  damaged  connection 

cables�

DO NOT expose to or use near 

liquids, rain, or moisture�

DO  NOT  place  on  uneven  or 

unstable  work  surfaces�  Seek 

servicing if the casing has been 

damaged�

DO  NOT  press  or  touch  the 

display  panel�  Do  not  place 

together  with  small  items 

that  may  scratch  or  enter  the 

Notebook PC� 

SAFE  TEMP:  This  Notebook 

PC  should  only  be  used  in 

environments  with  ambient 

temperatures  between  5°C 

(41°F) and 35°C (95°F)�

INPUT  RATING:  Refer  to  the 

rating label on the bottom of the 

Notebook PC and be sure that 

your  power  adapter  complies 

with the rating�

WARNING: To avoid bodily injury, DO NOT attempt to troubleshoot your notebook PC if 

any of the above conditions have damaged it, the battery, or the battery charger. Instead, 

unplug your notebook and contact a qualified computer technician.

System Power Rating: 65W, 19V, 3.42A

Summary of Contents for SP15R-UMA

Page 1: ...SP15R UMA Notebook PC Hardware User Guide...

Page 2: ...e 14 Left Side 15 Bottom Side 17 3 Getting Started Power System 20 Using AC Power 20 Using Battery Power 21 Battery Care 21 Powering ON the Notebook PC 22 Power Options 22 Checking Battery Power 23 Ch...

Page 3: ...hpad 32 Touchpad Usage Illustrations 33 Caring for the Touchpad 34 Automatic Touchpad Disabling 34 Storage Devices 35 Optical Drive 35 Flash Memory Card Reader 36 ExpressCard 37 Connections 38 Network...

Page 4: ...4 Notes...

Page 5: ...document are used for artistic purposes only and do not show what is actually used in the product itself 1 Introducing the Notebook PC About This User Guide Safety Precautions Transportation Precauti...

Page 6: ...s you information on using the Notebook PC s components Notes For The User Afew notes and warnings in bold are used throughout this document that you should be aware of in order to complete certain ta...

Page 7: ...objects into the Notebook PC Do not block air vents DO NOT throw the Notebook PC in municipal waste Check local regulations for disposal of electronic products DO NOT carry or cover a Notebook PC that...

Page 8: ...attery pack when the Notebook PC is in use Airplane Precautions Contact your airline if you want to use the Notebook PC on the airplane Most airlines will have restrictions for using electronic device...

Page 9: ...es may break Never lift the Notebook PC by the display panel 3 Open the Display Panel 4 Turn ON the Notebook PC The power switch turns the Notebook PC ON and OFF or puts the Notebook PC into sleep or...

Page 10: ...10 Notes...

Page 11: ...11 NOTE Photos and icons in this document are used for artistic purposes only and do not show what is actually used in the product itself 2 Knowing the Parts Basic sides of the Notebook PC...

Page 12: ...the Notebook PC NOTE The keyboard will be different for each territory IMPORTANT Selected models may feature display panels that do not fully open to a 180 degree angle with such models do not attemp...

Page 13: ...e navigation in the Windows operating system Touchpad and Buttons The touchpad with its buttons is a pointing device that provides the same functions as a desktop mouse A software controlled scrolling...

Page 14: ...he supplied power adapter CAUTION The adapter may become warm to hot when in use Be sure not to cover the adapter and keep it away from your body Optical Drive The Notebook PC comes in various models...

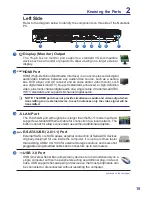
Page 15: ...allows convenient use without additional adapters 5 HDMI Port HDMI High Definition Multimedia Interface is an uncompressed all digital audio video interface between any audio video source such as a s...

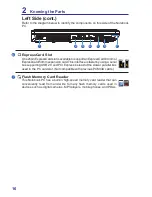
Page 16: ...o Duo MagicGate with MS adapter SD Secure Digital miniSD with SD adapter SDHC Secure Digital High Capacity microSD with SD adapter Memory Stick Micro with MS adapter xD Picture Card MMC Multimedia Car...

Page 17: ...latile data storage device It stores data on a magnetic surface layered onto hard disk platters Visit an authorized service center or retailer for more information on hard disk drive for your Notebook...

Page 18: ...18 Notes...

Page 19: ...tos and icons in this document are used for artistic purposes only and do not show what is actually used in the product itself 3 Getting Started Power System Special Keyboard Functions Switches Status...

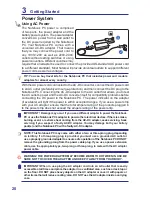
Page 20: ...fe operation of the Notebook PC DO NOT remove the grounding prong from the power cable plug If you use a power extension cable use the appropriate type two prong or three prong to mate with the AC ada...

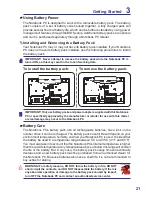
Page 21: ...at the battery be used in a temperature range between 5 C and 35 C 41 F and 95 F You must also take into account that the Notebook PC s internal temperature is higher than the outside temperature Any...

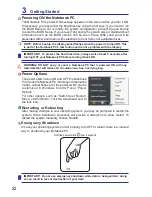
Page 22: ...nformation such as the BIOS version can be seen Press ESC and you will be presented with a boot menu with selections to boot from your available drives Power Options The power switch turns ON and OFF...

Page 23: ...the CPU system memory size and the size of the display panel Left click the battery icon Cursor over the battery icon without power adapter Cursor over the battery icon with power adapter Right click...

Page 24: ...ts are turned OFF Because RAM is volatile it requires power to keep refresh the data Click the Start button and the arrowhead next to the lock icon to see this option You can also use the keyboard sho...

Page 25: ...Colors select High Color in Display Property Settings NOTE Must connect an external monitor before booting up Signal Icon F2 Wireless Models Only Toggles the internal wireless LAN ON or OFF with an o...

Page 26: ...event any images or videos from being taken and transmitted accidentally Play Pause Icon Plays or pauses media in the media player Stop Icon Stops a media player during playback Rewind Icon Rewinds or...

Page 27: ...sor activates the properties menu and is equivalent to pressing the right mouse button on a Windows object Keyboard as Cursors The keyboard can be used as cursors while Number Lock is ON or OFF in ord...

Page 28: ...Switch Wireless Models Only Toggles the internal wireless LAN or Bluetooth on selected models ON or OFF with an on screen display When enabled the corresponding wireless indicator will light Windows...

Page 29: ...LAN When the built in wireless LAN is enabled this indicator will light Windows software settings are necessary Number Lock Indicator Indicates that number lock Num Lk is activated when lighted Number...

Page 30: ...30 Notes...

Page 31: ...NOTE Photos and icons in this document are used for artistic purposes only and do not show what is actually used in the product itself 4 Using the Notebook PC Pointing Device Storage Devices Connectio...

Page 32: ...y function is to move the cursor around or select items displayed on the screen with the use of your fingertip instead of a standard desktop mouse The following illustrations demonstrate proper use of...

Page 33: ...hpad twice Lightly but rapidly strike the touchpad with three fingers Press the left cursor button and release Lightly but rapidly strike the touchpad Hold left button and slide finger on touchpad Lig...

Page 34: ...irt liquids or grease Do not touch the touchpad if your fingers are dirty or wet Do not rest heavy objects on the touchpad or the touchpad buttons Do not scratch the touchpad with your finger nails or...

Page 35: ...ray is closed Always watch the disc closely while closing the tray slowly to prevent damage DO NOT exert pressure on ODD tray An optical drive letter should be present regardless of the presence of a...

Page 36: ...of memory card readers because it utilizes the internal high bandwidth PCI bus IMPORTANT Flash memory card compatibility varies depending on Notebook PC model and flash memory card specifications Fla...

Page 37: ...the Removing an ExpressCard instructions below 2 Insert the ExpressCard with the connector side first and label side up Standard ExpressCards will be flush with the Notebook PC when fully inserted 3...

Page 38: ...interface at 100 1000Mbps it must be connected to a 100 BASE TX 1000 BASE T hub not a BASE T4 hub For 10Base T use category 3 4 or 5 twisted pair wiring 10 100 Mbps Full Duplex is supported on this No...

Page 39: ...work configurations for distances up to 40 meters between the client and the access point To provide efficient security to your wireless communication the optional built in wireless LAN comes with a 6...

Page 40: ...Not Connected network icon 4 Select ShowWireless ifyouhavemany networks in your area 5 Select the wireless network you want to connect to 6 When connecting you may have to enter a password 7 After con...

Page 41: ...s and icons in this document are used for artistic purposes only and do not show what is actually used in the product itself A Appendix Declaration and Safety Statements Federal Communications Commiss...

Page 42: ...receiver Connect the equipment into an outlet on a circuit different from that to which the receiver is connected Consult the dealer or an experienced radio TV technician for help WARNING The use of...

Page 43: ...ion within 5 15 GHz and 5 25GHz frequency ranges and is restricted to indoor environments only FCC Caution Any changes or modifications not expressly approved by the party responsible for compliance c...

Page 44: ...our safety have the optical drive serviced only by an authorized service provider CAUTION INVISIBLE LASER RADIATION WHEN OPEN DO NOT STARE INTO BEAM OR VIEW DIRECTLY WITH OPTICAL INSTRUMENTS Optical D...

Page 45: ...n optional DVD ROM drive or a CD ROM drive In order to view DVD titles you must install your own DVD viewer software Optional DVD viewer software may be purchased with this Notebook PC The DVD ROM dri...

Page 46: ...46 Notes...

Reviews: