background image

34

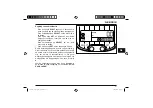
ACCU EN OPLADEN

ACCUOPLADER

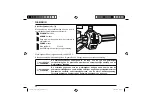
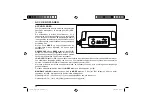
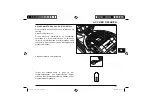
Voor het opladen van de accu’s dient de meegeleverde 

specifieke accuoplader te worden gebruikt (MOD. 

TVC202).
De accuoplader is alleen actief wanneer hij is 

aangesloten op het elektriciteitsnet, en op het voertuig 

of een accu door middel van de aansluiting. Nadat hij 

is aangesloten knipperen alle leds enkele seconden. 

Vervolgens geven vast brandende leds de resterende 

acculading aan.
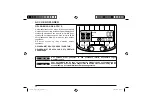
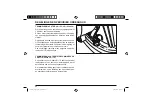
Met de knop 

MODE

 op de accuoplader kan de 

oplaadmodus worden ingesteld, De keuze hierbij 

bestaat uit:

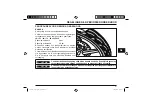
ONDERHOUD

: druk op 

MODE

 totdat de 2 leds (tot 50) 

knipperen, de accu wordt opgeladen tot 50%. Op dit 

punt kan de accu lange tijd ongebruikt worden gelaten 

zonder dat dit gevolgen heeft voor de levensduur.

LONG LIFE

 (Opladen tot 90%): deze modus is aanbevolen in periodes waarin de scooter vaak gebruikt wordt voor 

een optimale en langdurige werking van de accu’s. Voor maximale efficiëntie van het systeem is het aanbevolen 

om elke 10 oplaadcycli tot 90% af te wisselen met 1 oplaadcyclus tot 100%.
Met deze procedure wordt een hoog aantal oplaad- en ontlaadcycli van de accu’s verkregen voor langdurige 

goede prestaties.
Om deze modus te selecteren drukt u op 

MODE

 totdat de 4 leds knipperen (tot 90).

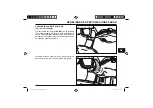
MAXIMALE LADING

: standaardmodus, druk op 

MODE

 totdat de 5 leds (tot 100) knipperen, de accu wordt 

opgeladen tot 100%. Hiermee heeft u de maximale werkingsduur.
Oplaadtijd (eS

pro 

45 - eS

pro 

25km/h): 1 tot 4 uur (volledig opladen van een lege accu).

Oplaadtijd (eS

pro 

70): 1 tot 6 uur (volledig opladen van een lege accu).

eSpro45_eSpro70_Rev_2_NL.indb   34

eSpro45_eSpro70_Rev_2_NL.indb   34

14/07/2020   17:35:41

14/07/2020   17:35:41

Summary of Contents for eSpro 25Km/h

Page 1: ...vertenze e consigli riguardo il corretto utilizzo e manutenzione del suo nuovo veicolo E importante leggerlo in ogni sua parte prima di mettersi alla guida del mezzo per la prima volta Scoprirà oltretutto particolari e caratteristiche che contribuiranno a convincerla della Sua ottima scelta La presente pubblicazione è da ritenersi parte integrante del veicolo In caso di vendita del mezzo deve esse...

Page 2: ...Spro 70 LATO SINISTRO 5 eSpro 70 LATO DESTRO 5 POSIZIONE COMANDI E STRUMENTI 6 PLANCIA eSpro 45 eSpro 25Km h 6 PLANCIA eSpro 70 7 GRUPPO COMANDI SINISTRO 8 Leva comando freno posteriore 8 Leva freno a tamburo con funzione combinata solo eSpro 70 8 Selettore modalità rigenerazione energia 8 Commutatore lampeggiatori 9 Pulsante clacson 9 eSpro45_eSpro70_Rev_02_IT indb ii eSpro45_eSpro70_Rev_02_IT in...

Page 3: ... SPIE LUMINOSE 14 Indicatore di abilitazione motore solo eSpro 45 eSpro 25Km h 14 Indicatore alta temperatura 15 Indicatore problema grave 15 Indicatore lampeggiatori in funzione 16 Indicatore luci in funzione 16 Indicatore luce abbagliante solo eSpro 70 16 Indicatore di ricarica in corso 16 TACHIMETRO eSpro 45 eSpro 25Km h 17 TACHIMETRO eSpro 70 17 PULSANTI SETTAGGIO MENU 17 DISPLAY DIGITALE 18 S...

Page 4: ... energia 25 SELEZIONE FUNZIONI DISPLAY 26 Modalità visualizzazione dati contachilometri 26 Regolazione della funzione orologio 27 SELLA 28 Apertura sella 28 Gancio portaborse 28 SOSTA DELLO SCOOTER 29 Cavalletto centrale 29 Cavalletto laterale 29 BATTERIA E RICARICA 30 BATTERIE 30 Gestione della batteria nel primo utilizzo dello scooter 30 Smaltimento delle batterie esauste 33 eSpro45_eSpro70_Rev_...

Page 5: ...TAMBURO eSpro 45 eSpro 25Km h 46 FRENO POSTERIORE A TAMBURO CON FUNZIONE COMBINATA solo eSpro 70 46 PROCEDURE DI MANUTENZIONE ORDINARIA 47 PNEUMATICI 47 CONTROLLO DEL LIVELLO DEL LIQUIDO FRENO ANTERIORE 48 SOSTITUZIONE LAMPADINA FARO ANTERIORE eSpro 45 eSpro 25Km h 49 FARO ANTERIORE eSpro 70 50 GRUPPO OTTICO POSTERIORE E INDICATORI DI DIREZIONE 51 TABELLA RIEPILOGATIVA PROCEDURE DI MANUTENZIONE OR...

Page 6: ... eSpro 45 eSpro 70 eSpro 25Km h 58 DATI MOTORE 59 BATTERIA 59 DATI VEICOLO 59 DATI GRUPPO OTTICO ANTERIORE 60 DATI GRUPPO OTTICO POSTERIORE 60 DICHIARAZIONE DI CONFORMITÀ DOC UE 61 eSpro45_eSpro70_Rev_02_IT indb vi eSpro45_eSpro70_Rev_02_IT indb vi 14 07 2020 12 19 58 14 07 2020 12 19 58 ...

Page 7: ... se non evitate possono causare morte o lesioni gravi AVVERTENZA Questo simbolo indica un avviso generico per la sicurezza Viene utilizzato per metterVi in guardia di potenziale pericolo di danni alle persone e o ai mezzi Il mancato o incompleto rispetto di queste prescrizioni può essere la causa di eventuali gravi danni al veicolo e in alcuni casi al decadimento della garanzia Sono indicati i giu...

Page 8: ...i esperienza o di conoscenza amenocheesseabbianopotutobeneficiare attraversol intermediazione di una persona responsabile della loro sicurezza di una sorveglianza o di istruzioni riguardanti l uso dello scooter ATTENZIONE Il mancato o incompleto rispetto di queste prescrizioni può essere la causa di eventuali gravi danni alle persone al veicolo all ambiente ed in alcuni casi del decadimento della ...

Page 9: ...re la corrispondenza delle matricole del veicolo con quelle riportate sui documenti dello stesso AVVERTENZA L alterazione delle matricole di identificazione può far incorrere in gravi sanzioni penali Valido solo per eSpro 45 eSpro 25Km h Non richiesto per eSpro 70 ASKOLL EVA S R L TYPE code dB A min kW 1 IT IT IT IT IT eSpro45_eSpro70_Rev_02_IT indb 3 eSpro45_eSpro70_Rev_02_IT indb 3 14 07 2020 12...

Page 10: ... sx E Cavalletto centrale F Cavalletto laterale G Vano batterie H Sella I Gancio sella J Gruppo ottico posteriore K Portatarga L Catarifrangente posteriore M Motore N Catarifrangente anteriore dx O Commutatore accensione eSpro 45 eSpro 25Km h LATO SINISTRO A B D C E F I H G J K L M N O eSpro45_eSpro70_Rev_02_IT indb 4 eSpro45_eSpro70_Rev_02_IT indb 4 14 07 2020 12 20 03 14 07 2020 12 20 03 ...

Page 11: ...valletto centrale F Cavalletto laterale G Vano batterie H Sella I Gancio sella J Gruppo ottico posteriore K Portatarga L Catarifrangente posteriore M Motore N Catarifrangente anteriore dx O Commutatore accensione eSpro 70 LATO SINISTRO IT IT IT IT IT A B D C F E I H G J K L M N O eSpro45_eSpro70_Rev_02_IT indb 5 eSpro45_eSpro70_Rev_02_IT indb 5 14 07 2020 12 20 06 14 07 2020 12 20 06 ...

Page 12: ...e B Commutatore a chiave C Selettore modalità rigenerazione energia D Commutatore lampeggiatori E Pulsante clacson PLANCIA eSpro 45 eSpro 25Km h POSIZIONE COMANDI E STRUMENTI Km trip A B PWR ECO Km SELECT SET 10 2 0 Km h mph 10 1 20 2 P U S H I G N I T I O N D E J C A B G F H I eSpro45_eSpro70_Rev_02_IT indb 6 eSpro45_eSpro70_Rev_02_IT indb 6 14 07 2020 12 20 09 14 07 2020 12 20 09 ...

Page 13: ...atore a chiave C Selettore modalità rigenerazione energia D Commutatore lampeggiatori E Pulsante clacson F Selettore modalità di guida PLANCIA eSpro 70 POSIZIONE COMANDI E STRUMENTI Km trip A B PWR ECO Km SELECT SET Km h mph P U S H I G N I T I O N IT IT IT IT IT A K D E B G F C H I J eSpro45_eSpro70_Rev_02_IT indb 7 eSpro45_eSpro70_Rev_02_IT indb 7 14 07 2020 12 20 11 14 07 2020 12 20 11 ...

Page 14: ...ore per garantire maggior sicurezza e migliori spazi di arresto Selettore modalità rigenerazione energia In fase di decelerazione dello scooter la batteria può essere ricaricata automaticamente attivando la modalità rigenerazione energia Utilizzare il commutatore a due posizioni per attivare o disattivare la modalità di rigenerazione energia MODE eSpro 45 eSpro 25Km h eSpro 70 eSpro45_eSpro70_Rev_...

Page 15: ... destra per azionare i lampeggiatori di destra Premere il pulsante al centro della levetta per spegnere i lampeggiatori Pulsante clacson Premere per azionare il clacson IT IT IT IT IT eSpro 45 eSpro 25Km h eSpro 45 eSpro 25Km h eSpro 70 eSpro 70 eSpro45_eSpro70_Rev_02_IT indb 9 eSpro45_eSpro70_Rev_02_IT indb 9 14 07 2020 12 20 14 14 07 2020 12 20 14 ...

Page 16: ...eno a disco anteriore è posta sulla parte destra del manubrio Comando acceleratore La velocità dello scooter viene regolata ruotando la manopola DE DE eSpro 45 eSpro 25Km h eSpro 70 eSpro45_eSpro70_Rev_02_IT indb 10 eSpro45_eSpro70_Rev_02_IT indb 10 14 07 2020 12 20 16 14 07 2020 12 20 16 ...

Page 17: ...itata a 25 Km h Selettore accensione faro abbagliante solo eSpro 70 Utilizzando il selettore è possibile attivare la luce abbagliante Pulsante di accensione motore La pressione del pulsante per 3 secondi in funzione della posizione della chiave nel commutatore abilita o disabilita il motore MODE MODE MODE MODE IT IT IT IT IT eSpro 70 eSpro 45 eSpro 45 eSpro 70 eSpro 70 eSpro 25Km h eSpro 25Km h eS...

Page 18: ... a chiave sia per l apertura della sella Si consiglia di conservare il duplicato della chiave separatamente da quella principale Abilitazione e disabilitazione sistema Ruotando la chiave su si abilita il sistema Ruotando la chiave su si disabilita il sistema AVVERTENZA Non ruotare od estrarre la chiave durante la marcia P U S H I G N I T I O N eSpro45_eSpro70_Rev_02_IT indb 12 eSpro45_eSpro70_Rev_...

Page 19: ...ELECT SET Km h mph COMANDI E STRUMENTI STRUMENTAZIONE A Spie luminose B Tachimetro C Display digitale D Comandi display IT IT IT IT IT eSpro 45 eSpro 25Km h eSpro 70 D C D C B B A A eSpro45_eSpro70_Rev_02_IT indb 13 eSpro45_eSpro70_Rev_02_IT indb 13 14 07 2020 12 20 27 14 07 2020 12 20 27 ...

Page 20: ...di ricarica in corso K Indicatore luce abbagliante in funzione solo eSpro 70 Indicatore di abilitazione motore solo eSpro 45 eSpro 25Km h La spia che indica l abiltazione del motore è di colore ambra si accende non appena viene abilitato il motore e rimane accesa fino alla sua disabilitazione E F G H I J K eSpro45_eSpro70_Rev_02_IT indb 14 eSpro45_eSpro70_Rev_02_IT indb 14 14 07 2020 12 20 31 14 0...

Page 21: ...Indicatore problema grave La spia dell indicatore di problema grave è di colore rosso si accende insieme alla spia di malfunzionamento sul display Quando si accende fermare il veicolo il codice di errore relativo può essere letto sul display E necessario recarsi in un officina autorizzata per far controllare il mezzo Per la descrizione dell allarme relativo al codice visualizzato fare riferimento ...

Page 22: ...catore di ricarica in corso La spia dell indicatore di ricarica in corso è di colore ambra si accende e rimane fissa quando il carica batterie è connesso alla rete elettrica ed è in corso la ricarica delle batterie Si accende anche quando entra in funzione la modalità rigenerazione energia Indicatore luce abbagliante solo eSpro 70 La spia accensione luce abbagliante è di colore blu si accende azio...

Page 23: ...i per selezionare il parametro da visualizzare sul display azzerare il valore visualizzato km trip impostare e confermare nuovi valori ora TACHIMETRO eSpro 70 Il tachimetro indica la velocità corrente Il valore appare in chilometri orari km h ed in miglia orarie mph 1 0 2 0 Km h mph 1 0 1 20 2 Km h mph SELECT SET IT IT IT IT IT eSpro45_eSpro70_Rev_02_IT indb 17 eSpro45_eSpro70_Rev_02_IT indb 17 14...

Page 24: ...so chilometri percorribili con la carica residua della batteria ora allarmi e relativi codici di errore Spia manutenzione La spia di manutenzione può accendersi da sola od in combinazione con la spia indicatore di problema grave In caso si accenda è consigliabile recarsi presso un Rivenditore autorizzato per il controllo e la soluzione del problema Km trip A B PWR ECO Km eSpro45_eSpro70_Rev_02_IT ...

Page 25: ...anuale GUIDA SICURA AVVERTENZA Prima del primo utilizzo Vi consigliamo di provare lo scooter in zone chiuse al traffico fino all acquisizione di una buona conoscenza dello stesso AVVERTENZA Guidate sempre entro i limiti delle vostre capacità ATTENZIONE Mettersi alla guida in stato di ebbrezza sotto l effetto di stupefacenti o di alcuni medicinali è molto pericoloso per se stessi ed è vietato dalla...

Page 26: ...ZA Facendo ricorso ai freni utilizzarli entrambi per ripartire l azione frenante su entrambe le ruote ATTENZIONE Non frenare a fondo su pavimentazioni stradali bagnate sterrate o scivolose AVVERTENZA Dopo aver percorso un lungo tratto stradale bagnato senza azionare i freni l azione frenante sarà inizialmente minore E opportuno azionare periodicamente i freni in queste condizioni ATTENZIONE In cas...

Page 27: ...er disinserire il bloccasterzo inserire la chiave nel commutatore e ruotarla verso destra OPERAZIONI PER LAMESSAIN MARCIA Inserimento e disinserimento del bloccasterzo Per inserire il bloccasterzo ruotare il manubrio verso sinistra sino a fine corsa IT IT IT IT IT Km trip A B PWR ECO Km SELECT SET 10 2 0 Km h mph 10 1 20 2 P U S H I G N I T I O P U S H eSpro45_eSpro70_Rev_02_IT indb 21 eSpro45_eSp...

Page 28: ...di messa in moto si accende Per disabilitare il motore premere nuovamente il pulsante di abilitazione motore per 3 secondi e ruotare la chiave nel commutatore verso sinistra su La disabilitazione del motore avviene anche con la sola rotazione su della chiave P U S H I G N I T I O N MODE MODE eSpro 45 eSpro 70 eSpro 25Km h eSpro45_eSpro70_Rev_02_IT indb 22 eSpro45_eSpro70_Rev_02_IT indb 22 14 07 20...

Page 29: ...o normativa 168 2013 EC I valori di autonomia sopra elencati valgono con l utilizzo di 2 batterie connesse ed a parità di carica AVVERTENZA Le batterie agli ioni di litio subiscono nel tempo un progressivo decadimento delle performance che riducono i valori di autonomia iniziali AVVERTENZA I dati di autonomia indicati dipendono strettamente dalle condizioni di utilizzo che possono essere pendenza ...

Page 30: ...rie connesse ed a parità di carica AVVERTENZA Le batterie agli ioni di litio subiscono nel tempo un progressivo decadimento delle performance che riducono i valori di autonomia iniziali AVVERTENZA I dati di autonomia indicati dipendono strettamente dalle condizioni di utilizzo che possono essere pendenza e o tipo di superficie del percorso temperatura ambiente velocità media livello di assistenza ...

Page 31: ...a viene attivata aumentando allo stesso tempo l effetto di decelerazione Premendo il pulsante verso il basso la modalità rigenerazione energia viene disattivata Abbinando la frenata alla decelerazione la ricarica sarà maggiore Quando la modalità rigenerazione energia è attiva la spia di ricarica è accesa Con un alto livello di carica della batteria la modalità rigenerazione non viene attivata IT I...

Page 32: ... Km trip Chilometraggio parziale percorso Tenere premuto SET per azzerare durante la visualizzazione del parametro Km Chilometri percorribili con la carica residua della batteria Il valore varia in base alle condizioni di utilizzo alla carica residua della batteria della modalità di guida impostata e della modalità rigenerazione energia selezionata PWR ECO Km trip A B Km SELECT SET eSpro45_eSpro70...

Page 33: ... pulsante SET per uscire dalla regolazione L ora è memorizzata nella batteria veicolo per cui se si dispone di due batterie è opportuno settare una prima volta l ora con entrambe le batterie inserite per sincronizzare l orario In ogni caso in presenza di due batterie viene sempre visualizzato l orario memorizzato nella batteria posizionata nel vano A Per la descrizione batteria e posizionamento ne...

Page 34: ... Esercitando una pressione sulla parte inferiore del gancio la parte superiore fuoriesce ed è possibile appendervi un oggetto Rilasciando il gancio esso ritorna automaticamente in sede AVVERTENZA L oggetto trasportato non deve impedire o limitare il movimento delle gambe AVVERTENZA Evitare di far gravare l intero peso solo sul gancio l oggetto trasportato deve comunque essere appoggiato sulla peda...

Page 35: ...mpre prima di salire sullo scooter Cavalletto laterale Abbassare il cavalletto laterale con il piede fino all apertura completa e accompagnare lo scooter fino al completo appoggio sul terreno AVVERTENZA Prima della ripartenza del veicolo assicurarsi che il cavalletto laterale sia sollevato un sensore di sicurezza impedisce l abilitazione del motore quando il cavalletto è abbassato AVVERTENZA Utili...

Page 36: ... compresa tra 0 C e 40 C A basse temperature può verificarsi una riduzione di autonomia La batteria è un componente sempre attivo si possono manifestare leggeri cali di tensione anche con display spento Gestione della batteria nel primo utilizzo dello scooter Con batterie nuove è necessario eseguire almeno 3 4 cicli di carica scarica completi portando la carica al 100 e scaricando le batterie ad u...

Page 37: ...i natura Le batterie tanto in fase di ricarica quanto in fase di stoccaggio non devono essere esposte a fonti di calore freddo umidità polvere o intemperie La garanzia copre i malfunzionamenti delle batterie derivati da difetti di produzione impossibilità di ricarica e di scarica La garanzia non copre il degrado di prestazione delle batterie dovuto al normale utilizzo ed invecchiamento delle stess...

Page 38: ... il vostro mezzo nel punto in cui si trova Non continuate per nessun motivo ad utilizzarla Non appena la batteria si raffredda trasportate il veicolo presso il vostro rivenditore In presenza di fiamme o risalita di fumo dalla batteria fermare immediatamente il veicolo Spegnete quindi l incendio con un estintore se disponibile Se non avete a disposizione un estintore aspettate che l incendio si est...

Page 39: ...esto tipo di rifiuti stabilisce che gli Stati aderenti a tale convenzione si impegnino ad adottare misure appropriate affinché gli accumulatori esausti siano raccolti separatamente ai fini del loro possibile recupero o smaltimento In ogni caso per informazioni più aggiornate in materia si invita l utente a contattare l ufficio municipale preposto a tale interesse eSpro45_eSpro70_Rev_02_IT indb 33 ...

Page 40: ...ica al 90 questa modalità è raccomandata nei periodi di frequente utilizzo dello scooter per un funzionamento ottimale e prolungato delle batterie Per la massima efficienza del sistema si raccomanda di alternare 1 ciclo di carica al 100 ogni 10 cicli al 90 Questa procedura consente di ottenere un elevato numero di cicli di carica e scarica delle batterie mantenendo una buona performance nel tempo ...

Page 41: ...ssa a terra della spina a 3 poli Collegare l apparecchio ad una rete di alimentazione elettrica protetta da un interruttore differenziale con una sensibilità non eccedente i 30 mA La connessione elettrica dell apparecchio deve rispettare i dati riportati sull etichetta dati elettrici dello stesso Non utilizzare cavi di prolunga Se la lunghezza del cavo di alimentazione è insufficiente rivolgersi a...

Page 42: ...ne di ricarica delle batterie può essere eseguita con due modalità RICARICA CON BATTERIA A BORDO RICARICA CON BATTERIA FUORI BORDO ATTENZIONE L operazione di ricarica deve essere eseguita in ambiente indoor e protetto da intemperie ATTENZIONE Per la ricarica delle batterie procedere prima collegando il connettore del carica batterie alla presa della batteria e successivamente collegare la presa de...

Page 43: ...carica con batteria a bordo procedere come segue Disabilitare il sistema Sollevare la sella controllare che il caricabatterie sia collegato all apposita presa e che le batterie siano correttamente inserite nei vani e collegate ai connettori estrarre il cavo a molla del carica batterie dotato di spina Collegare la spina alla rete elettrica eSpro45_eSpro70_Rev_02_IT indb 37 eSpro45_eSpro70_Rev_02_IT...

Page 44: ...ente per il passaggio del cavo di ricarica Ciò può essere utile nel caso in cui si proceda alla ricarica all aperto mantenendo così una copertura sulle batterie e caricabatterie tale da consentire la fuoriuscita del calore generato dal processo di carica Aprire la sella portare il meccanismo di chiusura a molla verso sinistra e tenerlo premuto eSpro45_eSpro70_Rev_02_IT indb 38 eSpro45_eSpro70_Rev_...

Page 45: ...ccata in posizione rialzata per permettere il passaggio del cavo di ricarica Aprendo la serratura con la chiave e sollevando la sella il meccanismo tornerà automaticamente nella posizione originale eSpro45_eSpro70_Rev_02_IT indb 39 eSpro45_eSpro70_Rev_02_IT indb 39 14 07 2020 12 21 07 14 07 2020 12 21 07 ...

Page 46: ...tà di circolare solo con l altra Scollegare il cavo della batteria premendo sulle due alette laterali del connettore per estrarlo Estrarre la batteria dall alloggiamento utilizzando per il sollevamento l apposita maniglia Una volta estratta sorreggerla con entrambe le mani eSpro45_eSpro70_Rev_02_IT indb 40 eSpro45_eSpro70_Rev_02_IT indb 40 14 07 2020 12 21 08 14 07 2020 12 21 08 ...

Page 47: ...alette poste ai lati Rimuovere il caricabatteria dal suo alloggio assieme ai suoi due cavi ATTENZIONE Durante la rimozione del carica batterie si raccomanda di maneggiarlo con cura per evitare di farselo cadere addosso o a terra eSpro45_eSpro70_Rev_02_IT indb 41 eSpro45_eSpro70_Rev_02_IT indb 41 14 07 2020 12 21 09 14 07 2020 12 21 09 ...

Page 48: ...erie alla rete elettrica Selezionare la modalità di ricarica desiderata come illustrato all inizio di questo capitolo al paragrafo CARICABATTERIE Al termine delle operazioni di ricarica ricollocare il caricabatterie e la batteria nel vano dello scooter seguendo questi passi ricollocare sul veicolo prima il carica batteria e collegare il cavo con connettore alla presa sul veicolo eSpro45_eSpro70_Re...

Page 49: ...lla presa sotto lo sportellino a molla sulla batteria inserire il connettore fino a sentire un click e controllare che sia ben assicurata Poi collocare la spina del cavo a molla a fianco del carica batteria e riavvolgere il cavo sopra la batteria eSpro45_eSpro70_Rev_02_IT indb 43 eSpro45_eSpro70_Rev_02_IT indb 43 14 07 2020 12 21 12 14 07 2020 12 21 12 ...

Page 50: ...ssibile regolare l altezza del fascio luminoso del faro anteriore agendo sulla vite di regolazione posta sotto al faro stesso utilizzando la chiave TORX T 20 fornita come accessorio e riposta sotto la sella Ruotando la vite di 1 2 giro in senso orario si punterà il fascio luminoso verso il basso in senso antiorario si punterà il fascio luminoso verso l alto eSpro 45 eSpro 25Km h eSpro 70 eSpro45_e...

Page 51: ...esso Un azione frenante efficace deve iniziare dopo circa 1 3 di corsa della leva freno AVVERTENZA Se il freno funziona male controllare lo stato di usura delle pastiglie freni se lo spessore è molto ridotto vanno entrambe sostituite operazione da effettuare in un punto di assistenza autorizzato AVVERTENZA Dopo la sostituzione delle pastiglie azionare la leva freno varie volte per riposizionare le...

Page 52: ... leva di comando freno in condizione di riposo verificare che la ruota giri liberamente Un azione frenante efficace deve iniziare dopo circa 1 3 di corsa della leva freno FRENO POSTERIORE A TAMBURO CON FUNZIONE COMBINATA solo eSpro 70 Lo scooter mod eSpro 70 utilizza la doppia frenata azionando il freno posteriore si attiva automaticamente anche il freno anteriore La ripartizione ha prevalenza sul...

Page 53: ...ollare regolarmente la pressione degli pneumatici ed adeguarla se necessario prima di mettersi in viaggio eSpro 45 eSpro 70 eSpro 25Km h Pressione pneumatico anteriore 2 bar Pressione pneumatico posteriore 2 8 bar Gli pneumatici sono dotati di indicatore di usura e la sostituzione deve essere effettuata appena tali indicatori sono visibili sul battistrada Controllare anche eventuali tagli sui fian...

Page 54: ...uitofrenanteèigroscopico assorbecioèumiditàdall ariacircostante Se l umidità nel liquido supera un certo valore la frenata sarà inefficiente AVVERTENZA E consigliabile far sostituire il liquido ogni 2 anni non utilizzare mai liquido per freni contenuto in contenitori già aperti o usati parzialmente AVVERTENZA Verificare che venga utilizzato solo liquido per freni classificato DOT4 AVVERTENZA Il li...

Page 55: ...modo utilizzando la chiave TORX T 20 fornita come accessorio e collocata sotto la sella rimuovere le 2 viti laterali sotto al faro rimuovere prima il semi guscio sinistro poi quello destro ruotandoli verso l esterno IT IT IT IT IT eSpro 45 eSpro 25Km h eSpro 45 eSpro 25Km h eSpro45_eSpro70_Rev_02_IT indb 49 eSpro45_eSpro70_Rev_02_IT indb 49 14 07 2020 12 21 20 14 07 2020 12 21 20 ...

Page 56: ...ooter mod eSpro 70 il faro anteriore è dotato di lampadina di tipo led e non occorre sostituirla In caso di esurimento della lampadina deve essere sotituito il faro completo Per la sostituzione rivolgersi ad un punto di assistenza autorizzato eSpro 45 eSpro 25Km h eSpro 45 eSpro 25Km h eSpro 70 eSpro45_eSpro70_Rev_02_IT indb 50 eSpro45_eSpro70_Rev_02_IT indb 50 14 07 2020 12 21 22 14 07 2020 12 21...

Page 57: ...atori di direzione anteriori e posteriori e la luce porta targa sono dotati di luci led e sono integrati nella struttura del veicolo Per la loro sostituzione rivolgersi ad un punto di assistenza autorizzato IT IT IT IT IT eSpro45_eSpro70_Rev_02_IT indb 51 eSpro45_eSpro70_Rev_02_IT indb 51 14 07 2020 12 21 24 14 07 2020 12 21 24 ...

Page 58: ... sostituire ogni 2 anni S S S S S Usura pastiglie freno ante riore C S C S C S C S C Usura ganasce freno pos teriore C R C S C S C S C S Cinghie trasmissione C C C S C C S C C S C C S C Dadi bulloni dispositivi di fissaggio C C C C C C Cavalletto C L C L C L C L C L Cuscinetti sterzo C C C C Tranne puntamento faro tutti i controlli vanno effettuati da Personale qualificato ASKOLL eSpro45_eSpro70_R...

Page 59: ...ta Evitare di lavare lo scooter direttamente al sole specialmente in estate per evitare che la carrozzeria scaldandosi asciughi immediatamente lo shampoo prima del risciacquo e questo possa arrecare danni alla vernice Non utilizzare getti d acqua ad alta pressione per il lavaggio in modo da evitare di danneggiare componenti delicati del veicolo Durante il lavaggio non indirizzare mai il getto d ac...

Page 60: ...una pulizia generale dello scooter operare il rimessaggio in luogo coperto stazionare lo scooter sul cavalletto centrale per evitare che le ruote restino a contatto con il terreno nella stessa posizione coprire lo scooter con un telo eSpro45_eSpro70_Rev_02_IT indb 54 eSpro45_eSpro70_Rev_02_IT indb 54 14 07 2020 12 21 26 14 07 2020 12 21 26 ...

Page 61: ...istema rileva un guasto sull unità ECU Si consiglia di portare lo scooter presso officina autorizzata Guasto al circuito di potenza il sistema rileva un assorbimento anomalo del motore Per motivi di sicurezza il sistema non eroga potenza Si consiglia di portare il mezzo presso officina autorizzata Guasto Batteria A il sistema rileva un guasto al pacco batteria A Si consiglia di portare la batteria...

Page 62: ...atura eccessiva dell unità elettronica L erogazione di potenza al veicolo viene inibita finchè la temperatura non scende Si consiglia di allontanare il veicolo da fonti di calore Sovratemperatura motore il sistema rileva una temperatura eccessiva del motore Viene permesso un funzionamento a potenza ridotta in modo da consentirne il raffreddamento Malfunzionamento proiettore anteriore il sistema ri...

Page 63: ...ituirli presso un autofficina autorizzata Malfunzionamento fanale posteriore e luce targa il sistema rileva la rottura o il malfunzionamento del fanale posteriore e luce targa Verificarne il funzionamento e sostituirli presso un autofficina autorizzata A A IT IT IT IT IT eSpro45_eSpro70_Rev_02_IT indb 57 eSpro45_eSpro70_Rev_02_IT indb 57 14 07 2020 12 21 32 14 07 2020 12 21 32 ...

Page 64: ...58 DATI TECNICI DATI TECNICI DIMENSIONI DELLO SCOOTER eSpro 45 eSpro 70 eSpro 25Km h eSpro45_eSpro70_Rev_02_IT indb 58 eSpro45_eSpro70_Rev_02_IT indb 58 14 07 2020 12 21 33 14 07 2020 12 21 33 ...

Page 65: ...rità di carica secondo 168 2013 EC BATTERIA Modello TVC102 TVC103 Carica LI ION Peso 7 8 Kg Autonomia 71 Km con 2 batterie connesse ed a parità di carica secondo 168 2013 EC 86 Km con 2 batterie connesse ed a parità di carica secondo 168 2013 EC 96 Km con 2 batterie connesse ed a parità di carica secondo 168 2013 EC Temperatura operativa In esercizio 20 C a 45 C DATI VEICOLO Lunghezza 1830 mm Larg...

Page 66: ...ntivo Peso massimo ammissibile al portapacchi posteriore 30Kg centrato al portapacchi Posti 1 Trasmissione Cinghia dentata DATI GRUPPO OTTICO ANTERIORE Fanale anteriore H8 35W LED Indicatori di direzione LED Luci plancia LED DATI GRUPPO OTTICO POSTERIORE Fanale posteriore LED Luce stop LED Indicatori di direzione LED Luce targa LED eSpro45_eSpro70_Rev_02_IT indb 60 eSpro45_eSpro70_Rev_02_IT indb 6...

Page 67: ...ritto è conforme alla seguente normativa di armonizzazione dell Unione in materia Direttiva 2014 35 UE LVD Direttiva 2014 30 UE EMC Direttiva 2011 65 UE RoHS II Sono state applicate le norme armonizzate e le specifiche tecniche seguenti EN 60335 1 2002 A11 2004 A1 2004 A12 2006 A2 2006 A1 EC 2007 A13 2008 EC 2009 EC 2010 A14 2010 A15 2011 EN 60335 2 29 2004 A2 2010 EN 62233 2008 EN 55014 1 2006 A1...

Page 68: ...62 NOTE eSpro45_eSpro70_Rev_02_IT indb 62 eSpro45_eSpro70_Rev_02_IT indb 62 14 07 2020 12 21 34 14 07 2020 12 21 34 ...

Page 69: ...ments et des conseils concernant l utilisation et l entretien de votre nouveau véhicule Il est important de le lire dans toutes ses parties avant de commencer à conduire pour la première fois Vous découvrirez les détails et caractéristiques qui contribueront à vous convaincre que votre choix est le bon Cette publication doit être considérée comme partie intégrante du véhicule En cas de vente du vé...

Page 70: ...TÉ GAUCHE 5 eSpro 70 CÔTÉ DROIT 5 POSITION COMMANDES ET INSTRUMENTS 6 TABLEAU DE BORD eSpro 45 eSpro 25Km h 6 TABLEAU DE BORD eSpro 70 7 GROUPE COMMANDES GAUCHE 8 Levier de frein arrière 8 Levier de frein à tambour avec fonction combinée eSpro 70 uniquement 8 Sélecteur du mode régénération d énergie 8 Commutateur clignotants 9 Bouton klaxon 9 eSpro45_eSpro70_Rev_2_FR indb ii eSpro45_eSpro70_Rev_2_...

Page 71: ...LUMINEUX 14 Indicateur d activation du moteur eSpro 45 eSpro 25Km h uniquement 14 Indicateur de température élevée 15 Indicateur de problème grave 15 Indicateur de clignotants en fonction 16 Indicateur de feux allumés 16 Indicateur feu de route eSpro 70 uniquement 16 Indicateur de recharge en cours 16 TACHYMÈTRE eSpro 45 eSpro 25Km h 17 TACHYMÈTRE eSpro 70 17 BOUTONS RÉGLAGE MENU 17 AFFICHEUR NUMÉ...

Page 72: ...LECTION FONCTIONS AFFICHEUR 26 Mode d affichage des données du compteur kilométrique 26 Réglage de la fonction horloge 27 SELLE 28 Ouverture de la selle 28 Crochet porte bagages 28 STATIONNEMENT DU SCOOTER 29 Béquille centrale 29 Béquille latérale 29 BATTERIE ET RECHARGE 30 BATTERIES 30 Gestion de la batterie lors de la première utilisation du scooter 30 Élimination des batteries épuisées 33 eSpro...

Page 73: ...RIÈRE À TAMBOU eSpro 45 eSpro 25Km h 46 FREIN ARRIÈRE À TAMBOUR AVEC FONCTION COMBINÉE eSpro 70 uniquement 46 PROCÉDURES D ENTRETIEN COURANT 47 PNEUS 47 VERIFICATION DU NIVEAU DU LIQUIDE DE FREIN AVANT 48 REMPLACEMENT AMPOULE PHARE AVANT eSpro 45 eSpro 25Km h 49 PHARE AVANT eSpro 70 50 GROUPE OPTIQUE ARRIÈRE ET CLIGNOTANTS 51 TABLEAU RÉCAPITULATIF DES PROCÉDURES D ENTRETIEN COURANT 52 PROPRETÉ DU ...

Page 74: ...eSpro 25Km h 58 CARACTÉRISTIQUES DU MOTEUR 59 BATTERIE 59 CARACTÉRISTIQUES DU VÉHICULE 59 CARACTÉRISTIQUES GROUPE OPTIQUE AVANT 60 CARACTÉRISTIQUES GROUPE OPTIQUE ARRIÈRE 60 DÉCLARATION DE CONFORMITÉ UE DDC 61 eSpro45_eSpro70_Rev_2_FR indb vi eSpro45_eSpro70_Rev_2_FR indb vi 14 07 2020 15 02 41 14 07 2020 15 02 41 ...

Page 75: ...nt d entraîner la mort ou des blessures graves AVERTISSEMENT Ce symbole indique un avertissement générique de sécurité Il est utilisé pour vous mettre en garde contre un risque potentiel de blessures et ou de dommages matériels Le non respect total ou partiel de ces avertissements peut entraîner des dommages graves au véhicule et dans certains cas la perte de la garantie Les comportements adéquats...

Page 76: ...u de connaissances sauf si elles font l objet par l intermédiaire d une personne responsable de leur sécurité d une supervision ou d instructions relatives à l utilisation du scooter ATTENTION Le non respect total ou partiel de ces consignes peut être la cause de blessures graves aux personnes de dommages matériels de pollution et dans certains cas d annulation de la garantie ATTENTION Toute inter...

Page 77: ...Il est conseillé de vérifier la correspondance des numéros du véhicule et des numéros indiqués sur les documents AVERTISSEMENT L altération des numéros d identification est passible de sanctions pénales Valable uniquement pour eSpro 45 eSpro 25Km h Non requis pour eSpro 70 ASKOLL EVA S R L TYPE code dB A min kW 1 FR FR FR FR FR eSpro45_eSpro70_Rev_2_FR indb 3 eSpro45_eSpro70_Rev_2_FR indb 3 14 07 ...

Page 78: ...uille centrale F Béquille latérale G Logement batterie H Selle I Crochet selle J Groupe optique arrière K Porte plaque L Catadioptre arrière M Moteur N Catadioptre avant dte O Commutateur d allumage eSpro 45 eSpro 25Km h CÔTÉ GAUCHE A B D C E F I H G J K L M N O eSpro45_eSpro70_Rev_2_FR indb 4 eSpro45_eSpro70_Rev_2_FR indb 4 14 07 2020 15 02 46 14 07 2020 15 02 46 ...

Page 79: ...ntrale F Béquille latérale G Logement batterie H Selle I Crochet selle J Groupe optique arrière K Porte plaque L Catadioptre arrière M Moteur N Catadioptre avant dte O Commutateur d allumage eSpro 70 CÔTÉ GAUCHE FR FR FR FR FR A B D C F E I H G J K L M N O eSpro45_eSpro70_Rev_2_FR indb 5 eSpro45_eSpro70_Rev_2_FR indb 5 14 07 2020 15 02 48 14 07 2020 15 02 48 ...

Page 80: ...Commutateur à clé C Sélecteur du mode régénération d énergie D Commutateur clignotants E Bouton klaxon TABLEAU DE BORD eSpro 45 eSpro 25Km h POSITION COMMANDES ET INSTRUMENTS Km trip A B PWR ECO Km SELECT SET 10 2 0 Km h mph 10 1 20 2 P U S H I G N I T I O N B C D E F G H I J A eSpro45_eSpro70_Rev_2_FR indb 6 eSpro45_eSpro70_Rev_2_FR indb 6 14 07 2020 15 02 51 14 07 2020 15 02 51 ...

Page 81: ... à clé C Sélecteur du mode régénération d énergie D Commutateur clignotants E Bouton klaxon F Sélecteur de mode de conduite TABLEAU DE BORD eSpro 70 POSITION COMMANDES ET INSTRUMENTS Km trip A B PWR ECO Km SELECT SET Km h mph P U S H I G N I T I O N FR FR FR FR FR B K C D E F G H I J A eSpro45_eSpro70_Rev_2_FR indb 7 eSpro45_eSpro70_Rev_2_FR indb 7 14 07 2020 15 03 02 14 07 2020 15 03 02 ...

Page 82: ... pour assurer une plus grande sécurité et des distances d arrêt plus courtes Sélecteur du mode régénération d énergie En phase de décélération du scooter la batterie peut être rechargée automatiquement en activant le mode régénération d énergie Utiliser le commutateur à deux positions pour activer ou désactiver le mode régénération d énergie MODE eSpro 45 eSpro 25Km h eSpro 70 eSpro45_eSpro70_Rev_...

Page 83: ...tte vers la droite pour activer les clignotants droite Placer la manette au centre pour éteindre les clignotants Bouton klaxon Appuyer pour actionner le klaxon FR FR FR FR FR eSpro 45 eSpro 25Km h eSpro 45 eSpro 25Km h eSpro 70 eSpro 70 eSpro45_eSpro70_Rev_2_FR indb 9 eSpro45_eSpro70_Rev_2_FR indb 9 14 07 2020 15 03 07 14 07 2020 15 03 07 ...

Page 84: ...ier du frein à disque avant est situé sur la droite du guidon Commande accélérateur La vitesse du scooter est réglée en tournant la poignée DE DE eSpro 45 eSpro 25Km h eSpro 70 eSpro45_eSpro70_Rev_2_FR indb 10 eSpro45_eSpro70_Rev_2_FR indb 10 14 07 2020 15 03 10 14 07 2020 15 03 10 ...

Page 85: ...mitée à 25 km h Sélecteur d allumage du feu de route eSpro 70 uniquement En utilisant le sélecteur il est possible d activer le feu de route Bouton d allumage du moteur En appuyant sur le bouton pendant 3 secondes en fonction de la position de la clé dans le commutateur on active ou désactive le moteur MODE MODE MODE MODE FR FR FR FR FR eSpro 70 eSpro 45 eSpro 45 eSpro 70 eSpro 70 eSpro 25Km h eSp...

Page 86: ...le commutateur à clé et l ouverture de la selle Conserver le duplicata séparément de la clé principale Activation et désactivation du système En tournant la clé sur le système est activé En tournant la clé sur le système est désactivé AVERTISSEMENT Ne pas tourner ou retirer la clé lors de la conduite P U S H I G N I T I O N eSpro45_eSpro70_Rev_2_FR indb 12 eSpro45_eSpro70_Rev_2_FR indb 12 14 07 20...

Page 87: ... SET Km h mph COMMANDES ET INSTRUMENTS INSTRUMENTS A Voyants lumineux B Tachymètre C Afficheur numérique D Commandes afficheur FR FR FR FR FR eSpro 45 eSpro 25Km h eSpro 70 D C D C B B A A eSpro45_eSpro70_Rev_2_FR indb 13 eSpro45_eSpro70_Rev_2_FR indb 13 14 07 2020 15 03 20 14 07 2020 15 03 20 ...

Page 88: ...J Indicateur de recharge en cours K Indicateur feu de route en fonction eSpro 70 uniquement Indicateur d activation du moteur eSpro 45 eSpro 25Km h uniquement L indicateur d activation du moteur de couleur ambre s allume dès que le moteur est activé et reste allumé jusqu à ce qu il soit désactivé E F G H I J K eSpro45_eSpro70_Rev_2_FR indb 14 eSpro45_eSpro70_Rev_2_FR indb 14 14 07 2020 15 03 25 14...

Page 89: ...R Indicateur de problème grave Le voyant de problème grave rouge s allume en même temps que l indicateur de dysfonctionnement sur l écran Lorsque le voyant s allume arrêter le véhicule le code d erreur correspondante est affiché sur l écran Rendez vous dans un atelier conventionné pour faire contrôler le véhicule Pour la description de l alarme correspondante au code affiché consulter le chapitre ...

Page 90: ...ur de recharge en cours Le voyant de recharge en cours de couleur ambre s allume et reste allumé fixe lorsque le chargeur est branché sur le secteur et une recharge est en cours Il s allume également quand le mode régénération d énergie entre en fonction Indicateur feu de route eSpro 70 uniquement Le voyant d allumage du feu de route est de couleur bleue et s allume en actionnant le sélecteur mult...

Page 91: ...ur sélectionner le paramètre à afficher sur l écran remettre à zéro la valeur affichée km trajet définir et confirmer de nouvelles valeurs heure TACHYMÈTRE eSpro 70 Le compteur de vitesse indique la vitesse actuelle La valeur apparaît en kilomètres heure km h et miles heure mph 1 0 2 0 Km h mph 1 0 1 20 2 Km h mph SELECT SET FR FR FR FR FR eSpro45_eSpro70_Rev_2_FR indb 17 eSpro45_eSpro70_Rev_2_FR ...

Page 92: ... partiel kilomètres restants avec la charge résiduelle de la batterie heure alarmes et codes d erreur Voyant d entretien Le voyant d entretien peut s allumer seul ou en combinaison avec le voyant indicateur de problème grave Si le voyant s allume rendez vous dans un atelier conventionné pour le contrôle et la résolution du problème Km trip A B PWR ECO Km eSpro45_eSpro70_Rev_2_FR indb 18 eSpro45_eS...

Page 93: ...ssayer le scooter dans des zones fermées à la circulation jusqu à avoir acquis une bonne connaissance du scooter AVERTISSEMENT Conduire toujours dans les limites de vos capacités ATTENTION Conduire en état d ébriété sous l influence de drogues ou de certains médicaments est très dangereux pour soi et interdit par la loi AVERTISSEMENT Avant de commencer à conduire il est préférable de toujours port...

Page 94: ...VERTISSEMENT En freinage utiliser les deux leviers pour répartir l action de freinage sur les deux roues ATTENTION Ne pas freiner sur des surfaces mouillées de terre ou glissantes AVERTISSEMENT Après avoir parcouru une longue section de route mouillée sans actionner les freins l action de freinage sera initialement réduite Dans ces conditions actionner les freins de façon périodique ATTENTION En c...

Page 95: ...Pour libérer la direction insérer la clé dans le contacteur d allumage et tourner vers la droite OPÉRATIONS POUR LE DÉMARRAGE Engager et désengager le verrou de direction Pour engager le verrou de direction tourner le guidon vers la gauche jusqu à ce qu il se bloque FR FR FR FR FR Km trip A B PWR ECO Km SELECT SET 10 2 0 Km h mph 10 1 20 2 P U S H I G N I T I O P U S H eSpro45_eSpro70_Rev_2_FR ind...

Page 96: ... démarrage s allume Pour désactiver le moteur appuyer de nouveau sur le bouton d activation du moteur pendant 3 secondes et tourner la clé dans le commutateur vers la gauche sur La désactivation du moteur se produit également avec la seule rotation sur de la clé P U S H I G N I T I O N MODE MODE eSpro 45 eSpro 70 eSpro 25Km h eSpro45_eSpro70_Rev_2_FR indb 22 eSpro45_eSpro70_Rev_2_FR indb 22 14 07 ...

Page 97: ... valeurs d autonomie ci dessus sont calculées pour une utilisation de deux batteries connectées et à parité de charge AVERTISSEMENT Les batteries aux ions lithium subissent dans le temps une baisse progressive des performances qui réduisent les valeurs d autonomie initiales AVERTISSEMENT Les données d autonomie indiquées dépendent étroitement des conditions d utilisation qui peuvent être la pente ...

Page 98: ... et à parité de charge AVERTISSEMENT Les batteries aux ions lithium subissent dans le temps une baisse progressive des performances qui réduisent les valeurs d autonomie initiales AVERTISSEMENT Les données d autonomie indiquées dépendent étroitement des conditions d utilisation qui peuvent être la pente et ou le type de parcours la température ambiante la vitesse moyenne le niveau d assistance du ...

Page 99: ...ation d énergie est activé en augmentant l effet de décélération En poussant le bouton vers le bas le mode régénération d énergie est désactivé La combinaison de la décélération et du freinage augmente la recharge Lorsque le mode régénération d énergie est activé le voyant de recharge est allumé Avec un niveau élevé de charge de la batterie le mode régénération est désactivé FR FR FR FR FR MODE eS...

Page 100: ...être modifié Km trip Kilométrage partiel parcouru Appuyer sur la touche SET pour réinitialiser le paramètre pendant son affichage Km Kilomètres restants avec la charge résiduelle de la batterie La valeur varie en fonction des conditions d utilisation de la charge restante de la batterie du mode de conduite sélectionné et du mode de régénération d énergie sélectionné PWR ECO Km trip A B Km SELECT S...

Page 101: ... pour quitter le réglage L heure est mémorisée dans la batterie du véhicule Par conséquent si vous avez deux batteries il faudrait régler l heure une première fois avec les deux batteries installées pour synchroniser l heure Dans tous les cas en présence de deux batteries l heure affichée est celle en mémoire dans la batterie placée dans le compartiment A Pour obtenir une description de la batteri...

Page 102: ...rçant une pression sur la partie inférieure du crochet la partie supérieure sort et il est possible d accrocher un objet En libérant le crochet il revient automatiquement en place AVERTISSEMENT L objet transporté ne doit pas empêcher ou restreindre le mouvement des jambes AVERTISSEMENT Éviter d imposer la totalité du fardeau sur le crochet l objet transporté doit également être posé sur le repose ...

Page 103: ...ffectuée avant de monter sur le scooter Béquille latérale Abaissez la béquille latérale avec votre pied jusqu à ce que l ouverture soit complète et accompagnez le scooter jusqu à ce qu il soit complètement appuyé sur le terrain AVERTISSEMENT Avant le départ du véhicule assurez vous que la béquille latérale est soulevée un capteur de sécurité empêche l activation du moteur quand la béquille est aba...

Page 104: ...re 0 C et 40 C À basses températures une réduction de l autonomie est possible La batterie est un composant toujours actif il peut se produire de légères chutes de tension même quand l écran est éteint Gestion de la batterie lors de la première utilisation du scooter Avec des batteries neuves il est nécessaire d effectuer au moins 3 4 cycles de charge décharge en chargeant la batterie à 100 et en ...

Page 105: ...elle nature Tant lors de leur recharge que pendant leur entreposage les batteries ne doivent pas être exposées à des sources de chaleur froid à l humidité les poussières ou les intempéries La garantie couvre les dysfonctionnements des batteries dus à des défauts de production et à l impossibilité de recharge et de décharge La garantie ne couvre pas la dégradation des performances des batteries due...

Page 106: ... élevée laisser votre véhicule là où il se trouve Ne l utiliser sous aucun prétexte Dès que la batterie est refroidie amener le véhicule chez votre revendeur En présence de flammes ou de fumée s échappant de la batterie arrêter immédiatement le véhicule Éteindre le feu avec un extincteur si disponible Si vous ne disposez pas d un extincteur attendre que le feu soit éteint et que toutes les parties...

Page 107: ...ne pour ce type de déchets établit que les États adhérant à cette convention s engagent à prendre des mesures appropriées afin que les accumulateurs épuisés soient collectés séparément en vue de leur récupération éventuelle ou de leur élimination Dans tous les cas pour plus d informations actualisées sur le sujet l utilisateur est invité à contacter le service municipal préposé eSpro45_eSpro70_Rev...

Page 108: ...G LIFE recharge à 90 ce mode est recommandé pendant les périodes d utilisation fréquente du scooter pour un fonctionnement optimal et prolongé des batteries Pour l efficacité maximum du système il est recommandé d alterner 1 cycle de charge à 100 tous les 10 cycles à 90 Cette procédure permet d obtenir un nombre élevé de cycles de charge et décharge des batteries en maintenant une bonne performanc...

Page 109: ...e mise à la terre de la fiche 3 pôles Brancher l appareil à un réseau d alimentation électrique protégé par un interrupteur différentiel avec une sensibilité maximale de 30 mA Le branchement électrique doit correspondre aux données sur l étiquette du chargeur Ne pas utiliser de rallonges Si la longueur du cordon d alimentation est insuffisante consulter un électricien ou un installateur qualifié N...

Page 110: ...éder à la recharge La recharge de la batterie peut se faire de deux façons RECHARGE AVEC BATTERIE À BORD RECHARGE AVEC BATTERIE DÉPOSÉE ATTENTION L opération de recharge doit être effectuée en intérieur et protégée des intempéries ATTENTION Pour recharger les batteries brancher le connecteur du chargeur du chargeur de batterie à la prise de la batterie et connecter ensuite la prise du chargeur de ...

Page 111: ...batterie à bord procéder comme suit Désactiver le système Soulever la selle assurez vous que le chargeur est branché à la prise et que les batteries sont correctement insérées dans les compartiments et reliées aux connecteurs extraire le câble à ressort du chargeur de batterie doté de fiche Brancher la fiche au réseau électrique eSpro45_eSpro70_Rev_2_FR indb 37 eSpro45_eSpro70_Rev_2_FR indb 37 14 ...

Page 112: ...ouverture suffisante pour le passage du câble de charge Cela peut être utile en cas de recharge extérieure ce qui maintient un couvercle sur le chargeur de batterie tout en évacuant la chaleur produite par le processus de recharge Ouvrir la selle déplacer le mécanisme de ressort de fermeture vers la gauche et maintenez le appuyé eSpro45_eSpro70_Rev_2_FR indb 38 eSpro45_eSpro70_Rev_2_FR indb 38 14 ...

Page 113: ...loquée dans une position relevée pour permettre le passage du câble de recharge En ouvrant la serrure avec la clé et en soulevant la selle le mécanisme reviendra immédiatement à sa position initiale eSpro45_eSpro70_Rev_2_FR indb 39 eSpro45_eSpro70_Rev_2_FR indb 39 14 07 2020 15 04 06 14 07 2020 15 04 06 ...

Page 114: ...ler uniquement avec l autre batterie Débrancher le câble de la batterie en appuyant sur les deux pattes latérales du connecteur pour le retirer Extraire la batterie en utilisant la poignée de levage prévue à cet effet Une fois extraite soutenir la batterie avec les deux mains eSpro45_eSpro70_Rev_2_FR indb 40 eSpro45_eSpro70_Rev_2_FR indb 40 14 07 2020 15 04 08 14 07 2020 15 04 08 ...

Page 115: ...ux pattes sur les côtés Retirer le chargeur de son support avec ses deux câbles ATTENTION Lors du retrait du chargeur de batterie il est recommandé de le manipuler avec soin pour éviter de le faire tomber sur soi ou sur le sol eSpro45_eSpro70_Rev_2_FR indb 41 eSpro45_eSpro70_Rev_2_FR indb 41 14 07 2020 15 04 09 14 07 2020 15 04 09 ...

Page 116: ... au secteur Sélectionner le mode de recharge souhaité comme expliqué plus haut dans ce chapitre au paragraphe CHARGEUR A la fin de cette opération de recharge remettre en place le chargeur et la batterie dans le compartiment du scooter en procédant comme suit remettre en place sur le véhicule d abord le chargeur de batterie et brancher le câble avec connecteur à la prise du véhicule eSpro45_eSpro7...

Page 117: ... avec connecteur à la prise sous le volet à ressort sur la batterie insérer le connecteur jusqu à entendre un clic et vérifier qu il est bien fixé Placer la fiche du câble à ressort à côté du chargeur de batterie et enrouler le cordon sur la batterie eSpro45_eSpro70_Rev_2_FR indb 43 eSpro45_eSpro70_Rev_2_FR indb 43 14 07 2020 15 04 12 14 07 2020 15 04 12 ...

Page 118: ...e régler la hauteur du faisceau du phare avant en tournant la vis de réglage sous le phare lui même à l aide de la clé TORX T 20 fournie comme accessoire et placée sous la selle En tournant la vis 1 2 de tour vers la droite on oriente le faisceau vers le bas vers la gauche on oriente le faisceau vers le haut eSpro 70 eSpro 45 eSpro 25Km h eSpro45_eSpro70_Rev_2_FR indb 44 eSpro45_eSpro70_Rev_2_FR i...

Page 119: ...e Un freinage efficace doit commencer après environ 1 3 de la course du levier de frein AVERTISSEMENT Si le frein ne fonctionne pas de façon satisfaisante vérifier l usure des plaquettes Si l épaisseur est très réduite faire remplacer les deux plaquettes par un atelier conventionné AVERTISSEMENT Après le remplacement des plaquettes actionner le levier de frein à plusieurs reprises pour positionner...

Page 120: ...le réglage avec le levier de commande de frein au repos vérifier que la roue tourne librement Un freinage efficace doit commencer après environ 1 3 de la course du levier de frein FREIN ARRIÈRE À TAMBOUR AVEC FONCTION COMBINÉE eSpro 70 uniquement Le scooter mod eSpro 70 utilise le double freinage l actionnement du frein arrière active automatiquement le frein avant La répartition est prévalente su...

Page 121: ...on des pneus et l ajuster si nécessaire avant de commencer votre trajet eSpro 45 eSpro 70 eSpro 25Km h Pression pneumatique avant 2 bar Pression pneumatique arrière 2 8 bar Les pneus sont équipés d indicateurs d usure et le remplacement doivent être effectué dès que ces indicateurs sont visibles sur la bande de roulement Vérifier également la présence éventuelle de coupures sur les côtés des pneus...

Page 122: ...à savoir qu il absorbe l humidité de l air ambiant Si l humidité contenue dans le liquide dépasse une certaine valeur le freinage sera inefficace AVERTISSEMENT Il est conseillé de remplacer le liquide tous les deux ans ne jamais utiliser le liquide de frein contenu dans des récipients déjà ouverts ou utilisés partiellement AVERTISSEMENT Veiller à n utiliser que du liquide de freins classé DOT4 AVE...

Page 123: ...utilisant la clé TORX T 20 fournie comme accessoire et placée sous la selle retirer les 2 vis latérales sous le phare retirer d abord les demi coques à gauche puis à droite en les tournant vers l extérieur FR FR FR FR FR eSpro 45 eSpro 25Km h eSpro 45 eSpro 25Km h eSpro45_eSpro70_Rev_2_FR indb 49 eSpro45_eSpro70_Rev_2_FR indb 49 14 07 2020 15 04 20 14 07 2020 15 04 20 ...

Page 124: ...cooter mod eSpro 70 le phare avant est équipé d une ampoule de type led qui ne doit pas être remplacée En cas d épuisement de l ampoule il faut remplacer le phare complet Pour le remplacement contacter un atelier conventionné eSpro 45 eSpro 25Km h eSpro 45 eSpro 25Km h eSpro 70 eSpro45_eSpro70_Rev_2_FR indb 50 eSpro45_eSpro70_Rev_2_FR indb 50 14 07 2020 15 04 21 14 07 2020 15 04 21 ...

Page 125: ...gnotants avant et arrière et le feu de la plaque d immatriculation sont équipés de LED et sont intégrés dans la structure du véhicule Pour le remplacement contacter un atelierconventionné FR FR FR FR FR eSpro45_eSpro70_Rev_2_FR indb 51 eSpro45_eSpro70_Rev_2_FR indb 51 14 07 2020 15 04 23 14 07 2020 15 04 23 ...

Page 126: ...ous les 2 ans S S S S S Usure plaquettes de frein avant C S C S C S C S C Usure mâchoires frein arrière C R C S C S C S C S Courroies de transmission C C C S C C S C C S C C S C Écrous boulons dispositifs de fixation C C C C C C Béquille C L C L C L C L C L Roulements de direction C C C C Excepté l orientation du phare tous les contrôles doivent être confiés à un personnel qualifié ASKOLL eSpro45_...

Page 127: ...e laver le scooter au soleil surtout en été pour empêcher le réchauffement de la carrosserie et le séchage du shampoing au risque d endommager la peinture Ne pas utiliser de jets d eau à haute pression pour le lavage afin d éviter d endommager les composants délicats du véhicule Pendant le lavage ne jamais diriger le jet d eau directement sur les composants délicats tels que le câblage électrique ...

Page 128: ...toyage général du scooter de le ranger dans un lieu couvert de stationner le scooter sur la béquille centrale pour éviter que les roues restent en contact avec le sol dans la même position de couvrir le scooter avec un linge eSpro45_eSpro70_Rev_2_FR indb 54 eSpro45_eSpro70_Rev_2_FR indb 54 14 07 2020 15 04 25 14 07 2020 15 04 25 ...

Page 129: ...ecte une défaillance de l ECU Apporter votre scooter à un atelier conventionné Panne dans le circuit d alimentation le système détecte une absorption anormale du moteur Pour des raisons de sécurité le système ne fournit pas d alimentation Apporter votre véhicule à un atelier conventionné Panne de la batterie A le système détecte une anomalie dans le bloc batterie A Apporter la batterie dans un ate...

Page 130: ...ive de l onduleur La distribution de puissance au véhicule est inhibée jusqu à ce que la température de la carte diminue Il est conseillé d éloigner le vélo de toute source de chaleur Surchauffe moteur le système détecte une température excessive du moteur Un fonctionnement en puissance réduite est possible de manière à permettre le refroidissement Dysfonctionnement phare avant le système détecte ...

Page 131: ...conventionné Dysfonctionnement feu arrière et feu de plaque d immatriculation le système détecte la rupture ou un dysfonctionnement du feu arrière et du feu de la plaque d immatriculation Vérifier le fonctionnement et les faire remplacer par un atelier conventionné A A FR FR FR FR FR eSpro45_eSpro70_Rev_2_FR indb 57 eSpro45_eSpro70_Rev_2_FR indb 57 14 07 2020 15 04 31 14 07 2020 15 04 31 ...

Page 132: ...58 CARACTÉRISTIQUES TECHNIQUES DIMENSIONS DU SCOOTER eSpro 45 eSpro 70 eSpro 25Km h eSpro45_eSpro70_Rev_2_FR indb 58 eSpro45_eSpro70_Rev_2_FR indb 58 14 07 2020 15 04 32 14 07 2020 15 04 32 ...

Page 133: ...et à parité de charge selon 168 2013 EC BATTERIE Modèle TVC102 TVC103 Charge LI ION Poids 7 6 Kg Autonomie 71 Km avec 2 batteries connectées et à parité de charge selon 168 2013 EC 86 Km avec 2 batteries connectées et à parité de charge selon 168 2013 EC 96 Km avec 2 batteries connectées et à parité de charge selon 168 2013 EC Température opérationnelle En fonctionnement 20 C à 45 C CARACTÉRISTIQU...

Page 134: ...arge additionnelle Poids maximum admissible au porte bagage arrière 30Kg centré sur le porte bagage Places 1 Transmission Courroie crantée CARACTÉRISTIQUES GROUPE OPTIQUE AVANT Phare avant H8 35W LED Clignotants LED Éclairage tableau de bord LED CARACTÉRISTIQUES GROUPE OPTIQUE ARRIÈRE Feu arrière LED Feu stop LED Clignotants LED Feu de plaque LED eSpro45_eSpro70_Rev_2_FR indb 60 eSpro45_eSpro70_Re...

Page 135: ...ion communautaire d harmonisation pertinente Directive 2014 35 EU LVD Directive 2014 30 EU EMC Directive 2011 65 EU RoHS II Les normes harmonisées et les spécifications techniques suivantes ont été respectées EN 60335 1 2002 A11 2004 A1 2004 A12 2006 A2 2006 A1 EC 2007 A13 2008 EC 2009 EC 2010 A14 2010 A15 2011 EN 60335 2 29 2004 A2 2010 EN 62233 2008 EN 55014 1 2006 A1 2009 A2 2011 EN 55014 2 199...

Page 136: ...62 REMARQUES eSpro45_eSpro70_Rev_2_FR indb 62 eSpro45_eSpro70_Rev_2_FR indb 62 14 07 2020 15 04 33 14 07 2020 15 04 33 ...

Page 137: ...odas las cualidades de su nueva adquisición Contiene informaciones advertencias y consejos para el uso y el mantenimiento adecuados Es importante que lo lea de principio a fin antes de conducir el vehículo por primera vez Además durante la lectura descubrirá detalles y características que le confirmarán su óptima elección Esta publicación ha de considerarse parte integrante del vehículo En caso de...

Page 138: ...DO 5 eSpro 70 LADO DERECHO 5 POSICIÓN DE LOS MANDOS E INSTRUMENTOS 6 TABLERO eSpro 45 eSpro 25Km h 6 TABLERO eSpro 70 7 GRUPO DE MANDOS IZQUIERDO 8 Palanca de mando del freno trasero 8 Palanca del freno de tambor con función combinada solo eSpro 70 8 Selector del modo de regeneración de energía 8 Conmutador de los intermitentes 9 Botón del claxon 9 eSpro45_eSpro70_Rev_2_ES indb ii eSpro45_eSpro70_...

Page 139: ...IGOS LUMINOSOS 14 Indicador de habilitación del motor solo eSpro 45 eSpro 25Km h 14 Indicador de alta temperatura 15 Indicador de problema grave 15 Indicador de intermitentes activados 16 Indicador de luces encendidas 16 Indicador de luz de carretera solo eSpro 70 16 Indicador de carga de batería en curso 16 VELOCÍMETRO eSpro 45 eSpro 25Km h 17 VELOCÍMETRO eSpro 70 17 BOTONES DE AJUSTE DEL MENÚ 17...

Page 140: ...de regeneración de energía 25 AJUSTES EN LA PANTALLA 26 Visualización del cuentakilómetros 26 Ajuste del reloj 27 SILLÍN 28 Apertura del sillín 28 Gancho portabolsas 28 ESTACIONAMIENTO DEL SCOOTER 29 Caballete central 29 Caballete lateral 29 BATERÍA Y RECARGA 30 BATERÍAS 30 Preparación de la batería en el primer uso del scooter 30 Eliminación de las baterías agotadas 33 eSpro45_eSpro70_Rev_2_ES in...

Page 141: ...pro 45 eSpro 25Km h 46 FRENO TRASERO DE TAMBOR CON FUNCIÓN COMBINADA solo eSpro 70 46 OPERACIONES DE MANTENIMIENTO ORDINARIO 47 NEUMÁTICOS 47 CONTROL DEL NIVEL DE LÍQUIDO DEL FRENO DELANTERO 48 CAMBIO DE LA BOMBILLA DEL FARO DELANTERO eSpro 45 eSpro 25Km h 49 FARO DELANTERO eSpro 70 50 GRUPO ÓPTICO TRASERO E INTERMITENTES 51 TABLA SINÓPTICA DE LAS OPERACIONES DE MANTENIMIENTO PERIÓDICO 52 LIMPIEZA...

Page 142: ...o 45 eSpro 70 eSpro 25Km h 58 DATOS DEL MOTOR 59 BATERÍA 59 DATOS DEL VEHÍCULO 59 DATOS DEL GRUPO ÓPTICO DELANTERO 60 DATOS DEL GRUPO ÓPTICO TRASERO 60 DECLARACIÓN UE DE CONFORMIDAD DOC 61 eSpro45_eSpro70_Rev_2_ES indb vi eSpro45_eSpro70_Rev_2_ES indb vi 14 07 2020 15 39 49 14 07 2020 15 39 49 ...

Page 143: ... se evitan pueden causar lesiones graves o muerte ADVERTENCIA Este símbolo indica un aviso genérico de seguridad Se utiliza para advertir de un peligro potencial de daños a las personas o al vehículo La inobservancia total o parcial de estas indicaciones puede causar daños graves al vehículo y en ciertos casos la anulación de la garantía También se indican los comportamientos correctos para evitar...

Page 144: ...gan los conocimientos y la experiencia necesarios salvo que estén instruidas y supervisadas por una persona que se haga responsable de su seguridad y del buen uso del vehículo PRECAUCIÓN La inobservancia total o parcial de estas indicaciones puede causar daños graves a las personas al vehículo y al medioambiente y en ciertos casos puede anular la garantía PRECAUCIÓN Toda modificación que altere la...

Page 145: ... datos de identificación indicados en el vehículo coincidan con los que figuran en los documentos respectivos ADVERTENCIA La alteración de los datos de identificación puede ser causa de graves sanciones penales Válido solo para eSpro 45 eSpro 25Km h No se requiere para eSpro 70 ASKOLL EVA S R L TYPE code dB A min kW 1 ES ES ES ES ES eSpro45_eSpro70_Rev_2_ES indb 3 eSpro45_eSpro70_Rev_2_ES indb 3 1...

Page 146: ...aballete central F Caballete lateral G Alojamiento de las baterías H Sillín I Gancho del sillín J Grupo óptico trasero K Portamatrícula L Catadióptrico trasero M Motor N Catadióptrico delantero derecho O Conmutador de encendido eSpro 45 eSpro 25Km h LADO IZQUIERDO A B D C E F I H G J K L M N O eSpro45_eSpro70_Rev_2_ES indb 4 eSpro45_eSpro70_Rev_2_ES indb 4 14 07 2020 15 39 54 14 07 2020 15 39 54 ...

Page 147: ...e central F Caballete lateral G Alojamiento de las baterías H Sillín I Gancho del sillín J Grupo óptico trasero K Portamatrícula L Catadióptrico trasero M Motor N Catadióptrico delantero derecho O Conmutador de encendido eSpro 70 LADO IZQUIERDO ES ES ES ES ES A B D C F E I H G J K L M N O eSpro45_eSpro70_Rev_2_ES indb 5 eSpro45_eSpro70_Rev_2_ES indb 5 14 07 2020 15 39 57 14 07 2020 15 39 57 ...

Page 148: ...os B Conmutador con llave C Selector del modo de regeneración de energía D Conmutador de los intermitentes E Botón del claxon TABLERO eSpro 45 eSpro 25Km h POSICIÓN DE LOS MANDOS E INSTRUMENTOS Km trip A B PWR ECO Km SELECT SET 10 2 0 Km h mph 10 1 20 2 P U S H I G N I T I O N D E J C A B G F H I eSpro45_eSpro70_Rev_2_ES indb 6 eSpro45_eSpro70_Rev_2_ES indb 6 14 07 2020 15 40 00 14 07 2020 15 40 0...

Page 149: ...ador con llave C Selector del modo de regeneración de energía D Conmutador de los intermitentes E Botón del claxon F Selector del modo de conducción TABLERO eSpro 70 POSICIÓN DE LOS MANDOS E INSTRUMENTOS Km trip A B PWR ECO Km SELECT SET Km h mph P U S H I G N I T I O N ES ES ES ES ES A K D E B G F C H I J eSpro45_eSpro70_Rev_2_ES indb 7 eSpro45_eSpro70_Rev_2_ES indb 7 14 07 2020 15 40 02 14 07 20...

Page 150: ...dad de la trasera para garantizar mayor seguridad y menor espacio de parada Selector del modo de regeneración de energía Si está activado el modo de regeneración de energía cuando el scooter desacelera la batería se carga automáticamente Utilice el conmutador de dos posiciones para activar o desactivar el modo de regeneración de energía MODE eSpro 45 eSpro 25Km h eSpro 70 eSpro45_eSpro70_Rev_2_ES ...

Page 151: ...sor hacia la derecha para accionar los intermitentes derechos Sitúe el cursor en el centro para apagar los intermitentes Botón del claxon Presiónelo para accionar el claxon ES ES ES ES ES eSpro 45 eSpro 25Km h eSpro 45 eSpro 25Km h eSpro 70 eSpro 70 eSpro45_eSpro70_Rev_2_ES indb 9 eSpro45_eSpro70_Rev_2_ES indb 9 14 07 2020 15 40 04 14 07 2020 15 40 04 ...

Page 152: ...a del freno de disco delantero se encuentra en la parte derecha del manillar Mando del acelerador La velocidad del scooter se regula girando la empuñadura DE DE eSpro 45 eSpro 25Km h eSpro 70 eSpro45_eSpro70_Rev_2_ES indb 10 eSpro45_eSpro70_Rev_2_ES indb 10 14 07 2020 15 40 07 14 07 2020 15 40 07 ...

Page 153: ... velocidad está limitada a 25 km h Selector de encendido del faro de carretera solo eSpro 70 Permite encender y apagar la luz de carretera Botón de encendido del motor La presión del botón durante 3 segundos según la posición de la llave en el conmutador habilita o deshabilita el motor MODE MODE MODE MODE ES ES ES ES ES eSpro 70 eSpro 45 eSpro 45 eSpro 70 eSpro 70 eSpro 25Km h eSpro 25Km h eSpro45...

Page 154: ...nmutador y la apertura del sillín Se aconseja guardar el duplicado separado de la llave principal Habilitación y deshabilitación del sistema Girando la llave a se habilita el sistema Girando la llave a se deshabilita el sistema ADVERTENCIA No gire ni extraiga la llave durante la marcha P U S H I G N I T I O N eSpro45_eSpro70_Rev_2_ES indb 12 eSpro45_eSpro70_Rev_2_ES indb 12 14 07 2020 15 40 15 14 ...

Page 155: ... SET Km h mph MANDOS E INSTRUMENTOS INSTRUMENTOS A Testigos luminosos B Velocímetro C Pantalla digital D Mandos de la pantalla ES ES ES ES ES eSpro 45 eSpro 25Km h eSpro 70 D C D C B B A A eSpro45_eSpro70_Rev_2_ES indb 13 eSpro45_eSpro70_Rev_2_ES indb 13 14 07 2020 15 40 18 14 07 2020 15 40 18 ...

Page 156: ...s encendidas J Indicador de carga de batería en curso K Indicador de luz de carretera encendida solo eSpro 70 Indicador de habilitación del motor solo eSpro 45 eSpro 25Km h Testigo de color ámbar se enciende cuando se habilita el motor y se apaga cuando se realiza la deshabilitación E F G H I J K eSpro45_eSpro70_Rev_2_ES indb 14 eSpro45_eSpro70_Rev_2_ES indb 14 14 07 2020 15 40 22 14 07 2020 15 40...

Page 157: ... capítulo CÓDIGOS DE ERROR Indicador de problema grave Testigo de color rojo se enciende al mismo tiempo que el testigo de fallo en la pantalla Si se enciende pare el vehículo El código de error se indica en la pantalla Acuda a un taller autorizado para hacer la revisión Para la descripción de la alarma relativa al código visualizado consulte el capítulo CÓDIGOS DE ERROR ES ES ES ES ES eSpro45_eSp...

Page 158: ...e batería en curso Testigo de color ámbar se enciende y permanece con luz fija cuando el cargador de baterías se ha conectado a la red eléctrica y está cargando las baterías También se enciende cuando se activa el modo de regeneración de energía Indicador de luz de carretera solo eSpro 70 El testigo de encendido de la luz de carretera es azul y se ilumina al accionar el selector situado en el mand...

Page 159: ...ara seleccionar el parámetro que se desea ver en la pantalla poner a cero el valor visualizado km trip ajustar y confirmar valores hora VELOCÍMETRO eSpro 70 Indica la velocidad actual El valor aparece en kilómetros hora km h o millas hora mph 1 0 2 0 Km h mph 1 0 1 20 2 Km h mph SELECT SET ES ES ES ES ES eSpro45_eSpro70_Rev_2_ES indb 17 eSpro45_eSpro70_Rev_2_ES indb 17 14 07 2020 15 40 26 14 07 20...

Page 160: ...recorrido kilómetros que se pueden recorrer con la carga que tiene la batería hora alarmas y respectivos códigos de error Testigo de mantenimiento El testigo de mantenimiento se puede encender solo o junto con el testigo de problema grave Si se enciende es aconsejable acudir a un concesionario para el control y la solución del problema Km trip A B PWR ECO Km eSpro45_eSpro70_Rev_2_ES indb 18 eSpro4...

Page 161: ...s del primer uso se recomienda probar el scooter en una zona cerrada al tráfico hasta familiarizarse con la conducción y con los mandos ADVERTENCIA Conduzca siempre dentro de los límites de su capacidad PRECAUCIÓN Conducir bajo el efecto del alcohol de drogas o de ciertos fármacos es muy peligroso para su seguridad y está prohibido por la ley ADVERTENCIA Antes de ponerse en marcha colóquese el cas...

Page 162: ...s ruedas PRECAUCIÓN No frene a fondo en carreteras mojadas de tierra o resbaladizas ADVERTENCIA Si recorre un largo tramo de carretera mojada sin accionar los frenos la acción de frenado será inicialmente menor En estas condiciones se recomienda accionar los frenos periódicamente PRECAUCIÓN En caso de lluvia la visibilidad disminuye reduzca la velocidad y conduzca con prudencia eSpro45_eSpro70_Rev...

Page 163: ...llave Para desbloquear la dirección inserte la llave en el conmutador y gírela hacia la derecha OPERACIONESDEPUESTAENMARCHA Bloqueo y desbloqueo de la dirección Para bloquear la dirección gire el manillar hacia la izquierda hasta el tope ES ES ES ES ES Km trip A B PWR ECO Km SELECT SET 10 2 0 Km h mph 10 1 20 2 P U S H I G N I T I O P U S H eSpro45_eSpro70_Rev_2_ES indb 21 eSpro45_eSpro70_Rev_2_ES...

Page 164: ...go de puesta en marcha se enciende Para deshabilitar el motor presione otra vez el botón de habilitación durante 3 segundos y gire la llave del conmutador hacia la izquierda hasta la posición El motor también se deshabilita con tan solo girar la llave a la posición P U S H I G N I T I O N MODE MODE eSpro 45 eSpro 70 eSpro 25Km h eSpro45_eSpro70_Rev_2_ES indb 22 eSpro45_eSpro70_Rev_2_ES indb 22 14 ...

Page 165: ...lamento 168 2013 UE Las autonomías indicadas se entienden para dos baterías conectadas con igual nivel de carga ADVERTENCIA Con el paso del tiempo las baterías de iones de litio sufren una caída progresiva de las prestaciones que reduce los valores de autonomía iniciales ADVERTENCIA Los datos de autonomía indicados dependen en gran parte de las condiciones de uso que pueden ser pendiente o tipo de...

Page 166: ...l de carga ADVERTENCIA Con el paso del tiempo las baterías de iones de litio sufren una caída progresiva de las prestaciones que reduce los valores de autonomía iniciales ADVERTENCIA Los datos de autonomía indicados dependen en gran parte de las condiciones de uso que pueden ser pendiente o tipo de superficie del recorrido temperatura ambiente velocidad media nivel de asistencia del motor presión ...

Page 167: ... regeneración de energía y aumenta el efecto de desaceleración Si el botón se presiona hacia abajo la regeneración se desactiva Si se combina el frenado con la desaceleración la recarga es mayor Cuando el modo de regeneración de energía está activado el testigo de recarga está encendido Si la batería tiene un nivel alto de carga el modo de regeneración no se activa ES ES ES ES ES MODE eSpro 45 eSp...

Page 168: ...metraje parcial recorrido Mantenga presionado el botón SET durante la visualización del parámetro para ponerlo a cero Km Kilómetros que se pueden recorrer con la carga que tiene la batería El valor cambia según las condiciones de uso la carga residual de la batería el modo de conducción seleccionado y la activación o no del modo de regeneración de energía PWR ECO Km trip A B Km SELECT SET eSpro45_...

Page 169: ...e La hora se memoriza en la batería del vehículo por lo cual si se dispone de dos baterías es conveniente hacer el primer ajuste de la hora con las dos baterías montadas para sincronizarlas De cualquier forma cuando se usan las dos baterías se indica siempre la hora memorizada en la que ocupa el compartimento A Para la descripción de las baterías y la posición en los alojamientos A y B consulte el...

Page 170: ...re el sillín y el reposapiés Al presionar la parte inferior del gancho la parte superior sobresale y permite colgar un objeto Al soltarlo el gancho vuelve automáticamente a su alojamiento ADVERTENCIA El objeto transportado no debe impedir ni limitar el movimiento de las piernas ADVERTENCIA Evite cargar todo el peso sobre el gancho el objeto transportado se debe apoyar siempre en el reposapiés eSpr...

Page 171: ...montarse en el scooter Caballete lateral Baje el caballete lateral con el pie hasta la apertura completa y guíe el scooter hasta que se apoye por completo en el suelo ADVERTENCIA Antesdevolverausarelvehículo controle que el caballete lateral esté levantado un sensor de seguridad impide el arranque del motor si el caballete está bajado ADVERTENCIA Utilice los caballetes sobre superficies firmes y l...

Page 172: ... ambiente comprendida entre 0 C y 40 C A bajas temperaturas se puede reducir la autonomía La batería está siempre activada por lo cual se pueden producir ligeras caídas de tensión incluso con la pantalla apagada Preparación de la batería en el primer uso del scooter Con las baterías nuevas realice al menos 3 4 ciclos completos de carga y descarga llevando la carga al 100 y descargando después a un...

Page 173: ... ningún tipo Tanto durante la recarga como durante el almacenamiento las baterías no se deben exponer a fuentes de calor o frío a la humedad al polvo o a la intemperie La garantía cubre defectos de funcionamiento derivados de defectos de fabricación e imposibilidad de recarga y descarga La garantía no cubre defectos de prestación de las baterías debidos al uso normal y al envejecimiento El fabrica...

Page 174: ... lo normal deje el vehículo en el lugar donde se encuentra No lo utilice por ningún motivo En cuanto se enfríe la batería lleve el vehículo al establecimiento vendedor Si sale fuego o humo de la batería pare el vehículo de inmediato Apague el incendio con un extintor si dispone de él Si no hay un extintor disponible espere a que el incendio se extinga y todas las partes del vehículo se hayan enfri...

Page 175: ...gentes La directiva europea para este tipo de residuos establece que los países firmantes de dicha convención se comprometen a adoptar medidas apropiadas para que los acumuladores agotados se recojan por separado y se destinen a la recuperación el reciclaje o la eliminación Para más información consulte con la oficina correspondiente de su ayuntamiento eSpro45_eSpro70_Rev_2_ES indb 33 eSpro45_eSpr...

Page 176: ...a al 90 esta modalidad se recomienda para asegurar un funcionamiento óptimo y prolongado de las baterías en los periodos de uso frecuente del scooter Para la máxima eficiencia del sistema se aconseja hacer un ciclo de carga al 100 cada diez ciclos al 90 Este procedimiento permite obtener un alto número de ciclos de carga y descarga de las baterías manteniendo un buen porcentaje de carga a lo largo...

Page 177: ...cte el aparato a una red de alimentación eléctrica protegida por un interruptor diferencial con sensibilidad no superior a 30 mA La red a la cual se hará la conexión debe asegurar los valores indicados en la etiqueta de datos técnicos del aparato No utilice cables de extensión Si la longitud del cable de alimentación es insuficiente hágalo cambiar por un electricista o instalador cualificado No co...

Page 178: ...de 0 es necesario cargar la batería Las baterías se pueden cargar de dos modos CARGA CON LA BATERÍA MONTADA CARGA CON LA BATERÍA DESMONTADA PRECAUCIÓN La carga debe efectuarse en un local cubierto y protegido de la intemperie PRECAUCIÓN Para recargar las baterías enchufe primero el conector del cargador en la toma de la batería y después conecte la toma del cargador a la red eléctrica Km trip SELE...

Page 179: ...atería montada en el vehículo proceda del siguiente modo Desactive el sistema Levante el sillín controle que el cargador esté conectadoalatomadecorrienteyquelasbateríasestén correctamente introducidas en los compartimentos y conectadas a los conectores Extraiga el cable espiral del cargador dotado de clavija Conecte la clavija a la red eléctrica eSpro45_eSpro70_Rev_2_ES indb 37 eSpro45_eSpro70_Rev...

Page 180: ...ertura suficiente para que pase el cable de carga Esto puede ser útil si la carga se realiza al aire libre puesto que las baterías y el cargador quedan cubiertos pero se puede disipar el calor generado por el proceso de carga Abra el sillín desplace el pestillo hacia la izquierda y reténgalo eSpro45_eSpro70_Rev_2_ES indb 38 eSpro45_eSpro70_Rev_2_ES indb 38 14 07 2020 15 40 56 14 07 2020 15 40 56 ...

Page 181: ...lín se bloquea en posición elevada para permitir el paso del cable de carga Al abrir la cerradura con la llave y levantar el sillín el pestillo vuelve automáticamente a la posición original eSpro45_eSpro70_Rev_2_ES indb 39 eSpro45_eSpro70_Rev_2_ES indb 39 14 07 2020 15 40 58 14 07 2020 15 40 58 ...

Page 182: ... seguir utilizando el scooter Desconecte el cable de la batería presionando las dos aletas laterales del conector para extraerlo Saque la batería del alojamiento sujetándola por el asa Una vez extraída sosténgala con las dos manos eSpro45_eSpro70_Rev_2_ES indb 40 eSpro45_eSpro70_Rev_2_ES indb 40 14 07 2020 15 40 59 14 07 2020 15 40 59 ...

Page 183: ...o presione las dos aletas laterales Quite el cargador de su alojamiento junto con los dos cables PRECAUCIÓN Al extraer el cargador sujételo con firmeza para evitar que se le caiga al suelo o en los pies eSpro45_eSpro70_Rev_2_ES indb 41 eSpro45_eSpro70_Rev_2_ES indb 41 14 07 2020 15 41 00 14 07 2020 15 41 00 ...

Page 184: ...onecte el cargador a la red eléctrica Seleccione el modo de carga como se describe al principiodeestecapítulo enelapartado CARGADOR DE BATERÍAS Cuando la carga esté terminada coloque nuevamente el cargador y la batería en el compartimento del scooter de este modo Instale primero el cargador y conecte el cable dotado de conector a la toma del vehículo eSpro45_eSpro70_Rev_2_ES indb 42 eSpro45_eSpro7...

Page 185: ... a la toma situada bajo la tapa de muelle de la batería Inserte el conector hasta percibir el clic y controle que la batería esté bien asegurada Finalmente coloque la clavija del cable espiral junto al cargador y enrolle el cable sobre la batería eSpro45_eSpro70_Rev_2_ES indb 43 eSpro45_eSpro70_Rev_2_ES indb 43 14 07 2020 15 41 03 14 07 2020 15 41 03 ...

Page 186: ...a subir o bajar el haz de luz del faro delantero gire el tornillo situado debajo del faro con la llave TORX T 20 suministrada como accesorio y guardada bajo el sillín Girando el tornillo media vuelta hacia la derecha el haz luminoso baja si se lo gira hacia la izquierda el haz luminoso sube eSpro 45 eSpro 25Km h eSpro 70 eSpro45_eSpro70_Rev_2_ES indb 44 eSpro45_eSpro70_Rev_2_ES indb 44 14 07 2020 ...

Page 187: ...rrecto si comienza aproximadamente a 1 3 de la carrera de la palanca de freno ADVERTENCIA Si el freno funciona mal controle el desgaste de las pastillas si están muy consumidas hay que cambiar las dos Esta operación debe realizarse en un taller autorizado ADVERTENCIA Tras la sustitución de las pastillas accione varias veces la palanca del freno para asentar las pastillas y ubicar la palanca en la ...

Page 188: ...alanca del freno en reposo compruebe que la rueda gire libremente El frenado es correcto si comienza aproximadamente a 1 3 de la carrera de la palanca de freno FRENO TRASERO DE TAMBOR CON FUNCIÓN COMBINADA solo eSpro 70 El scooter mod eSpro 70 está provisto de freno doble al accionar el freno trasero se activa automáticamente también el delantero El reparto de frenado da prioridad al freno trasero...

Page 189: ...ess Controle regularmente la presión de los neumáticos y si corresponde restablézcala antes de ponerse en marcha eSpro 45 eSpro 70 eSpro 25Km h Presión neumático delantero 2 bar Presión neumático trasero 2 8 bar Los neumáticos están dotados de indicadores de desgaste Cambie los neumáticos en cuanto los indicadores sean visibles en la banda de rodadura Controle también si los neumáticos presentan c...

Page 190: ...sea que absorbe la humedad del aire Si la cantidad de agua en el líquido supera un cierto valor el frenado será ineficiente ADVERTENCIA Se aconseja hacer cambiar el líquido cada dos años No utilice nunca el líquido de frenos contenido en recipientes ya abiertos ADVERTENCIA Asegúrese de que se emplee solo líquido de frenos clasificado como DOT 4 ADVERTENCIA El líquido de frenos es muy corrosivo Evi...

Page 191: ...izando la llave TORX T 20 suministrada como accesorio y guardada debajo del sillín Extraiga los dos tornillos laterales que están debajo del faro quite primero la media carcasa izquierda y después la derecha girándola hacia fuera ES ES ES ES ES eSpro 45 eSpro 25Km h eSpro 45 eSpro 25Km h eSpro45_eSpro70_Rev_2_ES indb 49 eSpro45_eSpro70_Rev_2_ES indb 49 14 07 2020 15 41 11 14 07 2020 15 41 11 ...

Page 192: ...DELANTERO eSpro 70 En el scooter mod eSpro 70 el faro delantero está dotado de una lámpara led no sustituible Si la lámpara se agota se debe cambiar todo el faro Para la sustitución acuda a un taller autorizado eSpro 45 eSpro 25Km h eSpro 45 eSpro 25Km h eSpro 70 eSpro45_eSpro70_Rev_2_ES indb 50 eSpro45_eSpro70_Rev_2_ES indb 50 14 07 2020 15 41 12 14 07 2020 15 41 12 ...

Page 193: ...ntermitentes delanteros y traseros y la luz de la matrícula utilizan bombillas de led y están integrados en la estructura del vehículo Para la sustitución acuda a un taller autorizado ES ES ES ES ES eSpro45_eSpro70_Rev_2_ES indb 51 eSpro45_eSpro70_Rev_2_ES indb 51 14 07 2020 15 41 14 14 07 2020 15 41 14 ...

Page 194: ... 2 años S S S S S Desgaste pastillas freno delantero C S C S C S C S C Desgaste mordazas freno trasero C R C S C S C S C S Correas de transmisión C C C S C C S C C S C C S C Tuercas pernos dispositivos de fijación C C C C C C Caballete C L C L C L C L C L Rodamientos de la dirección C C C C Salvo la orientación del faro todos los ajustes deben ser realizados por personal cualificado de ASKOLL eSpr...

Page 195: ...are y seque con una gamuza No lave el scooter al rayo del sol sobre todo en verano para evitar que la carrocería se caliente y seque el champú antes del aclarado lo cual podría dañar la pintura No lave el vehículo con chorros de agua a alta presión ya que podría dañar los componentes delicados Durante el lavado no dirija nunca el chorro de agua directamente hacia los componentes delicados como los...

Page 196: ...mpieza general del scooter guardar el vehículo en un sitio cubierto apoye el scooter en el caballete central para evitar que las ruedas queden en contacto con el suelo en la misma posición cubrir el scooter con una funda eSpro45_eSpro70_Rev_2_ES indb 54 eSpro45_eSpro70_Rev_2_ES indb 54 14 07 2020 15 41 16 14 07 2020 15 41 16 ...

Page 197: ... el sistema detecta un desperfecto de la ECU Se aconseja llevar el vehículo a un taller autorizado Fallo del circuito de potencia el sistema detecta una absorción anómala del motor Por motivos de seguridad el sistema no entrega potencia Se aconseja llevar el vehículo a un taller autorizado Fallo de la batería A el sistema detecta un desperfecto en la batería A Se aconseja llevar la batería a un ta...

Page 198: ...ecta una temperatura excesiva de la unidad electrónica Se corta la entrega de potencia al vehículo hasta que baja la temperatura Se aconseja alejar el vehículo de fuentes de calor Sobretemperatura del motor el sistema detecta una temperatura excesiva del motor Se permite el funcionamiento a potencia reducida para que el motor pueda enfriarse Fallo del faro delantero el sistema detecta un problema ...

Page 199: ...o acuda a un taller autorizado Fallo del faro trasero y luz de matrícula el sistema detecta un problema en el faro trasero y la luz de matrícula Controle el funcionamiento y si es preciso acuda a un taller autorizado A A ES ES ES ES ES eSpro45_eSpro70_Rev_2_ES indb 57 eSpro45_eSpro70_Rev_2_ES indb 57 14 07 2020 15 41 22 14 07 2020 15 41 22 ...

Page 200: ...58 DATOS TÉCNICOS DIMENSIONES DEL SCOOTER eSpro 45 eSpro 70 eSpro 25Km h eSpro45_eSpro70_Rev_2_ES indb 58 eSpro45_eSpro70_Rev_2_ES indb 58 14 07 2020 15 41 23 14 07 2020 15 41 23 ...

Page 201: ...s con igual nivel de carga según 168 2013 UE BATERÍA Modelo TVC102 TVC103 Carga LI ION Peso 7 6 Kg Autonomía 71 km 2 baterías conectadas con igual nivel de carga según 168 2013 UE 86 km 2 baterías conectadas con igual nivel de carga según 168 2013 UE 96 km 2 baterías conectadas con igual nivel de carga según 168 2013 UE Temperatura operativa En uso 20 C 45 C DATOS DEL VEHÍCULO Largo 1830 mm Ancho ...

Page 202: ...nal Peso máximo permitido en el portaequipajes trasero 30 kg centrado en el portaequipajes Plazas 1 Transmisión Correa dentada DATOS DEL GRUPO ÓPTICO DELANTERO Faro delantero H8 35W LED Intermitentes LED Luces del tablero LED DATOS DEL GRUPO ÓPTICO TRASERO Faro trasero LED Luz de freno LED Intermitentes LED Luz de matrícula LED eSpro45_eSpro70_Rev_2_ES indb 60 eSpro45_eSpro70_Rev_2_ES indb 60 14 0...

Page 203: ...enormativaaplicabledearmonizacióncomunitaria Directiva 2014 35 UE baja tensión Directiva 2014 30 UE compatibilidad electromagnética Directiva 2011 65 UE RUSP II Se han aplicado las siguientes normas armonizadas y especificaciones técnicas EN 60335 1 2002 A11 2004 A1 2004 A12 2006 A2 2006 A1 EC 2007 A13 2008 EC 2009 EC 2010 A14 2010 A15 2011 EN 60335 2 29 2004 A2 2010 EN 62233 2008 EN 55014 1 2006 ...

Page 204: ...62 NOTAS eSpro45_eSpro70_Rev_2_ES indb 62 eSpro45_eSpro70_Rev_2_ES indb 62 14 07 2020 15 41 25 14 07 2020 15 41 25 ...

Page 205: ... quality It contains information warnings and advice on the proper use and maintenance of your new vehicle It is important to read it entirely before driving your vehicle for the first time You will find out details and features that will reassure you of the choice made This publication is to be considered an integral part of the vehicle If the vehicle is sold the manual must be delivered to the n...

Page 206: ...IGHT SIDE 4 eSpro 70 LEFT SIDE 5 eSpro 70 RIGHT SIDE 5 CONTROLS AND INSTRUMENTS POSITION 6 DASHBOARD eSpro 45 eSpro 25Km h 6 DASHBOARD eSpro 70 7 LH CONTROLS 8 Rear brake lever 8 Drum brake lever with combined function eSpro 70 only 8 Power regeneration switch 8 Turn indicators switch 9 Horn 9 eSpro45_eSpro70_Rev_2_EN indb ii eSpro45_eSpro70_Rev_2_EN indb ii 14 07 2020 14 40 29 14 07 2020 14 40 29...

Page 207: ...ngine enabling warning light eSpro 45 eSpro 25Km h only 14 Temperature warning light 15 Serious problem warning light 15 Operating turn indicators warning light 16 Lights warning light 16 High beam light indicator eSpro 70 only 16 Charging warning light 16 SPEEDOMETER eSpro 45 eSpro 25Km h 17 SPEEDOMETER eSpro 70 17 MENU SETTING BUTTONS 17 DIGITAL DISPLAY 18 Maintenance warning light 18 eSpro45_eS...

Page 208: ...n 25 SELECTION OF DISPLAY FUNCTIONS 26 Odometer data display mode 26 Setting the clock 27 SEAT 28 Opening the seat 28 Bag hook 28 PARKING THE SCOOTER 29 Central kickstand 29 Side kickstand 29 BATTERIES AND RECHARGE 30 BATTERIES 30 Battery management in the first use of the scooter 30 Disposal of exhausted batteries 33 eSpro45_eSpro70_Rev_2_EN indb iv eSpro45_eSpro70_Rev_2_EN indb iv 14 07 2020 14 ...

Page 209: ...ISC BRAKE 45 REAR BRAKE DRUM eSpro 45 eSpro 25Km h 46 REAR DRUM BRAKE WITH COMBINED FUNCTION eSpro 70 only 46 ORDINARY MAINTENANCE PROCEDURES 47 TYRES 47 FRONT BRAKE FLUID LEVEL CONTROL 48 HEADLAMP BULB REPLACEMENT eSpro 45 eSpro 25Km h 49 HEADLIGHT eSpro 70 50 TAIL LIGHTS AND TURN INDICATORS 51 ORDINARY MAINTENANCE PROCEDURES TABLE 52 CLEANING THE VEHICLE 53 VEHICLE INACTIVITY 54 eSpro45_eSpro70_...

Page 210: ...IMENSIONS eSpro 45 eSpro 70 eSpro 25Km h 58 ENGINE DATA 59 BATTERY 59 VEHICLE DATA 59 HEADLIGHT DATA 60 TAIL LIGHT DATA 60 EU DECLARATION OF CONFORMITY DOC 61 eSpro45_eSpro70_Rev_2_EN indb vi eSpro45_eSpro70_Rev_2_EN indb vi 14 07 2020 14 40 30 14 07 2020 14 40 30 ...

Page 211: ...cular danger which could result in death or serious injury if not avoided WARNING This symbol indicates a security generic warning It is used to put warn about potential danger of personal injury or damage to things Failure to fully comply with these requirements may cause serious damage to the vehicle and in some cases void the warranty Right behaviour is indicated to prevent damaging nature by u...

Page 212: ... or mental capacities or lack of experience or knowledge unless a person responsible for their safety has supervised or instructed them concerning the use of the scooter CAUTION Failure to fully comply with these requirements may cause serious damage to people the vehicle the environment and in some cases void the warranty CAUTION Each processing that changes either performance or main structure o...

Page 213: ...e to check the correspondence of vehicle plates with the ones present in its documents WARNING Alteration of identification plates can incur in serious penalties Valid only for eSpro 45 eSpro 25Km h Not required for eSpro 70 ASKOLL EVA S R L TYPE code dB A min kW 1 EN EN EN EN EN eSpro45_eSpro70_Rev_2_EN indb 3 eSpro45_eSpro70_Rev_2_EN indb 3 14 07 2020 14 40 33 14 07 2020 14 40 33 ...

Page 214: ...r E Central kickstand F Side kickstand G Battery compartment H Seat I Seat hook J Tail light K License plate holder L Rear reflector M Engine N Front RH reflector O Ignition switch eSpro 45 eSpro 25Km h LEFT SIDE A B D C E F I H G J K L M N O eSpro45_eSpro70_Rev_2_EN indb 4 eSpro45_eSpro70_Rev_2_EN indb 4 14 07 2020 14 40 35 14 07 2020 14 40 35 ...

Page 215: ...tral kickstand F Side kickstand G Battery compartment H Seat I Seat hook J Tail light K License plate holder L Rear reflector M Engine N Front RH reflector O Ignition switch eSpro 70 LEFT SIDE EN EN EN EN EN A B D C F E I H G J K L M N O eSpro45_eSpro70_Rev_2_EN indb 5 eSpro45_eSpro70_Rev_2_EN indb 5 14 07 2020 14 40 38 14 07 2020 14 40 38 ...

Page 216: ...l B Key switch C Power regeneration switch D Turn indicators switch E Horn DASHBOARD eSpro 45 eSpro 25Km h CONTROLS AND INSTRUMENTS POSITION Km trip A B PWR ECO Km SELECT SET 10 2 0 Km h mph 10 1 20 2 P U S H I G N I T I O N D E J C A B G F H I eSpro45_eSpro70_Rev_2_EN indb 6 eSpro45_eSpro70_Rev_2_EN indb 6 14 07 2020 14 40 40 14 07 2020 14 40 40 ...

Page 217: ...l B Key switch C Power regeneration switch D Turn indicators switch E Horn F Driving mode switch DASHBOARD eSpro 70 CONTROLS AND INSTRUMENTS POSITION Km trip A B PWR ECO Km SELECT SET Km h mph P U S H I G N I T I O N EN EN EN EN EN A K D E B G F C H I J eSpro45_eSpro70_Rev_2_EN indb 7 eSpro45_eSpro70_Rev_2_EN indb 7 14 07 2020 14 40 42 14 07 2020 14 40 42 ...

Page 218: ...rear one to ensure greater safety and improved stopping distances Power regeneration switch During scooter deceleration the battery can be automatically recharged by activating the power regeneration mode Use the 2 position turn indicators switch to activate or deactivate power regeneration MODE eSpro 70 eSpro 45 eSpro 25Km h eSpro45_eSpro70_Rev_2_EN indb 8 eSpro45_eSpro70_Rev_2_EN indb 8 14 07 20...

Page 219: ... to the right to operate RH turn indicator Press the button in the centre of the lever to turn the indicators off Horn Press to honk the horn EN EN EN EN EN eSpro 70 eSpro 70 eSpro 45 eSpro 25Km h eSpro 45 eSpro 25Km h eSpro45_eSpro70_Rev_2_EN indb 9 eSpro45_eSpro70_Rev_2_EN indb 9 14 07 2020 14 40 45 14 07 2020 14 40 45 ...

Page 220: ... disk brake lever is placed on the right side of the handlebar Throttle control Scooter speed is adjusted through the grip DE DE eSpro 70 eSpro 45 eSpro 25Km h eSpro45_eSpro70_Rev_2_EN indb 10 eSpro45_eSpro70_Rev_2_EN indb 10 14 07 2020 14 40 48 14 07 2020 14 40 48 ...

Page 221: ...ited to 25 Km h Headlight high beam light ON OFF selector eSpro 70 only Using the selector is possible to activate the high beam light Engine start switch Pressing the button for 3 seconds will start or stop the engine depending on key position MODE MODE MODE MODE EN EN EN EN EN eSpro 70 eSpro 45 eSpro 45 eSpro 70 eSpro 70 eSpro 25Km h eSpro 25Km h eSpro45_eSpro70_Rev_2_EN indb 11 eSpro45_eSpro70_...

Page 222: ... the key switch and to open the seat Please keep the duplicate key separated from the main one Enabling and disabling the system Turning the key to the system enables Turning the key to the system disables WARNING Do not turn or remove key while driving P U S H I G N I T I O N eSpro45_eSpro70_Rev_2_EN indb 12 eSpro45_eSpro70_Rev_2_EN indb 12 14 07 2020 14 40 55 14 07 2020 14 40 55 ...

Page 223: ...ay D Display controls Km trip A B PWR ECO Km SELECT SET 10 2 0 Km h mph 1 0 1 20 2 Km trip A B PWR ECO Km SELECT SET Km h mph EN EN EN EN EN eSpro 45 eSpro 25Km h eSpro 70 D C D C B B A A eSpro45_eSpro70_Rev_2_EN indb 13 eSpro45_eSpro70_Rev_2_EN indb 13 14 07 2020 14 40 58 14 07 2020 14 40 58 ...

Page 224: ...ight J Charging warning light K High beam light ON indicator eSpro 70 only Engine enabling warning light eSpro 45 eSpro 25Km h only The warning light indicating that the engine is enabled is amber it turns on as soon as the engine is enabled and remains on until it is disabled E F G H I J K eSpro45_eSpro70_Rev_2_EN indb 14 eSpro45_eSpro70_Rev_2_EN indb 14 14 07 2020 14 41 02 14 07 2020 14 41 02 ...

Page 225: ...OR CODES chapter Serious problem warning light Serious problem warning light is red it turns on together with the malfunction one Stop the vehicle when it turns on and read the error code on the display It is necessary to go to an authorized workshop to have the vehicle checked Alarm description regarding displayed code is explained in ERROR CODES chapter EN EN EN EN EN eSpro45_eSpro70_Rev_2_EN in...

Page 226: ...when engine is enabled Charging warning light Charging warning light is amber it turns on and remains on when the battery charger is connected and batteries are being charged It also turns on when power regeneration is active High beam light indicator eSpro 70 only The high beam light indicator is blue it is turned on by actuating the selector on the left stalk eSpro45_eSpro70_Rev_2_EN indb 16 eSp...

Page 227: ...ons must be used to select the parameter to display reset displayed value km trip set and confirm new values hour SPEEDOMETER eSpro 70 Speedometer indicates current speed The value is displayed in kilometres per hour km h and miles per hour mph 1 0 2 0 Km h mph 1 0 1 20 2 Km h mph SELECT SET EN EN EN EN EN eSpro45_eSpro70_Rev_2_EN indb 17 eSpro45_eSpro70_Rev_2_EN indb 17 14 07 2020 14 41 07 14 07 ...

Page 228: ...e to go with remaining battery charge time alarms and their error codes Maintenance warning light Maintenance warning light can light by itself or together with Serious problem warning light If it turns on it is advisable to take the vehicle to an Authorized Dealer to have the problem controlled and solved Km trip A B PWR ECO Km eSpro45_eSpro70_Rev_2_EN indb 18 eSpro45_eSpro70_Rev_2_EN indb 18 14 ...

Page 229: ...he first use we suggest you to try the scooter in areas closed to traffic until you familiarise yourself with it WARNING Always ride within the limits of your abilities CAUTION Riding under the influence of alcohol drugs or certain medicines is dangerous and it is prohibited by law WARNING Before you start riding always wear a helmet and fasten it correctly WARNING If you are carrying a passenger ...

Page 230: ... vehicles WARNING Use both brakes to allocate braking action on both wheels CAUTION Do not brake hard on wet slippery or dirt roads WARNING If travelling on a wet road for some time without actuating the brakes initially there will be less braking action Under these conditions periodically actuate the brakes CAUTION In case of rain visibility decreases so reduce speed and drive carefully eSpro45_e...

Page 231: ...age the steering lock insert the key into the ignition switch and turn it right OPERATIONS TO START Steering lock engagement To engage the steering lock turn the handlebar left until it stops EN EN EN EN EN Km trip A B PWR ECO Km SELECT SET 10 2 0 Km h mph 10 1 20 2 P U S H I G N I T I O P U S H eSpro45_eSpro70_Rev_2_EN indb 21 eSpro45_eSpro70_Rev_2_EN indb 21 14 07 2020 14 41 12 14 07 2020 14 41 ...

Page 232: ...arning light will turn on To disable the engine press the engine enabling button again for 3 seconds and turn the key in the ignition switch to the left on The engine will be disabled also by rotating the key to P U S H I G N I T I O N MODE MODE eSpro 45 eSpro 70 eSpro 25Km h eSpro45_eSpro70_Rev_2_EN indb 22 eSpro45_eSpro70_Rev_2_EN indb 22 14 07 2020 14 41 13 14 07 2020 14 41 13 ...

Page 233: ...86 Km according to regulation 168 2013 EC The autonomy values listed above are valid with the use of 2 batteries connected and with the same charging value WARNING Lithium ion batteries undergo a progressive performance decay that reduces the initial autonomy values WARNING The autonomy data indicated depend strictly on the conditions of use which may be slope and or type of road surface ambient t...

Page 234: ...th the use of 2 batteries connected and with the same charging value WARNING Lithium ion batteries undergo a progressive performance decay that reduces the initial autonomy values WARNING The autonomy data indicated depend strictly on the conditions of use which may be slope and or type of road surface ambient temperature average speed motor assistance level tire pressure weight carried and user s...

Page 235: ...on mode is activated and deceleration increases Pressing the button downwards power regeneration mode is deactivated Combining braking with deceleration charging will be greater When power regeneration mode is activated charging warning light is on With a high level of battery charge power regeneration mode is not activated EN EN EN EN EN MODE eSpro 70 eSpro 45 eSpro 25Km h eSpro45_eSpro70_Rev_2_E...

Page 236: ...er cannot be modified Km trip Partial mileage Keep SET pressed to zero during parameter display Km Mileage to go with remaining battery charge The value varies depending on the conditions of use remaining battery charge driving mode set and power regeneration mode selected PWR ECO Km trip A B Km SELECT SET eSpro45_eSpro70_Rev_2_EN indb 26 eSpro45_eSpro70_Rev_2_EN indb 26 14 07 2020 14 41 24 14 07 ...

Page 237: ... SET button to exit Since time is stored in the vehicle battery in case of two batteries it is convenient to set the clock with both batteries installed to synchronize time In the presence of two batteries time displayed is the one stored in compartment A Forbatterydescriptionandplacementincompartments A and B refer to the chapter BATTERY AND CHARGE EN EN EN EN EN Km trip A PWR SELECT SET eSpro45_...

Page 238: ...sing on the bottom of the hook the upper part comes out and it is possible to hang an object Releasing the hook it will automatically return to its seat WARNING The object carried should not tamper or restrict movement of the legs WARNING Avoid placing all the weight on the hook the object carried should also rest on the platform eSpro45_eSpro70_Rev_2_EN indb 28 eSpro45_eSpro70_Rev_2_EN indb 28 14...

Page 239: ...efore getting on the scooter Side kickstand Lower the side kickstand with your foot until the opening is complete and accompany the scooter until it is fully supported WARNING Before restarting the vehicle make sure that the side kickstand is raised a safety sensor prevents the motor from being enabled when the kickstand is down WARNING Use the kickstands on compact and flat surfaces and avoid sit...

Page 240: ... an ambient temperature between 0 C and 40 C There may be autonomy reduction at low temperatures The battery is an always active component it may show light voltage drops even with the control panel off Battery management in the first use of the scooter With new batteries it is necessary to perform at least 3 4 complete charging discharging cycles bringing the charge to 100 and discharging the bat...

Page 241: ...Batteries both during recharging and storage must not be exposed to heat cold humidity dust or weather The warranty covers malfunctions of batteries resulting from manufacturing defects inability to recharge and discharge The warranty does not cover degradation of battery performance due to normal use and ageing The manufacturer reserves the right to assess the validity of the warranty on the basi...

Page 242: ...erature leave your vehicle where it is Do not continue using it for any reason As soon as the battery has cooled take the vehicle to your dealer In the presence of flames or smoke rising from the battery stop the vehicle immediately Then turn off the fire with a fire extinguisher if available If a fire extinguisher is not available wait until the fire has extinguished and all parts of the vehicle ...

Page 243: ...ctive for this type of waste establishes that the States adhering to this convention undertake to adopt appropriate measures so that exhausted accumulators are collected separately for the purpose of their possible recovery or disposal In any case for more updated information on this topic the user must contact the municipal office in charge of this concern eSpro45_eSpro70_Rev_2_EN indb 33 eSpro45...

Page 244: ...arge this mode is recommended in periods when the scooter is frequently used to obtain the best and prolonged operation of the batteries For maximum system efficiency it is recommended to alternate 1 100 charge cycle every 10 90 cycles This procedure allows to obtain a high number of charge and discharge cycles of the batteries maintaining a good performance over time To select this mode press MOD...

Page 245: ...ct the device to a power supply network protected by a differential switch with a sensitivity not exceeding 30mA The electrical connection of the device must comply with the details on its electrical data label Do not use extension cords If the length of the power cord is not sufficient consult an electrician or qualified installer Do not cut or repair the power cord The power cord of this device ...

Page 246: ...ge level is close to 0 it is necessary to recharge Batteries can be recharged in two ways CHARGING WITH BATTERY ON BOARD CHARGING WITH BATTERY OUTBOARD CAUTION Charging must be performed indoors and protected from the weather CAUTION To recharge the batteries first connect the battery charging connector to the battery outlet and then connect the battery charger plug to the mains Km trip SELECT SET...

Page 247: ...arge with battery on board Disable the system Raise the seat make sure the charger is connected to the socket and that the batteries are properly inserted in their compartments and plugged to the connectors pull out the battery charger spring wire equipped with plug Connect the plug to the socket eSpro45_eSpro70_Rev_2_EN indb 37 eSpro45_eSpro70_Rev_2_EN indb 37 14 07 2020 14 41 35 14 07 2020 14 41...

Page 248: ...ning a sufficient opening for the charging cable This can be useful in case of outdoors charging so as to keep batteries and charger covered but allowing heat generated by the process to escape Open the seat move the spring closing mechanism to the left and press eSpro45_eSpro70_Rev_2_EN indb 38 eSpro45_eSpro70_Rev_2_EN indb 38 14 07 2020 14 41 37 14 07 2020 14 41 37 ...

Page 249: ...ism The seat is locked in raised position to allow the charging cable to pass Open the lock with the key and lift the seat to automatically return to its original position eSpro45_eSpro70_Rev_2_EN indb 39 eSpro45_eSpro70_Rev_2_EN indb 39 14 07 2020 14 41 38 14 07 2020 14 41 38 ...

Page 250: ...lity to circulate only with the other one Disconnect the battery cable by pressing on the two side tabs of the connector and pull it out Remove the battery from the compartment using the lifting handle Once removed hold it with both hands eSpro45_eSpro70_Rev_2_EN indb 40 eSpro45_eSpro70_Rev_2_EN indb 40 14 07 2020 14 41 40 14 07 2020 14 41 40 ...

Page 251: ...the two side tabs Remove the charger along with its two cables CAUTION When removing the battery charger it is recommended to handle it with care to prevent it from falling on yourself or on the ground eSpro45_eSpro70_Rev_2_EN indb 41 eSpro45_eSpro70_Rev_2_EN indb 41 14 07 2020 14 41 41 14 07 2020 14 41 41 ...

Page 252: ... Then connect the charger to the mains Select desired recharge mode as shown in BATTERY CHARGER Once charging has finished place battery and charger in their compartment as follows First place the charger on the vehicle and connect the cable with connector to the vehicle socket eSpro45_eSpro70_Rev_2_EN indb 42 eSpro45_eSpro70_Rev_2_EN indb 42 14 07 2020 14 41 42 14 07 2020 14 41 42 ...

Page 253: ...hicle to the socket under the spring flap on the battery insert the connector until you hear a click and make sure it is properly secured Then place the spring cable next to the battery charger and rewind the cable on top of the battery eSpro45_eSpro70_Rev_2_EN indb 43 eSpro45_eSpro70_Rev_2_EN indb 43 14 07 2020 14 41 44 14 07 2020 14 41 44 ...

Page 254: ...adlamp light beam height can be adjusted by turning the adjustment screw under the lamp with TORX T 20 wrench supplied as an accessory and placed under the seat By rotating the screw 1 2 turn clockwise the light beam will point downwards while counterclockwise it will point upwards eSpro 70 eSpro 45 eSpro 25Km h eSpro45_eSpro70_Rev_2_EN indb 44 eSpro45_eSpro70_Rev_2_EN indb 44 14 07 2020 14 41 46 ...

Page 255: ... or to irregular operation of the brake Effective braking action should begin after approximately 1 3 of the brake lever stroke WARNING In case of brake malfunctions check brake pad wear if thickness is reduced both are to be replaced at an authorized workshop WARNING After replacing the pads operate the brake lever several times to reposition them and bring the lever to the right position EN EN E...

Page 256: ...ke control lever in rest position check that the wheel turns freely Effective braking action should begin after approximately 1 3 of the brake lever stroke REAR DRUM BRAKE WITH COMBINED FUNCTION eSpro 70 only The scooter model eSpro 70 uses the dual braking actuating the rear brake automatically also activates the front brake The distribution has prevalence on the rear and the adjustment of the re...

Page 257: ... with tubeless tires Regularly check tyre pressure and if necessary adjust it before riding eSpro 45 eSpro 70 eSpro 25Km h Front tyre pressure 2 0 bar Rear tyre pressure 2 8 bar Tires have a wear indicator and must be changed as soon as these are visible on the tread Check also for cuts in the sides or irregular wear In this case consult an authorized workshop for replacement EN EN EN EN EN eSpro4...

Page 258: ...oscopic i e it absorbs moisture from the surrounding air If humidity in the fluid exceeds a certain value braking will be inefficient WARNING It is advisable to change the fluid every 2 years never use brake fluid from partially used or open containers WARNING Use only DOT4 brake fluid WARNING Brake fluid is highly corrosive Prevent it from being in contact with skin or with painted parts In case ...

Page 259: ...T 20 wrench under the seat remove the 2 lateral screws under the headlamp and then follow the procedure first remove the left half shell and then the right one turning them outwards EN EN EN EN EN eSpro 45 eSpro 25Km h eSpro 45 eSpro 25Km h eSpro45_eSpro70_Rev_2_EN indb 49 eSpro45_eSpro70_Rev_2_EN indb 49 14 07 2020 14 41 52 14 07 2020 14 41 52 ...

Page 260: ...ter model eSpro 70 the headlight is equipped with an LED lamp and there is no need to replace it If the bulb is exhausted it is necessary to change the complete headlight For the replacement contact an authorized service point eSpro 70 eSpro 45 eSpro 25Km h eSpro 45 eSpro 25Km h eSpro45_eSpro70_Rev_2_EN indb 50 eSpro45_eSpro70_Rev_2_EN indb 50 14 07 2020 14 41 54 14 07 2020 14 41 54 ...

Page 261: ...front and rear turn indicators and number plate light are equipped with LEDs and are integrated to the vehicle structure To replace them contact an authorized workshop EN EN EN EN EN eSpro45_eSpro70_Rev_2_EN indb 51 eSpro45_eSpro70_Rev_2_EN indb 51 14 07 2020 14 41 56 14 07 2020 14 41 56 ...

Page 262: ...fluid replace every 2 years S S S S S Front brake pad wear C S C S C S C S C Rear brake shoe wear C R C S C S C S C S Transmission belts C C C S C C S C C S C C S C Nuts bolts fasteners C C C C C C Stand C L C L C L C L C L Steering bearings C C C C Except for Headlamp orientation all checks must be carried out by qualified personnel from ASKOLL eSpro45_eSpro70_Rev_2_EN indb 52 eSpro45_eSpro70_Rev...

Page 263: ...id washing the scooter under direct sunlight especially in summer to prevent it from drying and warming the shampoo immediately before rinsing since this may damage the paint Do not use high pressure water jets to washing so as to prevent damaging delicate components of the vehicle When washing do not direct the water jet directly on delicate components such as electrical wiring or their connectio...

Page 264: ...ake a general clean up of the scooter store in a covered place park the scooter on the central kickstand to prevent the wheels from remaining in contact with the ground in the same position cover the scooter with a canvas eSpro45_eSpro70_Rev_2_EN indb 54 eSpro45_eSpro70_Rev_2_EN indb 54 14 07 2020 14 41 58 14 07 2020 14 41 58 ...

Page 265: ...ects a failure on the ECU It is advisable to take the vehicle to an authorized workshop Power circuit failure the system detects an abnormal absorption by the engine For safety reasons the system does not supply power It is advisable to take the vehicle to an authorized workshop Battery A failure the system detects a failure on battery A It is advisable to take the battery to an authorized worksho...

Page 266: ...rature the system detects excessive temperature on the electronic unit The system does not supply power until the temperature drops Remove the vehicle from sources of heat Engine overtemperature the system detects excessive temperature on the engine It can function at reduced power to allow cooling Headlight malfunction the system detects the failure or malfunction of the front lamp Check its oper...

Page 267: ...m at an authorized workshop Tail light and number plate light malfunction the system detects the failure or malfunction of the Tail light and number plate light Check its operation and replace them at an authorized workshop A A EN EN EN EN EN eSpro45_eSpro70_Rev_2_EN indb 57 eSpro45_eSpro70_Rev_2_EN indb 57 14 07 2020 14 42 04 14 07 2020 14 42 04 ...

Page 268: ...58 TECHNICAL DATA SCOOTER DIMENSIONS eSpro 45 eSpro 70 eSpro 25Km h eSpro45_eSpro70_Rev_2_EN indb 58 eSpro45_eSpro70_Rev_2_EN indb 58 14 07 2020 14 42 05 14 07 2020 14 42 05 ...

Page 269: ...g to 168 2013 EC BATTERY Model TVC102 TVC103 Charge LI ION Weight 7 8 Kg Autonomy 71 Km with 2 batteries connected and with the same charging value according to 168 2013 EC 86 Km with 2 batteries connected and with the same charging value according to 168 2013 EC 96 Km with 2 batteries connected and with the same charging value according to 168 2013 EC Operation temperature When operating 20 C to ...

Page 270: ...m permissible weight on the rear carrier luggage rack 30Kg centered on the luggage rack Seats 1 Transmission Toothed belt HEADLIGHT DATA Headlight H8 35W LED Turn indicators LED Dashboard lights LED TAIL LIGHT DATA Taillight LED Brake light LED Turn indicators LED License plate light LED eSpro45_eSpro70_Rev_2_EN indb 60 eSpro45_eSpro70_Rev_2_EN indb 60 14 07 2020 14 42 05 14 07 2020 14 42 05 ...

Page 271: ... relevant Union harmonization legislation Directive 2014 35 EU LVD Directive 2014 30 EU EMC Directive 2011 65 EU RoHS II The following harmonised standards and technical specifications have been applied EN 60335 1 2002 A11 2004 A1 2004 A12 2006 A2 2006 A1 EC 2007 A13 2008 EC 2009 EC 2010 A14 2010 A15 2011 EN 60335 2 29 2004 A2 2010 EN 62233 2008 EN 55014 1 2006 A1 2009 A2 2011 EN 55014 2 1997 A1 2...

Page 272: ...62 NOTES eSpro45_eSpro70_Rev_2_EN indb 62 eSpro45_eSpro70_Rev_2_EN indb 62 14 07 2020 14 42 06 14 07 2020 14 42 06 ...

Page 273: ...e te benutten Zij bevat informatie aanwijzingen en adviezen voor het juiste gebruik en onderhoud van uw nieuwe voertuig Het is belangrijk dat u de handleiding helemaal doorleest voordat u het voertuig voor het eerst gaat gebruiken U zult bovendien de bijzonderheden en kenmerken ontdekken die u nog duidelijker zullen overtuigen van de zeer goede keuze die u heeft gedaan Deze publicatie dient te wor...

Page 274: ...pro 70 LINKERZIJDE 5 eSpro 70 RECHTERZIJDE 5 POSITIE BEDIENINGSELEMENTEN EN INSTRUMENTEN 6 DASHBOARD eSpro 45 eSpro 25km h 6 DASHBOARD eSpro 70 7 LINKER GROEP BEDIENINGSELEMENTEN 8 Bedieningshendel achterrem 8 Trommelremhendel met gecombineerde functie alleen eSpro 70 8 Keuzeschakelaar energieregeneratiemodus 8 Schakelaar knipperlichten 9 Claxonknop 9 eSpro45_eSpro70_Rev_2_NL indb ii eSpro45_eSpro...

Page 275: ...TRUMENTEN 13 CONTROLELAMPJES 14 Indicator motoractivering alleen eSpro 45 eSpro 25km h 14 Indicator hoge temperatuur 15 Indicator ernstig probleem 15 Indicator knipperlichten in werking 16 Indicator lichten in werking 16 Indicator groot licht alleen eSpro 70 16 Indicator opladen bezig 16 TACHOMETER eSpro 45 eSpro 25km h 17 TACHOMETER eSpro 70 17 MENU INSTELLINGSKNOPPEN 17 DIGITAAL DISPLAY 18 Onder...

Page 276: ...dus 25 SELECTIE VAN DE DISPLAYFUNCTIES 26 Weergavemodus gegevens kilometerteller 26 Regeling van de klokfunctie 27 ZADEL 28 Openen van het zadel 28 Tassenhaak 28 STILSTAND VAN DE SCOOTER 29 Middenstandaard 29 Zijstandaard 29 ACCU EN OPLADEN 30 ACCU S 30 Beheer van de accu bij het eerste gebruik van de scooter 30 Afvalverwerking van lege accu s 33 eSpro45_eSpro70_Rev_2_NL indb iv eSpro45_eSpro70_Re...

Page 277: ... TROMMELREM ACHTER eSpro 45 eSpro 25km h 46 TROMMELREM ACHTER MET GECOMBINEERDE FUNCTIE alleen eSpro 70 46 PROCEDURES VOOR GEWOON ONDERHOUD 47 BANDEN 47 CONTROLE VAN HET REMVLOEISTOFPEIL 48 VERVANGING LAMPJE KOPLAMP eSpro 45 eSpro 25km h 49 KOPLAMP eSpro 70 50 ACHTERLAMPGROEP EN RICHTINGAANWIJZERS 51 SAMENVATTINGSTABEL VAN PROCEDURES VOOR GEWOON ONDERHOUD 52 SCHOONMAKEN VAN HET VOERTUIG 53 INACTIV...

Page 278: ...ER eSpro 45 eSpro 70 eSpro 25km h 58 MOTORGEGEVENS 59 ACCU 59 VOERTUIGGEGEVENS 59 GEGEVENS KOPLAMPGROEP 60 GEGEVENS ACHTERLAMPGROEP 60 EU VERKLARING VAN OVEREENSTEMMING DOC 61 eSpro45_eSpro70_Rev_2_NL indb vi eSpro45_eSpro70_Rev_2_NL indb vi 14 07 2020 17 34 37 14 07 2020 17 34 37 ...

Page 279: ...stig letsel kunnen veroorzaken BELANGRIJKE AANWIJZING Dit symbool duidt op een algemene waarschuwing voor de veiligheid Het wordt gebruikt om u attent te maken op mogelijk gevaar voor persoonlijk letsel en of beschadiging van de voertuigen Het geheel of gedeeltelijk veronachtzamen van deze voorschriften kan eventueel ernstige schade aan het voertuig tot gevolg hebben en leidt in enkele gevallen to...

Page 280: ...paciteiten of die onvoldoende ervaring of kennis bezitten tenzij ze onder toezicht staan van iemand die verantwoordelijk is voor hun veiligheid of instructies krijgen omtrent het gebruik van de scooter LET OP Het geheel of gedeeltelijk veronachtzamen van deze voorschriften kan mogelijk ernstige schadelijke gevolgen hebben voor personen het voertuig of het milieu en leidt in enkele gevallen tot ver...

Page 281: ...te gaan of de serienummers van het voertuig overeenstemmen met de nummers in de bijbehorende papieren BELANGRIJKE AANWIJZING Op het wijzigen van serienummers voor identificatie staan strafrechtelijke sancties Alleen geldig voor eSpro 45 eSpro 25km h Niet vereist voor eSpro 70 ASKOLL EVA S R L TYPE code dB A min kW 1 NL NL NL NL NL eSpro45_eSpro70_Rev_2_NL indb 3 eSpro45_eSpro70_Rev_2_NL indb 3 14 ...

Page 282: ... D Reflector linksvoor E Middenstandaard F Zijstandaard G Accuruimte H Zadel I Zadelhaak J Achterlampgroep K Kentekenhouder L Reflector achter M Motor N Reflector rechtsvoor O Ontstekingsschakelaar eSpro 45 eSpro 25km h LINKERZIJDE A B D C E F I H G J K L M N O eSpro45_eSpro70_Rev_2_NL indb 4 eSpro45_eSpro70_Rev_2_NL indb 4 14 07 2020 17 34 43 14 07 2020 17 34 43 ...

Page 283: ...ctor linksvoor E Middenstandaard F Zijstandaard G Accuruimte H Zadel I Zadelhaak J Achterlampgroep K Kentekenhouder L Reflector achter M Motor N Reflector rechtsvoor O Ontstekingsschakelaar eSpro 70 LINKERZIJDE NL NL NL NL NL A B D C F E I H G J K L M N O eSpro45_eSpro70_Rev_2_NL indb 5 eSpro45_eSpro70_Rev_2_NL indb 5 14 07 2020 17 34 46 14 07 2020 17 34 46 ...

Page 284: ...utelschakelaar C Keuzeschakelaar energieregeneratiemodus D Schakelaar knipperlichten E Claxonknop DASHBOARD eSpro 45 eSpro 25km h POSITIE BEDIENINGSELEMENTEN EN INSTRUMENTEN Km trip A B PWR ECO Km SELECT SET 10 2 0 Km h mph 10 1 20 2 P U S H I G N I T I O N D E J C A B G F H I eSpro45_eSpro70_Rev_2_NL indb 6 eSpro45_eSpro70_Rev_2_NL indb 6 14 07 2020 17 34 48 14 07 2020 17 34 48 ...

Page 285: ...hakelaar C Keuzeschakelaar energieregeneratiemodus D Schakelaar knipperlichten E Claxonknop F Keuzeschakelaar rijmodus DASHBOARD eSpro 70 POSITIE BEDIENINGSELEMENTEN EN INSTRUMENTEN Km trip A B PWR ECO Km SELECT SET Km h mph P U S H I G N I T I O N NL NL NL NL NL A K D E B G F C H I J eSpro45_eSpro70_Rev_2_NL indb 7 eSpro45_eSpro70_Rev_2_NL indb 7 14 07 2020 17 34 50 14 07 2020 17 34 50 ...

Page 286: ...oorrang voor het achterwiel om meer veiligheid en een betere remweg te garanderen Keuzeschakelaar energieregeneratiemodus Bij het decelereren van de scooter kan de accu automatisch worden opgeladen door de energieregeneratiemodus te activeren Gebruik de tweestandsschakelaar om de energieregeneratie in of uit te schakelen MODE eSpro 45 eSpro 25Km h eSpro 70 eSpro45_eSpro70_Rev_2_NL indb 8 eSpro45_e...

Page 287: ...naar rechts om de rechter knipperlichten te bedienen Druk op de knop in het midden van het hendeltje om de knipperlichten uit te zetten Claxonknop Druk hierop om de claxon te gebruiken NL NL NL NL NL eSpro 45 eSpro 25Km h eSpro 45 eSpro 25Km h eSpro 70 eSpro 70 eSpro45_eSpro70_Rev_2_NL indb 9 eSpro45_eSpro70_Rev_2_NL indb 9 14 07 2020 17 34 53 14 07 2020 17 34 53 ...

Page 288: ...m De hendel van de schijfrem voor zit aan de rechterkant van het stuur Snelheidsbediening De snelheid van de scooter wordt geregeld door de knop te draaien DE DE eSpro 45 eSpro 25Km h eSpro 70 eSpro45_eSpro70_Rev_2_NL indb 10 eSpro45_eSpro70_Rev_2_NL indb 10 14 07 2020 17 34 56 14 07 2020 17 34 56 ...

Page 289: ... tot 25 km h Keuzeschakelaar voor inschakeling van het groot licht alleen eSpro 70 Met de keuzeschakelaar kan het groot licht worden ingeschakeld Inschakelknop motor Door deze knop 3 seconden in te drukken wordt de motor in of uitgeschakeld afhankelijk van de stand van de sleutel in de schakelaar MODE MODE MODE MODE NL NL NL NL NL eSpro 70 eSpro 45 eSpro 45 eSpro 70 eSpro 70 eSpro 25Km h eSpro 25K...

Page 290: ... te openen Geadviseerd wordt om het duplicaat apart van de hoofdsleutel te bewaren In en uitschakeling van het systeem Door de sleutel op te draaien wordt het systeem ingeschakeld Door de sleutel op te draaien wordt het systeem uitgeschakeld BELANGRIJKE AANWIJZING Draai de sleutel niet om en haal hem niet uit de schakelaar tijdens het rijden P U S H I G N I T I O N eSpro45_eSpro70_Rev_2_NL indb 12...

Page 291: ...T Km h mph BEDIENINGSELEMENTEN EN INSTRUMENTEN INSTRUMENTEN A Controlelampjes B Tachometer C Digitaal display D Displaybedieningen NL NL NL NL NL eSpro 45 eSpro 25Km h eSpro 70 D C D C B B A A eSpro45_eSpro70_Rev_2_NL indb 13 eSpro45_eSpro70_Rev_2_NL indb 13 14 07 2020 17 35 06 14 07 2020 17 35 06 ...

Page 292: ...dicator opladen bezig K Indicator groot licht in werking alleen eSpro 70 Indicator motoractivering alleen eSpro 45 eSpro 25km h Het lampje dat aangeeft dat de motor geactiveerd is is amberkleurig en gaat branden zodra de motor geactiveerd wordt Het blijft branden tot de motor gedeactiveerd wordt E F G H I J K eSpro45_eSpro70_Rev_2_NL indb 14 eSpro45_eSpro70_Rev_2_NL indb 14 14 07 2020 17 35 10 14 ...

Page 293: ...cator ernstig probleem Het lampje van de indicator die een ernstig probleem aangeeft is rood en gaat branden samen met het storingslampje op het display Wanneer dit gaat branden moet u het voertuig stoppen De overeenkomende foutcode kunt u lezen op het display U moet beslist naar een erkende werkplaats gaan om het voertuig te laten controleren Voor de beschrijving van het alarm behorende bij de we...

Page 294: ...iveerd Indicator opladen bezig Het lampje van de indicator die aangeeft dat het opladen bezig is is amberkleurig en gaat vast branden wanneer de accuoplader verbonden is met het elektriciteitsnet en de accu s worden opgeladen Het gaat ook branden als de energieregeneratie in werking treedt Indicator groot licht alleen eSpro 70 Het lampje dat aangeeft dat het groot licht is ingeschakeld is blauw he...

Page 295: ...lgende selecteren van de parameter die op het display moet worden weergegeven resetten van de weergegeven waarde km trip instellen en bevestigen van nieuwe waarden tijd TACHOMETER eSpro 70 De tachometer geeft de huidige snelheid aan De waarde is uitgedrukt in kilometer per uur km h en in mijl per uur mph 1 0 2 0 Km h mph 1 0 1 20 2 Km h mph SELECT SET NL NL NL NL NL eSpro45_eSpro70_Rev_2_NL indb 1...

Page 296: ...de kilometers het aantal kilometers dat nog kan worden afgelegd met de resterende acculading de tijd alarmen en bijbehorende foutcodes Onderhoudslampje Het onderhoudslampje kan alleen gaan branden of samen met het indicatielampje van een ernstig probleem Als het gaat branden is het raadzaam om naar een erkende dealer te gaan voor een controle en om het probleem op te lossen Km trip A B PWR ECO Km ...

Page 297: ... BELANGRIJKE AANWIJZING Voor het eerste gebruik raden wij u aan de scooter uit te proberen op een plaats waar geen verkeer mag komen om uw scooter goed te leren kennen BELANGRIJKE AANWIJZING Rijd altijd binnen de grenzen van uw vaardigheid LET OP Het rijden onder invloed van drank drugs of bepaalde geneesmiddelen is zeer gevaarlijk en is bij wet verboden BELANGRIJKE AANWIJZING Zet altijd een helm ...

Page 298: ...n geboden BELANGRIJKE AANWIJZING Gebruik beide remmen wanneer u snelheid moet minderen zodat de remwerking wordt verdeeld over beide wielen LET OP Knijp de remmen niet helemaal in op nat onverhard of glad wegdek BELANGRIJKE AANWIJZING Nadat een lang stuk over nat wegdek is gereden zonder te remmen is de remwerking aanvankelijk minder Het is goed om de remmen in deze omstandigheden zo nu en dan te ...

Page 299: ... stuurslot uit te schakelen moet de sleutel in de schakelaar worden gestoken en naar rechts worden gedraaid HANDELINGEN OM TE STARTEN In en uitschakeling van het stuurslot Om het stuurslot in te schakelen draait u het stuur helemaal naar links NL NL NL NL NL Km trip A B PWR ECO Km SELECT SET 10 2 0 Km h mph 10 1 20 2 P U S H I G N I T I O P U S H eSpro45_eSpro70_Rev_2_NL indb 21 eSpro45_eSpro70_Re...

Page 300: ...gedrukt wordt Het startlampje gaat branden Om de motor uit te schakelen drukt u opnieuw de activeringsknop van de motor 3 seconden in en draait u de sleutel in de schakelaar naar links op De motor wordt ook uitgeschakeld als alleen de sleutel op wordt gedraaid MODE MODE P U S H I G N I T I O N eSpro 45 eSpro 25Km h eSpro 70 eSpro45_eSpro70_Rev_2_NL indb 22 eSpro45_eSpro70_Rev_2_NL indb 22 14 07 20...

Page 301: ... 168 2013 EG Bovengenoemde werkingsduren gelden bij gebruik van 2 aangesloten accu s met dezelfde lading BELANGRIJKE AANWIJZING De lithiumionen accu s ondergaan in de loop van de tijd een geleidelijke verslechtering van de prestaties waardoor de oorspronkelijke waarden van de werkingsduur afnemen BELANGRIJKE AANWIJZING De vermelde gegevens over de werkingsduur hangen nauw samen met de gebruiksomst...

Page 302: ... lading BELANGRIJKE AANWIJZING De lithiumionen accu s ondergaan in de loop van de tijd een geleidelijke verslechtering van de prestaties waardoor de oorspronkelijke waarden van de werkingsduur afnemen BELANGRIJKE AANWIJZING De vermelde gegevens over de werkingsduur hangen nauw samen met de gebruiksomstandigheden zoals helling en of type wegdek omgevingstemperatuur gemiddelde snelheid ondersteuning...

Page 303: ...rd terwijl tegelijkertijd het deceleratie effect wordt vergroot Door de knop naar boven te duwen wordt de energieregeneratie uitgeschakeld Als het remmen wordt gecombineerd met het decelereren wordt er meer opgeladen Wanneer de energieregeneratie actief is brandt het oplaadlampje Bij een hoog laadniveau van de accu wordt de regeneratiemodus niet geactiveerd NL NL NL NL NL MODE eSpro 45 eSpro 25Km ...

Page 304: ...t worden veranderd Km trip Kilometerstand dagteller Houd SET ingedrukt om dit gegeven te resetten tijdens de weergave van de parameter Km Aantal kilometers dat nog kan worden afgelegd met de resterende acculading Deze waarde varieert naargelang de gebruiksomstandigheden de resterende acculading de ingestelde rijmodus en of de energieregeneratiemodus is geselecteerd PWR ECO Km trip A B Km SELECT SE...

Page 305: ... regeling te sluiten De tijd wordt opgeslagen in de accu van het voertuig Als er twee accu s zijn is het dus het beste om de tijd de eerste keer in te stellen als beide accu s geplaatst zijn om de tijd te synchroniseren In elk geval wordt bij aanwezigheid van twee accu s altijd de tijd weergegeven die is opgeslagen in de accu in ruimte A Voor de beschrijving van de accu en de plaatsing in de ruimt...

Page 306: ...kant van de haak te drukken komt het bovenste deel naar buiten en kunt u er iets aan hangen Als de haak wordt losgelaten keert hij automatisch op zijn plaats terug BELANGRIJKE AANWIJZING Het vervoerde voorwerp mag de beweging van uw benen niet verhinderen of beperken BELANGRIJKE AANWIJZING Hang niet het hele gewicht aan de haak het vervoerde voorwerp moet ook op de treeplank rusten eSpro45_eSpro70...

Page 307: ...n Zijstandaard Breng de zijstandaard met uw voet omlaag tot hij helemaal uitgeklapt is en houd de scooter vast tot hij op de grond rust BELANGRIJKE AANWIJZING Voordat het voertuig weer wordt gestart moet worden gecontroleerd of de zijstandaard opgeklapt is een veiligheidssensor voorkomt dat de motor kan worden ingeschakeld terwijl de standaard omlaag staat BELANGRIJKE AANWIJZING Gebruik de standaa...

Page 308: ...emperatuur tussen 0 C en 40 C Bij lage temperaturen kan de accu korter werken De accu is een component die altijd actief is er kunnen dus ook lichte spanningsdalingen optreden als het display uit is Beheer van de accu bij het eerste gebruik van de scooter Nieuwe accu s moeten beslist minstens 3 4 volledig opgeladen en ontladen worden door de lading op 100 te brengen en de accu s leeg te laten lope...

Page 309: ... de bewaring mogen de batterijen niet worden blootgesteld aan warmte koudebronnen vochtigheid stof of weersinvloeden De garantie dekt storingen in de batterijen die het gevolg zijn van productiegebreken de onmogelijkheid om ze op te laden en te ontladen De garantie dekt niet de dalende prestaties van de batterijen die te wijten zijn aan normaal gebruik en veroudering ervan De fabrikant behoudt zic...

Page 310: ...t u uw voertuig waar het is Zet het gebruik in geen geval voort Zodra de accu afgekoeld is brengt u het voertuig naar uw verkoper Als er vlammen of rook uit de accu komen stopt u het voertuig onmiddellijk Blus de brand onmiddellijk met een blusapparaat indien voorhanden Als u geen brandblusser heeft wacht dan tot het vuur gedoofd is en alle delen van het voertuig zijn afgekoeld Als het risico best...

Page 311: ...it type afval bepaalt dat de bij dit verdrag aangesloten staten zich verbinden om geschikte maatregelen te treffen die ervoor zorgen dat de lege accu s apart worden verzameld voor een mogelijk hergebruik of verwerking Voor recentere informatie hierover dient de gebruiker hoe dan ook contact op te nemen met de gemeentelijke dienst die met deze taak belast is eSpro45_eSpro70_Rev_2_NL indb 33 eSpro45...

Page 312: ...evensduur LONG LIFE Opladen tot 90 deze modus is aanbevolen in periodes waarin de scooter vaak gebruikt wordt voor een optimale en langdurige werking van de accu s Voor maximale efficiëntie van het systeem is het aanbevolen om elke 10 oplaadcycli tot 90 af te wisselen met 1 oplaadcyclus tot 100 Met deze procedure wordt een hoog aantal oplaad en ontlaadcycli van de accu s verkregen voor langdurige ...

Page 313: ...uit het apparaat aan op een elektriciteitsnet dat wordt beveiligd door een differentiaalschakelaar met een gevoeligheid van niet meer dan 30 mA De elektrische verbinding van het apparaat moet overeenkomen met de gegevens die vermeld staan op het etiket met elektrische gegevens Gebruik geen verlengkabels Als de voedingskabel niet lang genoeg is moet u zich wenden tot een elektricien of gekwalificee...

Page 314: ...en worden opgeladen OPLADEN MET DE ACCU OP HET VOERTUIG OPLADEN MET DE ACCU VAN HET VOERTUIG VERWIJDERD LET OP Het opladen moet gebeuren in een overdekte ruimte beschermd tegen weersinvloeden LET OP Voor het opladen van de accu s moet eerst de stekker van de accuoplader op de aansluiting van de accu worden aangesloten en daarna moet de aansluiting van de accuoplader op het elektriciteitsnet worden...

Page 315: ... als volgt te werk om de accu op te laden op het voertuig Schakel het systeem uit Til het zadel op controleer of de accuoplader verbonden is met de aansluiting en of de accu s correct in de ruimten zitten en zijn verbonden op de connectors Haal de kabel van de accuoplader met stekker naar buiten Steek de stekker in het stopcontact eSpro45_eSpro70_Rev_2_NL indb 37 eSpro45_eSpro70_Rev_2_NL indb 37 1...

Page 316: ...ft om de oplaadkabel door te laten Dit kan nuttig zijn als het opladen buiten plaatsvindt zodat de accu s en accuoplader worden afgedekt en de warmte die ontstaat bij het oplaadproces naar buiten kan ontsnappen Open het zadel duw het afsluitmechanisme met veer naar links en houd het ingedrukt eSpro45_eSpro70_Rev_2_NL indb 38 eSpro45_eSpro70_Rev_2_NL indb 38 14 07 2020 17 35 45 14 07 2020 17 35 45 ...

Page 317: ...rdt in opgetilde stand geblokkeerd om de oplaadkabel door te laten Door het slot te openen met de sleutel en het zadel op te tillen keert het mechanisme automatisch terug in de oorspronkelijke stand eSpro45_eSpro70_Rev_2_NL indb 39 eSpro45_eSpro70_Rev_2_NL indb 39 14 07 2020 17 35 46 14 07 2020 17 35 46 ...

Page 318: ...on kan blijven rijden met de andere accu Koppel de accukabel los door op de twee zijvleugeltjes van de connector te duwen om hem los te maken Haal de accu uit de behuizing door hem op te tillen aan zijn handgreep Ondersteun hem daarna met beide handen eSpro45_eSpro70_Rev_2_NL indb 40 eSpro45_eSpro70_Rev_2_NL indb 40 14 07 2020 17 35 47 14 07 2020 17 35 47 ...

Page 319: ...es aan de zijkanten in Haal de accuoplader uit zijn behuizing samen met zijn twee kabels LET OP Het is aanbevolen om de accuoplader voorzichtig te hanteren tijdens het verwijderen om te voorkomen dat hij op u of op de grond valt eSpro45_eSpro70_Rev_2_NL indb 41 eSpro45_eSpro70_Rev_2_NL indb 41 14 07 2020 17 35 49 14 07 2020 17 35 49 ...

Page 320: ...hetelektriciteitsnet Selecteer de gewenste oplaadmodus zoals geïllustreerd is aan het begin van dit hoofdstuk in de paragraaf ACCUOPLADER Als het opladen is voltooid plaatst u de accuoplader en de accu als volgt terug in de ruimte in de scooter plaats eerst de accuoplader terug in het voertuig en verbind de kabel met connector met de aansluiting van het voertuig eSpro45_eSpro70_Rev_2_NL indb 42 eS...

Page 321: ...de connector in de aansluiting onder het klapdeurtje op de accu Steek de connector naar binnen totdat u een klik hoort en controleer of hij goed vastzit Plaats de stekker van de kabel met veer naast de accuoplader en rol de kabel op boven de accu eSpro45_eSpro70_Rev_2_NL indb 43 eSpro45_eSpro70_Rev_2_NL indb 43 14 07 2020 17 35 51 14 07 2020 17 35 51 ...

Page 322: ...bundel van de koplamp kan worden geregeld door middel van de stelschroef onder de lamp zelf met behulp van de TORX T 20 sleutel die als accessoire is meegeleverd en te vinden is onder het zadel Door de schroef 1 2 slag met de klok mee te draaien wordt de lichtbundel naar beneden gericht door de schroef tegen de klok in te draaien daarentegen naar boven eSpro 45 eSpro 25Km h eSpro 70 eSpro45_eSpro7...

Page 323: ...doelmatige remming moet beginnen nadat de remhendel 1 3 is ingeknepen BELANGRIJKE AANWIJZING Als de rem niet goed werkt moet de slijtage van de remblokken worden gecontroleerd Als deze dun geworden zijn moeten ze beide worden vervangen Dit moet u laten doen bij een erkend assistentiepunt BELANGRIJKE AANWIJZING Bedien de remhendel verschillende keren nadat de remblokken vervangen zijn om deze in te...

Page 324: ...rk Controleer na de regeling of het wiel vrij draait als de remhendel in rust is Een doelmatige remming moet beginnen nadat de remhendel 1 3 is ingeknepen TROMMELREMACHTERMETGECOMBINEERDE FUNCTIE alleen eSpro 70 De scooter van het model eSpro 70 heeft een dubbel remsysteem als de achterrem wordt bediend wordt automatisch ook de voorrem ingeschakeld De remkrachtverdeling geeft meer remkracht aan de...

Page 325: ... banden Controleer de spanning van de banden regelmatig en corrigeer deze indien nodig voordat u gaat rijden eSpro 45 eSpro 70 eSpro 25km h Spanning voorband 2 bar Spanning achterband 2 8 bar De banden hebben een slijtage indicator en moeten worden vervangen zodra deze indicatoren zichtbaar worden op het loopvlak Controleer ook of de zijkanten van de banden eventueel zijn ingesneden en of ze onreg...

Page 326: ...t vocht uit de omgevingslucht Als het vochtgehalte van de vloeistof een bepaalde waarde overschrijdt is de remwerking niet efficiënt BELANGRIJKE AANWIJZING Het is raadzaam de vloeistof om de 2 jaar te laten verversen Gebruik nooit remvloeistof uit houders die al geopend of gedeeltelijk gebruikt zijn BELANGRIJKE AANWIJZING Zorg dat er alleen remvloeistof wordt gebruikt die geclassificeerd is als DO...

Page 327: ... van de TORX T 20 sleutel die als accessoire geleverd is en onder het zadel zit de 2 schroeven aan de zijkanten onder de koplamp verwijder eerst de linker helft van de behuizing en daarna de rechter door ze naar buiten te draaien NL NL NL NL NL eSpro 45 eSpro 25Km h eSpro 45 eSpro 25Km h eSpro45_eSpro70_Rev_2_NL indb 49 eSpro45_eSpro70_Rev_2_NL indb 49 14 07 2020 17 36 00 14 07 2020 17 36 00 ...

Page 328: ... Bij de scooter van het model eSpro 70 heeft de koplamp een ledlampje dat niet hoeft te worden vervangen Als het lampje niet meer werkt moet de complete koplamp worden vervangen Ga voor de vervanging naar een erkend assistentiepunt eSpro 45 eSpro 25Km h eSpro 45 eSpro 25Km h eSpro 70 eSpro45_eSpro70_Rev_2_NL indb 50 eSpro45_eSpro70_Rev_2_NL indb 50 14 07 2020 17 36 02 14 07 2020 17 36 02 ...

Page 329: ...ngaanwijzers voor en achter en de kentekenverlichting zijn voorzien van ledlampjes die in de voertuigstructuur zijn geïntegreerd Ga voor de vervanging naar een erkend assistentiepunt NL NL NL NL NL eSpro45_eSpro70_Rev_2_NL indb 51 eSpro45_eSpro70_Rev_2_NL indb 51 14 07 2020 17 36 04 14 07 2020 17 36 04 ...

Page 330: ...ar verversen V V V V V Slijtage remblokken voor rem C V C V C V C V C Slijtage remklauwen ach terrem C R C V C V C V C V Transmissieriemen C C C V C C V C C V C C V C Moeren bouten bevestig ingselementen C C C C C C Standaard C L C L C L C L C L Stuurlagers C C C C Behalve het richten van de koplamp moeten alle controles worden gedaan door gekwalificeerd personeel van ASKOLL eSpro45_eSpro70_Rev_2_...

Page 331: ...cooter niet in de zon af vooral niet in de zomer om te voorkomen dat de warme carrosserie de shampoo onmiddellijk laat opdrogen voordat deze wordt afgespoeld want dit kan schadelijk zijn voor de lak Gebruik geen waterstralen onder hoge druk voor het schoonmaken want dan zouden de gevoelige componenten van het voertuig beschadigd kunnen raken Richt bij het schoonmaken nooit de waterstraal direct op...

Page 332: ...gende raadzaam maak de scooter helemaal schoon zet hem op een overdekte plaats zet de scooter op de middenstandaard om te voorkomen dat de wielen in dezelfde positie contact blijven houden met de grond bedek de scooter met een zeil eSpro45_eSpro70_Rev_2_NL indb 54 eSpro45_eSpro70_Rev_2_NL indb 54 14 07 2020 17 36 06 14 07 2020 17 36 06 ...

Page 333: ...eemt een storing in de ECU unit waar Geadviseerd wordt de scooter naar een erkende werkplaats te brengen Defect in de hoofdstroomkring het systeem neemt een abnormale stroomopname van de motor waar Om veiligheidsredenen geeft het systeem geen vermogen af Geadviseerd wordt het voertuig naar een erkende werkplaats te brengen Storing accu A het systeem neemt een storing waarin accupack A Geadviseerd ...

Page 334: ...t een te hoge temperatuur van de elektronische unit waar De afgifte van vermogen aan het voertuig wordt onderdrukt totdat de temperatuur daalt Geadviseerd wordt om het voertuig uit de buurt van warmtebronnen te brengen Overtemperatuur motor het systeem neemt een te hoge temperatuur van de motor waar Werking met beperkt vermogen wordt toegestaan om afkoeling mogelijk te maken Slechte werking koplam...

Page 335: ...vangen bij een erkende werkplaats Slechtewerkingachterlichtenkentekenverlichting het systeem neemt waar dat de achterlamp en de kentekenverlichting stuk zijn of niet goed werken Controleer de werking en laat ze vervangen bij een erkende werkplaats A A NL NL NL NL NL eSpro45_eSpro70_Rev_2_NL indb 57 eSpro45_eSpro70_Rev_2_NL indb 57 14 07 2020 17 36 11 14 07 2020 17 36 11 ...

Page 336: ... TECHNISCHE GEGEVENS TECHNISCHE GEGEVENS AFMETINGEN VAN DE SCOOTER eSpro 45 eSpro 70 eSpro 25km h eSpro45_eSpro70_Rev_2_NL indb 58 eSpro45_eSpro70_Rev_2_NL indb 58 14 07 2020 17 36 13 14 07 2020 17 36 13 ...

Page 337: ...ijke lading volgens 168 2013 EG ACCU Model TVC102 TVC103 Lading LI ION Gewicht 7 8 kg Werkingsduur 71 km met 2 accu s aangesloten en met gelijke lading volgens 168 2013 EG 86 km met 2 accu s aangesloten en met gelijke lading volgens 168 2013 EG 96 km met 2 accu s aangesloten en met gelijke lading volgens 168 2013 EG Bedrijfstemperatuur In werking 20 C tot 45 C VOERTUIGGEGEVENS Lengte 1830 mm Breed...

Page 338: ...ng Max toegestaan gewicht op bagagedrager achter 30kg in het midden van de bagagedrager Plaatsen 1 Transmissie Tandketting GEGEVENS KOPLAMPGROEP Koplamp H8 35W Led Richtingaanwijzers Led Lichten dashboard Led GEGEVENS ACHTERLAMPGROEP Achterlamp Led Remlicht Led Richtingaanwijzers Led Kentekenverlichting Led eSpro45_eSpro70_Rev_2_NL indb 60 eSpro45_eSpro70_Rev_2_NL indb 60 14 07 2020 17 36 13 14 07...

Page 339: ... volgende relevante harmoniserende wetgeving van de Europese Unie Richtlijn 2014 35 EU LVD Richtlijn 2014 30 EU EMC Richtlijn 2011 65 EU RoHS II De volgende geharmoniseerde normen en technische specificaties zijn toegepast EN 60335 1 2002 A11 2004 A1 2004 A12 2006 A2 2006 A1 EC 2007 A13 2008 EC 2009 EC 2010 A14 2010 A15 2011 EN 60335 2 29 2004 A2 2010 EN 62233 2008 EN 55014 1 2006 A1 2009 A2 2011 ...

Page 340: ...62 OPMERKINGEN eSpro45_eSpro70_Rev_2_NL indb 62 eSpro45_eSpro70_Rev_2_NL indb 62 14 07 2020 17 36 14 14 07 2020 17 36 14 ...

Reviews: