18 309884
Shutdown and Cleaning
NOTE:
If spraying
lacquers
, purchase
Lacquer
Conversion Kit
248202, and follow Pail Flushing
procedure.
NOTE:
For short shutdown periods (breaks on the
job), leave suction tube and prime tube in paint and
relieve pressure by turning Spray/Prime Valve to
PRIME. For extended shutdown periods, clean
sprayer by flushing as instructed in this section.
Pail Flushing
D
For flushing after spraying non–water/solvent
coatings with compatible flushing fluid. For water–
based coating, see Zip Flushing, page 19.
Do not clean with materials having flash points lower
than 70
_
F (21
_
C). Use water–based materials or
mineral spirits type material only. For complete infor-
mation about your fluid, request the MSDS from the
fluid distributor or retailer.
NOTE:
In Step 1, the sprayer must be under pressure
for the fluid filter system to be activated. If the sprayer
has no pressure, it needs to be primed.
1.
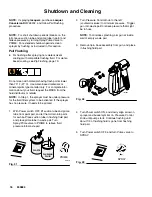
With Power switch OFF, lift suction tube and prime
tube from paint pail, and let them drain into paint
for awhile. Place suction tube in flushing fluid pail,
and place prime tube in waste pail. Turn
Spray/Prime valve to PRIME to relieve fluid
pressure into waste pail.
WASTE
FLUSHING
FLUID
9567A
PRIME
Fig. 41
2.
Turn Pressure Control knob to the left
(counterclockwise) to minimum pressure. Trigger
gun into waste pail to relieve pressure that might
be in hose.
NOTE:
To minimize splashing, aim gun at inside
wall of empty waste pail.
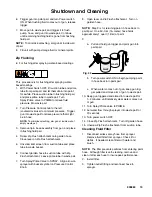
3.
Remove tip & base assembly from gun, and place
in flushing fluid pail.
Fig. 42
ti6768a
4.
Turn Power switch ON, and slowly align arrow on
sprayer and bucket symbol on Pressure Control
knob until pump starts. Continue flushing until
about 1/3 of flushing fluid is gone from flushing
fluid pail.
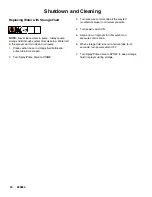
5.
Turn Power switch OFF, and turn Prime valve to
SPRAY.
SPRAY
Fig. 43


