Asoka® User Guide
PlugLink PL7667-ETH
Page 27 of 33
Chapter 8
Reset and network of PLC
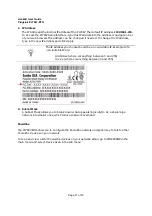
The PL7667-ETH device has two hardware push buttons:
FW RST (Firmware Default Reset ) button – Resets the PL7667-ETH back to factory default settings.
Press and hold the button with a pin or sharp object for about 2 seconds until you see the lights
on the device flash briefly.
SECURITY (Network ID) button – All PL7667-ETH devices have a default password Network
Encryption Key (NEK) set to “HomePlugAV” allowing them to communicate to each other. The
SECURITY button allows you to set a devices’ password to a randomized Network Encryption
Key (NEK) for maximum security. You can then set other devices to the same NEK by using their
SECURITY button. Only units with the same NEK can communicate to each other.
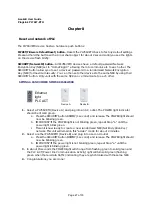
SETTING A RANDOMIZED NETWORK PASSWORD
1.
Select a PL7667-ETH (Device A) and plug into an AC outlet. The POWER light indicator
should be lit solid green.
a.
Press the SECURITY button BRIEFLY (1 second) and release. The POWER light should
now be blinking green.
b.
IMPORTANT: If the POWER light is not blinking green, repeat Step “a” until the
power light blinks green.
c.
This unit is now ready to create a new randomized NEK (Net Encryption Key)
network. This unit will remain in this “adder” mode for about 2 minutes.
2.
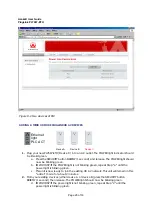
Select another PL7667-ETH (Device B) and plug into a second outlet.
a.
Press the SECURITY button BRIEFLY (1 second) and release. The POWER light should
now be blinking green.
b.
IMPORTANT: If the power light is not blinking green, repeat Step “a” until the
power light is blinking green.
3.
In about 15 seconds the POWER light will change from flashing green to solid green and
the PLC ACT (Power line Communication Activity) light will turn solid green (flashing
green when there is data traffic) indicating they are synchronized with the same NEK.
4.
Congratulations, you are done!
Ethernet
light
PLC ACT
Device A
Device B

