Dynamix DW-01Plus/H Gateway User Manual
- 9 -
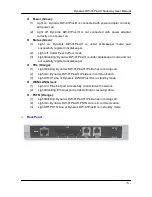
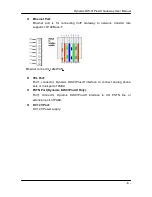
Connect the WAN port (silver) on the Dynamix DW-01Plus/H Gateway to
the Ethernet port of your network (e.g. Cable Modem, ADSL Modem)
using the standard CAT-5 straight Ethernet cable.
Step 2. Connect your PC to the LAN port of Dynamix DW-01Plus/H
Connect your PC to the LAN port of Dynamix DW-01Plus/H with standard
CAT-5 straight Ethernet cable.
Step 3. Set your PC as DHCP mode
Please go to the network setting of your PC and set it as DHCP mode, let
your PC can automatically search for DHCP server and get one valid IP
address. Dynamix DW-01Plus/H has embedded DHCP server (default is
enabled) so that your PC will get one IP address from Dynamix DW-
01Plus/H DHCP server.
Step 4.Open your browser and input IP address
192.168.123.123
Once your PC has got an IP from Dynamix DW-01Plus/H, you may
connect Dynamix DW-01Plus/H via WEB browser to do more
configurations. The default LAN IP address of Dynamix DW-01Plus/H is
“
192.168.123.123
”
; please input this IP address on web browser to
connect with web management interface. Please refer to Part III Web
management for more information.
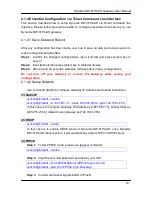
Step 5.Advanced Setting via Telnet (Optional)
If user wants to do more advanced and complete settings that cannot be
found via web management interface, please Telnet to the Dynamix DW-
01Plus/H to do more detail configurations.
Step 6.Connect other PC with LAN Ports (Optional)
If you have more than one PC, you can connect them with LAN Ports
(black) on the Dynamix DW-01Plus/H Gateway. Please set these PCs as
DHCP mode so that they can automatically get IP from Dynamix DW-
01Plus/H DHCP server. DHCP server of Dynamix DW-01Plus/H can
assign 253 IP most.
Caution:
To prevent damage to the Dynamix DW-01Plus/H Gateway, please
make sure you have connected with the correct power adapter.
Summary of Contents for Dynamix DW-01Plus/H
Page 1: ...1 ...


