2 9
2 9
2 9
2 9
2 9
ASRock G41M-VS2 Motherboard
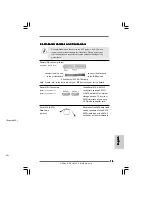
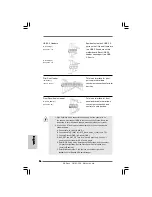
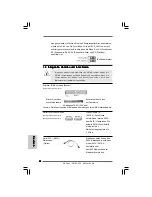
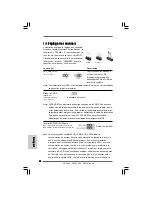
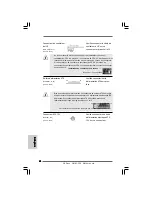
USB 2.0-Header
Zusätzlich zu den vier
(9-pol. USB6_7)
üblichen USB 2.0-Ports an den
(siehe S.2 - No. 16)
I/O-Anschlüssen befinden sich
zwei USB 2.0-Anschlussleisten
am Motherboard. Pro USB 2.0-
Anschlussleiste werden zwei
(9-pol. USB4_5)
USB 2.0-Ports unterstützt.
(siehe S.2 - No. 13)
Druckerport-Anschlussleiste
Dies ist eine Schnittstelle zum
(25-pol. LPT1)
Anschluss eines Druckerport-
(siehe S.2 - No. 23)
Kabels, mit dem Sie passende
Drucker auf einfache Weise
anschließen können.
Anschluss für Audio auf
Dieses Interface zu einem
der Gehäusevorderseite
Audio-Panel auf der Vorderseite
(9-Pin HD_AUDIO1)
Ihres Gehäuses, ermöglicht
(siehe S.2 - No. 22)
Ihnen eine bequeme
Anschlussmöglichkeit und
Kontrolle über Audio-Geräte.
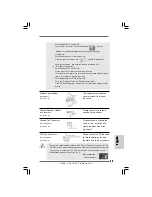
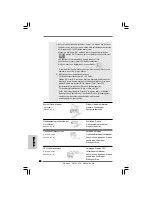
1. High Definition Audio unterstützt Jack Sensing (automatische Erkennung
falsch angeschlossener Geräte), wobei jedoch die Bildschirmverdrahtung
am Gehäuse HDA unterstützen muss, um richtig zu funktionieren.
Beachten Sie bei der Installation im System die Anweisungen in unserem
Handbuch und im Gehäusehandbuch.
2. Wenn Sie die AC’97-Audioleiste verwenden, installieren Sie diese wie
nachstehend beschrieben an der Front-Audioanschlussleiste:
A. Schließen Sie Mic_IN (MIC) an MIC2_L an.
B. Schließen Sie Audio_R (RIN) an OUT2_R und Audio_L (LIN) an
OUT2_L an.
C. Schließen Sie Ground (GND) an Ground (GND) an.
D. MIC_RET und OUT_RET sind nur für den HD-Audioanschluss gedacht.
Diese Anschlüsse müssen nicht an die AC’97-Audioleiste
angeschlossen werden.
E. Rufen Sie das BIOS-Setup-Dienstprogramm auf. Wechseln Sie zu
Erweiterte Einstellungen und wählen Sie Chipset-Konfiguration. Setzen
Sie die Option Frontleistenkontrolle von [Automatisch] auf [Aktiviert].
DeutschDeutschDeutschDeutschDeutsch
uP deaktivieren)
Summary of Contents for G41M-VS2
Page 78: ...8 9 8 9 8 9 8 9 8 9 ASRock G41M VS2 Motherboard ...
Page 79: ...9 0 9 0 9 0 9 0 9 0 ASRock G41M VS2 Motherboard ...
Page 80: ...9 1 9 1 9 1 9 1 9 1 ASRock G41M VS2 Motherboard ...
Page 81: ...9 2 9 2 9 2 9 2 9 2 ASRock G41M VS2 Motherboard ...
Page 82: ...9 3 9 3 9 3 9 3 9 3 ASRock G41M VS2 Motherboard ...
Page 83: ...9 4 9 4 9 4 9 4 9 4 ASRock G41M VS2 Motherboard ...
Page 84: ...9 5 9 5 9 5 9 5 9 5 ASRock G41M VS2 Motherboard SATAII_1 SATAII_2 ...
Page 85: ...9 6 9 6 9 6 9 6 9 6 ASRock G41M VS2 Motherboard ...
Page 86: ...9 7 9 7 9 7 9 7 9 7 ASRock G41M VS2 Motherboard 1 2 3 4 ...
Page 87: ...9 8 9 8 9 8 9 8 9 8 ASRock G41M VS2 Motherboard 24 13 12 1 24 13 12 1 ...
Page 88: ...9 9 9 9 9 9 9 9 9 9 ASRock G41M VS2 Motherboard 13 1 ...
Page 89: ...100 100 100 100 100 ASRock G41M VS2 Motherboard ...
Page 90: ...101 101 101 101 101 ASRock G41M VS2 Motherboard ...
Page 91: ...102 102 102 102 102 ASRock G41M VS2 Motherboard ...
Page 92: ...103 103 103 103 103 ASRock G41M VS2 Motherboard ...
Page 93: ...104 104 104 104 104 ASRock G41M VS2 Motherboard ...
Page 94: ...105 105 105 105 105 ASRock G41M VS2 Motherboard ...
Page 95: ...106 106 106 106 106 ASRock G41M VS2 Motherboard SATAII_1 SATAII_2 ...
Page 96: ...107 107 107 107 107 ASRock G41M VS2 Motherboard ...
Page 97: ...108 108 108 108 108 ASRock G41M VS2 Motherboard 1 2 3 4 24 13 12 1 24 13 12 1 ...
Page 98: ...109 109 109 109 109 ASRock G41M VS2 Motherboard 13 1 ...
Page 99: ...110 110 110 110 110 ASRock G41M VS2 Motherboard X O O O O O X O O O O O O X ...
Page 100: ...111 111 111 111 111 ASRock G41M VS2 Motherboard O O ...
Page 101: ...112 112 112 112 112 ASRock G41M VS2 Motherboard ...
Page 102: ...113 113 113 113 113 ASRock G41M VS2 Motherboard ...
Page 103: ...114 114 114 114 114 ASRock G41M VS2 Motherboard ...
Page 104: ...115 115 115 115 115 ASRock G41M VS2 Motherboard ...
Page 105: ...116 116 116 116 116 ASRock G41M VS2 Motherboard ...
Page 106: ...117 117 117 117 117 ASRock G41M VS2 Motherboard ...
Page 107: ...118 118 118 118 118 ASRock G41M VS2 Motherboard ...
Page 108: ...119 119 119 119 119 ASRock G41M VS2 Motherboard 24 13 12 1 24 13 12 1 1 2 3 4 ...
Page 109: ...120 120 120 120 120 ASRock G41M VS2 Motherboard ...

