


1
Guide to SATA Hard Disks
Installation and RAID Configuration
1.
Guide to SATA Hard Disks Installation ..............................2
1.1 Serial ATA (SATA) Hard Disks Installation ................2
2.
Guide to RAID Configurations
...........................................3
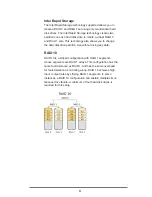
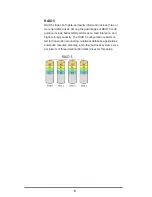
2.1 Introduction of RAID .................................................3
2.2 RAID Configuration Precautions
..............................6
2.3 Installing Windows
®
8 / 8 64-bit / 7 / 7 64-bit With
RAID Functions ........................................................7
2.4 Setting the BIOS RAID Items
...................................8
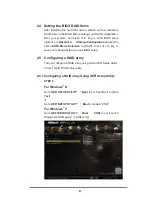
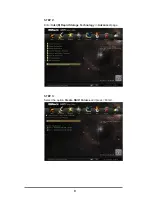
2.5 Configuring a RAID array
.........................................8
2.5.1
Configuring a RAID array Using UEFI Setup Utility
...... 8
2.5.2
Configuring a RAID array Using Intel RAID BIOS
...... 13
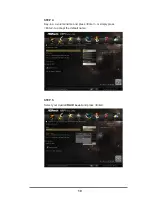
3.
Installing Windows
®
on a HDD under 2TB in RAID
mode
..................................................................17
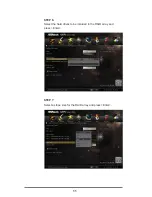
4.
Installing Windows
®
on a HDD larger than 2TB in
RAID mode
..................................................................18


