®
ASSA ABLOY
ElectroLynx® is a registered trademark of ASSA ABLOY Inc.
Copyright © 2014 Corbin Russwin, Inc. All rights reserved.
Reproduction in whole or in part without the express written
permission of Corbin Russwin, Inc. is prohibited.
11
6
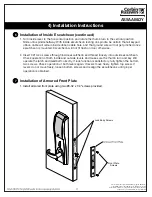
Installation of Inside Escutcheon (continued)
4) Installation Instructions
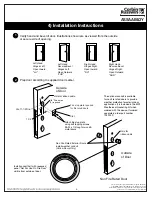
1. Turn inside lever to the horizontal position and rotate the thumb turn to the vertical position.
Slide onto spindle halfway. With inside escutcheon resting on spindle, be certain that all keypad
ribbon cable will remain inside ribbon cable hole, and that ground wire will not get pinched once
escutcheon is mounted. Escutcheon will not fit flush on door otherwise.
2. Insert 3 #10-24 screws through inside escutcheon and thread loosely into outside escutcheon.
Check operation of both inside and outside levers and make sure the thumb turn and key still
operate the latch and deadbolt correctly. If lock function is satisfactory, fully tighten the bottom
two screws. Check operation of both levers again. If levers move freely, tighten top screw. If
levers do not move freely, loosen bottom screws and realign the escutcheons until proper
operation is obtained.
7
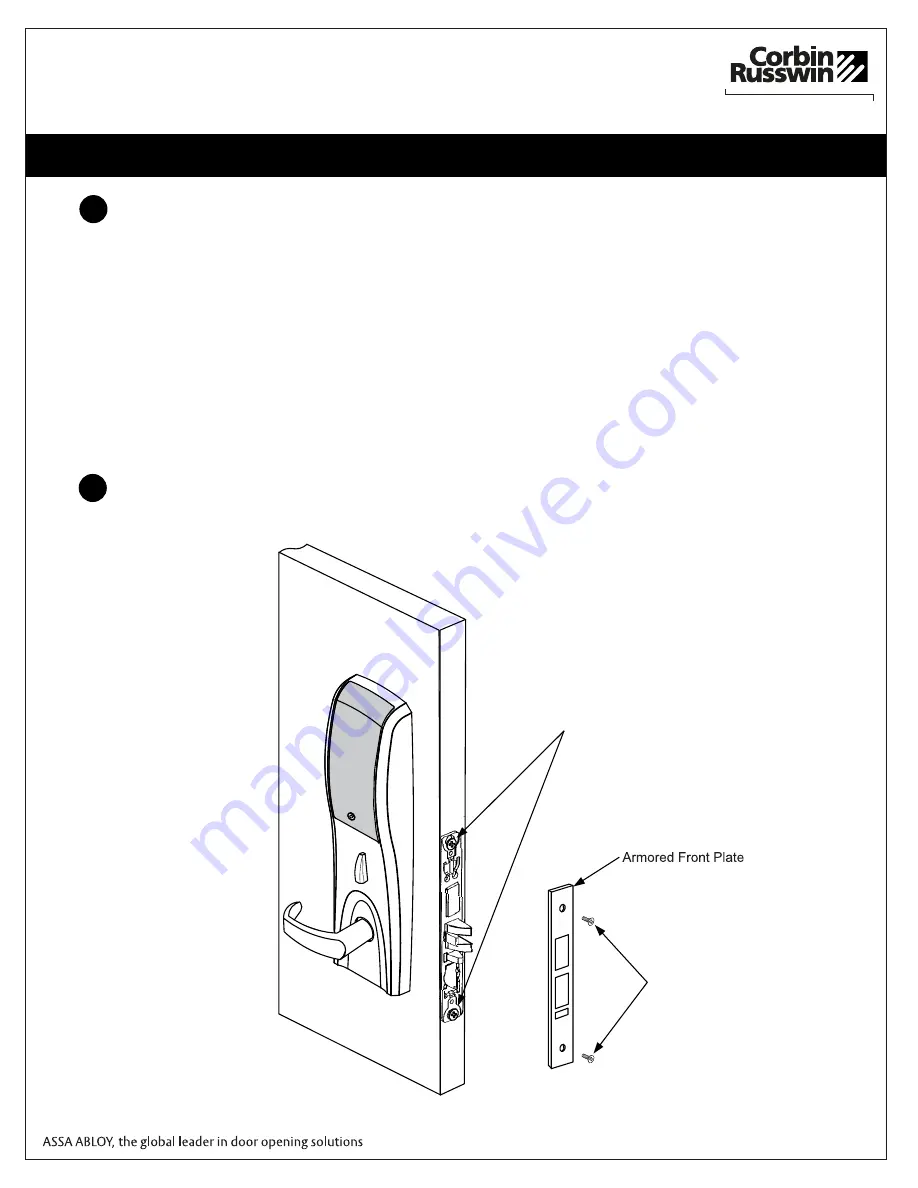
Installation of Armored Front Plate
1. Install armored front plate using two #8-32 x 1/4" screws provided.
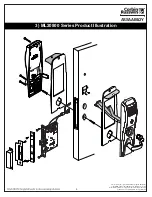
Lock Body Screws
Screws
Front Plate


